Blitzortung.org and Lightningmaps.org project documentation

| Description | Project documentation for Blitzortung.org, Lightningmaps.org, its Hardware and much more |
| Author(s) | Egon Wanke, Tobias Volgnandt, Richo Andersen and Blitzortung.org contributors |
| Repository | https://gitlab.lightningmaps.org/common/docs |
| Copyright | Blitzortung.org / Lightningmaps.org and contributors • Change cookie settings |
Table of Contents
Introduction
130 words Estimated reading is 1 minute
Blitzortung.org and Lightningmaps.org are world-wide non-commercial low-cost community-based lightning detection and lightning location networks. They provide free real time lightning maps for a lot of countries.
Important!
The system is made for private and entertainment purposes. It is not an official information service for lightning data. A commercial use of our data is strongly prohibited, even by the users that send data to our servers.
About this Documentation
This documentation includes information about almost every aspect of the network.
-
Build instructions
-
Science
-
Data and Maps
Embedding maps and statistics
-
Operate a station
-
Community
General ↵
General
479 words Estimated reading time 2 minutes
The lightning location network Blitzortung.org consists of several VLF lightning receiver sites and one central processing server for each larger region. The receiver sites transmit their data in short time intervals over the Internet to our server. Every data sentence contains the precise time of arrival of the received lightning strike impulse ("sferic") and the geographic position of the receiver site. With this information from all receiver sites the exact positions of the discharges are computed. The sferic positions are made available in raw format to all users that transmit their data to our server. The users can use the raw data for all non-commercial purposes. The lightning activities of the last two hours are displayed at Blitzortung.org on several public maps recomputed every minute.
The Project
The aim of this project is to accomplish a low budget highly accurate world-wide lightning location network based on a high number of receiver sites spaced close to each other, typically separated by 50 km - 250 km. The stations transmit their data to a central computing server, where the strike locations are computed by the arrival times of the signals.
The station operators are volunteers who bought and assembled the hardware by themselves. There are also volunteer programmers who develop and/or implement algorithms for the location or visualization of sferic positions, and people who assist to keep the system running. There is no restriction on membership. There is no fee and no contract. If a receiver site stops pooling its data for a longer time period, the server stops providing the access to the archive of sferic positions for the corresponding user.
Blitzortung.org is completely different to other data collection platforms as for example marinetraffic.com or flightradar24.com. Ships and airplanes already know their exact position. They send their positions by radio. The information can be received with simple receivers and transferred over the Internet to a data server. Receiving and sending the received position is not time-critical and on their data server nothing needs to be calculated. The data is only collected and visualized. To receive the position of a ship or aircraft, one receiving station is sufficient.
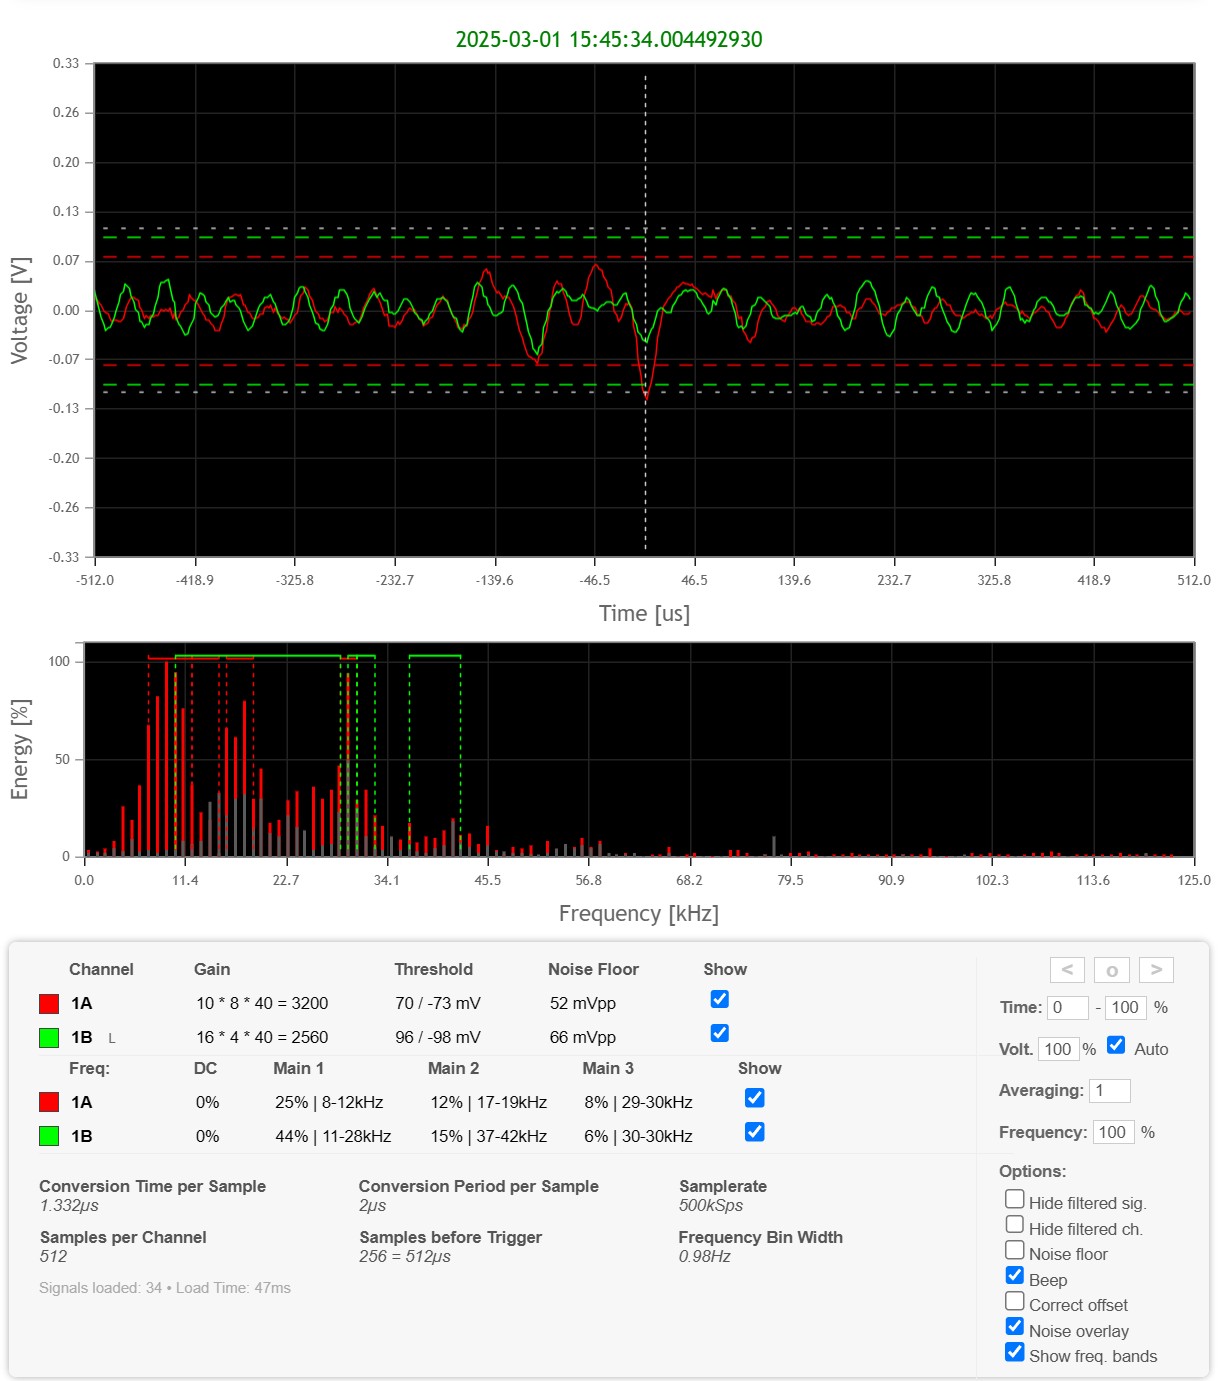
Lightning location, on the other hand, is much more complicated. The waveforms of the signals must be sampled with high frequency (512 values at ≥500 KHz) and assigned with an accurate absolute time stamp (+/- 1 usec). The exact location of the detector is extremely important. An absolute microsecond accurate time stamp and an accurate position of the receiving detector can only be obtained by a GPS module. On computing server the signals from different detectors are adjusted and compared with each other. Each pair of signals from different detectors defines a hyperbolic curve. The intersection point of several hyperbolic curves determines the location. This is calculated on our server in a few seconds, that even professional systems do not always achieve.
Example video
Lightning detection
1641 words Estimated reading time 7 minutes
Lightning discharge
How lightning initially forms is still a matter of debate1. Scientists have studied root causes ranging from atmospheric perturbations (wind, humidity, friction, and atmospheric pressure) to the impact of solar wind and accumulation of charged solar particles. Ice inside a cloud is thought to be a key element in lightning development, and may cause a forcible separation of positive and negative charges within the cloud, thus assisting in the formation of lightning. It was not obvious, that lightning deals with electricity, since the electric current does not flow through the air. This, on June 10th 1752, Benjamin Franklin flies a kite during a thunderstorm and collects a charge in a Leyden jar when the kite is struck by lightning, enabling him to demonstrate the electrical nature of lightning. He also invented the lightning rod, used to protect buildings and ships.
A lightning discharge emits radio frequency energy over a wide range of frequencies. When high currents occur in previously ionized channels during cloud-to-ground flashes, the most powerful emissions occur in the VLF range. VLF (very low frequency) refers to radio frequencies in the range of 3 kHz to 30 kHz. An essential advantage of low frequencies in contrast to higher frequencies is the property that these signals are propagated over thousands of kilometers by reflections from the ionosphere and the ground. In general, a lightning discharge generates several short duration pulses running between a storm cloud and the ground, or between or within storm clouds. The current flow generates an electric field parallel to the current flow, and a corresponding magnetic field perpendicular to the electric field.
Receiving a lightning signal
Waves with a frequency between 3 kHz and 30 kHz have a length between 100 km and 10 km. A suitable antenna for these frequencies is a small loop antenna with size of less than 1/10000 of the wavelength in circumference. Small loops are also called magnetic loops, because they are more sensitive to the magnetic component of the electromagnetic wave, and less sensitive to near electric field noises when properly shielded. If the loop is small with respect to the wavelength, the current around the antenna is nearly completely in phase. Therefore, waves approaching in the plane of the loop will cancel, and waves in the axis perpendicular to the plane of the loop will be strongest. This property changes if the loop becomes larger.
The electric field of the radio waves emitted by cloud-to-ground lightning discharges is mainly oriented vertically, and thus the magnetic field is oriented horizontally. To cover all directions (all- around 360 degree) it is advisable to use more than one loop. A suitable solution can be obtained by two orthogonal crossed loops as they are used for a direction finding system.
The electromagnetic signals of lightning discharges are not waves of a fixed frequency. The signals have more or less the form of an impulse and thus emits waves over a wide range of frequencies. Every of these impulses is unique and looks different. To measure the time of arrival of a lightning discharge, we need a wide-band receiving system, and not a tuned system. The antenna should be large to get a high voltage caused by the change of the electromagnetic field. If the loop consists of more than one winding, the wire placed side by side forms a capacitance.
Resonance
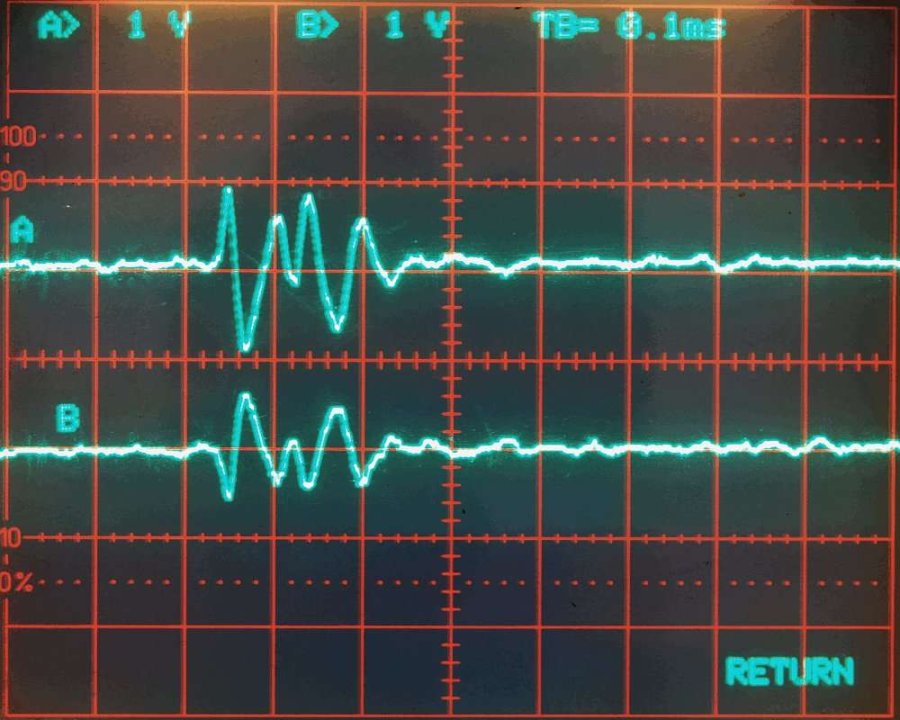
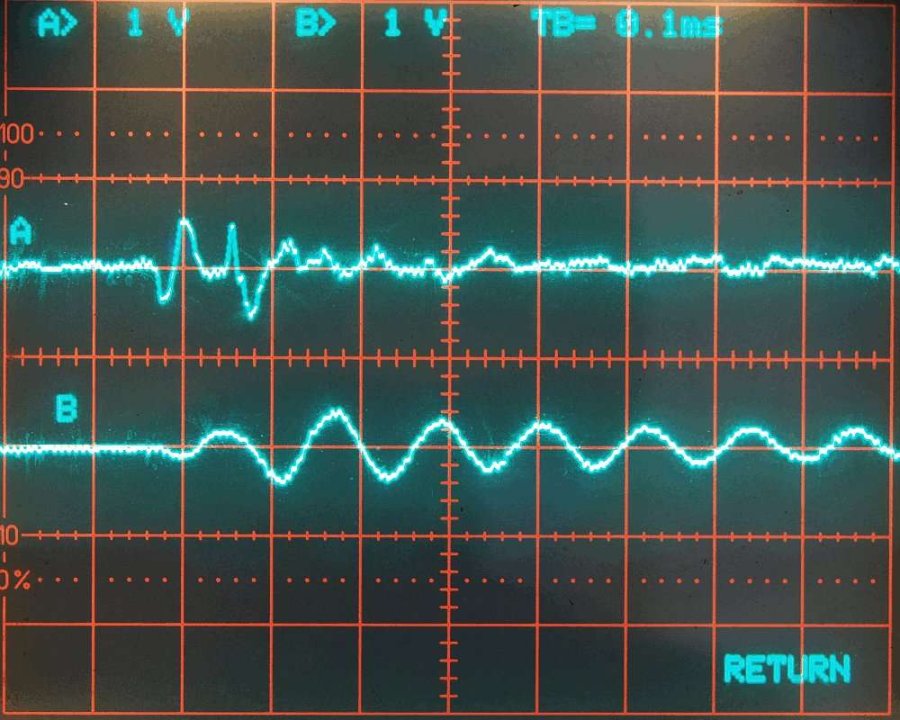
However, the unavoidable own resonance frequency of a loop should be as high as possible such that we can easily suppress these frequencies by a low-pass filter. The image below shows to the left a signal received by two equal sized untuned loops antennas. These loops have no additional tuning capacitor. The resonance frequency of the antenna is approximately at 1000 kHz (= 1 MHz). The used amplifier reduces frequencies of 1000 kHz by -72 dB (=4000 times). In the right image, Loop B is connected to a parallel tuning capacitor of 1 µF. Now, the tuned frequency is the antenna is approximately 10 kHz. Since lightning impulses often contain a lot of energy at 10 kHz, the tuned loop antenna only outputs unusable uniform waves of 10 kHz. This signal cannot be used for time measurement. This shows that it is very important to use a pure loop without any parallel capacitor.
Hint
Please avoid any additional tuning capacitor!
Time-of-Arrival method
The TOA lightning location technique is based on the computations of hyperbolic curves. The emitted radio signal of a lightning discharge is traveling through the air with the speed of light. This is approximately 300000 kilometers per second, or equivalently, 300 meters per microsecond. Each received signal gets a time stamp.
Let \(tA(s)\) be the time stamp for signal \(s\) from station \(A\). Time stamp \(tA(s)\) is the Coordinated Universal Time (abbreviated UTC) in microseconds with an accuracy of \(±1µs\). The difference of two time stamps for the same signal received by two different stations and the positions of these two stations define a hyperbolic curve. Let \(dA(p)\) be the distance of a point \(p\) to station \(A\) in meters. Then the hyperbolic curve for signal \(s\), is the set of all positions p whose distance difference \(dA(p) − dB(p)\) in meter corresponds to the time stamp difference \(tA(s) − tB(s)\) in microseconds converted by the speed of light into meter. That is,
The source of the signal has to be somewhere on this hyperbolic curve. The intersection point of three or more such hyperbolic curves defines the unique location of the source of the radio signal. The computed position is then be assumed to be the location of the lightning discharge. At least 4 sites not on a line are needed to define always a unique intersection point. With more than four receiving stations reporting a time stamp for the same signal there is some redundant information available to improve the accuracy and to verify the performance.
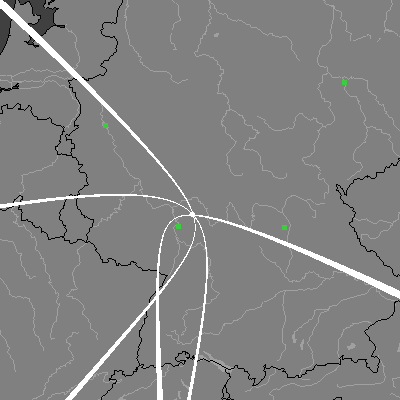
Three hyperbolic curves defined by the three time differences \(tB(s) − tA(s), tC(s) − tA(s)\), and \(tD(s) − tA(s)\) of four sites \(A\), \(B\), \(C\), and \(D\) (the green squares). The intersection of all three curves uniquely defines the location of the source of the radio signal (the white dot). The curves have a width corresponding to a tolerance of \(±5µs\). That is, the white area for signal \(s\) received by station \(A\) and \(B\) is the set of all points \(p\) for which
A time difference of \(±100µs\) corresponds to a distance difference of ±30 kilometers. That is, if site A receives the same signal \(100µs\) earlier than site B, the corresponding hyperbolic curve is defined by the set of all points that are 30 kilometers near to site A than to site B. Assume the time stamps have an accuracy of ±1µs and there are four sites arranged such that their positions define a square. If the signal source is exactly in the middle of the square, then the deviation of the computed position to the real source of the signal is greater than \(±300m * √2 = 424m\). It can be much greater if the source of the signal is outside the square. The picture below show the deviations for an accuracy of \(±1µs\) for different cut angles.
The main challenge of a TOA lightning location system is to assign the received signal a unique characteristic time stamp. This is not easy, because the outline of the signal changes when it travels over long distances. One way to handle different signal forms, is to compute a time of group arrival, see 1. However, if the time stamps are not consistently assigned, the hyperbolic curves do not intersect in a common intersection point. A collection of several nice papers about lightning detection can be found in 2.
The computations at our server are carried out in two steps. In the first step a starting point is computed using the method from 3 applied to the first 4 time stamps. After that a numerical method is used to minimize the sum of all squared distances to the hyperbolic curves. All our computations use spherical coordinates.
Accuracy
Note
Improvement of accuracy is on the to do list.
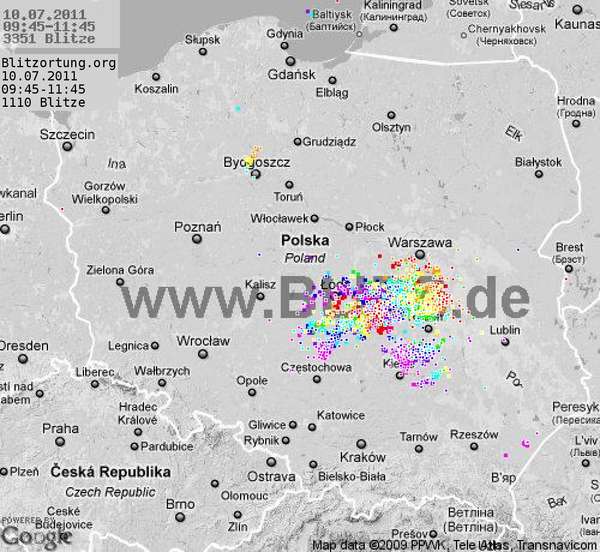
The following pictures show a comparison of the positions computed by Blitzortung.org and "BLIDS" over Germany, Belgium, and Poland. BLIDS is a commercial lightning information system in Germany operated by SIEMENS.
Direction finding method
Direction finding is a very simple method of estimating the source direction of a electromagnetic signal. The signal strength of magnetic antennas depends on the direction of the signal. Two magnetic antennas arranged at right angles can therefore be used to determine the direction of origin of the signal. The signal strength can also be used to estimate the distance. This method is very imprecise and is not used by us.
-
H.D. Betz, U. Schumann, and P. Laroche (Eds.) Lightning: Principles, Instruments and Applications. Springer Verlag, 2009. ↩↩
-
R.L. Dowden and J.B. Brundell and C.J. Rodger. VLF lightning location by time of group arrival (TOGA) at multiple sites. Journal of Atmospheric and Solar-Terrestrial Physics, 64(7):817-830, 2002. ↩
-
W.J. Koshak and R.J. Solakiewicz. TOA Lightning Location Retrieval on Spherical and Oblate Spheroidal Earth Geometries. Journal of Atmospheric and Oceanic Technology, 18(2):187-199, 2001. ↩
Participating
71 words
The hardware needed to participate to the network consists of an antenna system, a VLF amplifier, a controller board and a GPS receiver providing an 1PPS (one-pulse-per-second) signal.
Do not make any changes on the parts on the PCBs, especially on the amplifier.
Warning
It is essential for a TOA lightning locating network that all participating stations behave exactly the in the same way. Otherwise the computing accuracy will drop!
Data ↵
Lightning data
8 words
API
Work in progress
Live stream
Raw signal data
2428 words Estimated reading time 10 minutes
The raw signal data doesn't contain any information about lightning, only signals with timestamps received by the stations. This data can be used to compute lightning locations by using
Getting the data
We provide the raw signal only upon special request for partners and friends in case they want to do some own research. The data will be sent as UDP stream as it comes from the stations without further processing. As the stations have limited capacity the data will be distributed by our servers, but the stations can also send to more than one endpoint. We also provide a JSON encoded UDP data stream upon request.
Data structure
The detectors send their data records in plain text to the receiving server. The data records consist of lines that begin with control words followed by further information. There are no blank lines.
Encryption
Starting early 2024 the data can be
Header data
Each data record begins with four lines for the keywords station, processor, time, and position. These four lines are contained in every data sentence, otherwise the data sentence cannot be assigned to the detector.
station <station number>
processor <processor ID>
time <year>-<month>-<day> <hour>:<minute>:<second>[.nanoseconds] [timer]
position <latitude> <longitude> <altitude>
The parameters station, processor, position may not be available due to privacy settings and firmware version! In case of enabled privacy settings you we provide a separate source to assign the correct position.
<station number>is an integer greater than zero.<processor ID>is a unique identifier for the processor and thus a unique identifier for a registered station.<year>-<month>-<day> <hour>:<minute>:<second>corresponds to the point in time at which the signal exceeded a specified threshold value.<nanoseconds>is the number of nanoseconds since the last full second with 9 digits after the decimal point. In case of no GPS signal the nansoseconds (including the dot) will not be available.<timer>is a 64bit counter value derived from the CPU clock (i.e. 84MHz) which will be counted up until reset of the station. This value can be used as a high precision time stamp in case of no GPS signal. This available is available on stations with firmware 10.0 and later. Older firmware versions will not send any signal when there's no GPS signal.<latitude> <longitude> <altitude>: Latitude and longitude are given as a decimal number in degrees. The unit of the altitude is meters.
Additional header data
These lines may appear in the header data depending on firmware versions and settings.
<slot_number>is a 16bit number wich will be uniquely assigned randomly to a single station for some hours.<sequence>: A sequence number that is incremented for each signal sent by the station (until reset). Not all signals will be sent to each server.<signal_flags>: bit 1 (lowest) = signal of random noise level; bit 2 = stroke signal; bit 3 = sample of 1pps input; bit 4 = test signal; bit 5 = sample of 5V input; bit 32 = test wave enabled; bit 9 = filtered; bits 10-15 = filter flags. Other bits are reserved for future use.
Examples
station 4690
processor 31003C004147313332342455
time 2021-11-13 11:33:48.687089982
position 51.190365 11.942244 169
Footer data
Newer firmware versions may send additional information at the end of the data record.
<length>is the length of the whole data record until the end keyword.<tag>is a unique identifier for the data record (internal usage only).
Channel meta data
The following five lines for the keywords amp, conversion_time, conversion_gap, values, and start can follow for each channel. These lines do not have to be present in every data record, since this information does not change as often. However, these lines are usually sent every 10 minutes.
amp <channel> <version> <gain> [<filter_frequency>]
conversion_time <channel> <time_nanoseconds>
conversion_gap <channel> <gap_nanoseconds>
values <channel> <number>
start <channel> <offset>
ch <channel> <channel_flags>
<channel>is a number between 0 and 5.<version>is the version of the amplifier channel (i.e.12.2).<gain>describe the gains of the channel. Most channels have two adjustable gains. The value is given as integer. The gain numbers are separated by dots (i.e.16.4)<input>describe the inputs used by the op amp of each channels. Most channels have two op amps with two inputs each. The value is given as integer. The input numbers are separated by dots.<filter_frequency>is the filter frequency in Hz, when a filter is installed and used.<time_nanoseconds>is the time in nanoseconds that is needed for the conversion of a sample (666 by default).<gap_nanoseconds>is the time in nanoseconds between two conversions. It is 2000 by default which corresponds to a sampling rate of 500kHz.<number>is the number of values that are sent for each channel. 512 values are sent by default.<offset>is the offset in the sample which applies to the time stamp. It is 256 by default.<channel_flags>is a bit field which provide the same information as<signal_flags>in the header data, but individually for each channel.
At a sampling rate of 500kHz, a total time range of 1024 microseconds is sent, 512 microseconds before reaching the threshold (= timestamp) and 512 microseconds after passing the threshold.
Example:
Channel signal data
<channel>is a number between 0 and 5.<shift>is the shift value for the data values (see below).<coding>is the encoding method for the data values (see below).<bytes>is the number of data bytes that will follow.<binary data>is the data starting with a $ symbol.
Example
Data Shifting
Each data value is sent as one byte (8 bits) even if more than 8 bits are sampled. For example, if the data is sampled with 12 bits, the shift can be between 0 and 4. If the 4 most significant bits b_11, …, b_8 are zero in all data bytes, then the 8 least significant bits b_7, ...,b_0 are sent with a shift of 0. If this is not the case and the first three most significant bits b_11, b_ 10, b_ 9 are zero in all data bytes, then the 8 bits b_8, ..., b_1 are sent with a shift of 1. If this is not the case and the two most significant bits b_11 and b_10 are zero in all data bytes, then the 8 bits b_9, …, b_2 are sent with a shift of 2. If this is not the case and the first bit b_1 is zero in all data bytes, then the 8 bits b_ 10, …, b_3 are sent with a shift of 3. If this is not the case, then the most significant bit b_11 was not zero in at least one data byte. In this case the 8 most significant bits b_11, …, b_4 are sent with a shift of 4.
Here are some examples for the case that the entire data set in channel 0 consists of only 4 data values.
The keyword coding will be explained later. The key word data is followed by an indication of the number of data bytes that will follow. The third value contains the data starting with a $ symbol.
Example 1
Data: <001010101010><000111011101><101110101111><000010101010>
Example 2
Data: <001011101010><0001110111010><011110101111><000011101010>
Example 3
Data: <000011101010><0000110111010><000000101111><000001101010>
Signal data encoding
The signal data can be transmitted as raw data as well as encoded data. Currently only two methods are used for encoding the signal data. Coding 0 means plain binary raw data and coding 3 means encoded data method 3. The two encoded methods 1 and 2 are no longer used. Which encoded method is used is given after the channel number after the key word coding.
The type 3 encoded is a block encoded. The first byte of a block is called the block start byte. The 6 least significant bits of the block start byte represents the block length bl between 1 and 64 (<000000> = 1 and <111111> = 63). The two most significant bits of the block start byte represents the block type bt.
Example
The block type 0 indicates a block that has not been encoded. That means, the next bl bytes follow not encoded. The block type 1 indicates a block that consists only of noise. The block start byte is followed by one byte for the maximum noise level and one byte for the minimum noise level. Block type 2 indicates a block with differential encoding. The block start byte is followed by an initial byte.
Perl implementation
Below is an example of a decompression implemented in the Perl programming language.
use POSIX;

sub decode_data {
            my ($coding, @source) = @_;
            my @target;
            if ($coding == 0) {
                    #
                    # no compression
                    #
                    for ($i= 0; $i < (scalar @source); $i++) {
                            $target[$i]= $source [$i];
                    }
                    return ($target);
            }
            elsif ($coding == 3) {
                    $source_values= scalar @source;
                    $source_pos= 1;
                    $target_pos= 0;
                    while ($source_pos < (scalar @source)) {
                            $block_length= ($source[$source_pos]&0x3F)+1;
                            $block_coding_type= ($source[$source_pos]&0xC0)>>6;
                            $source_pos++;
                            if ($block_coding_type == 0) {
                                    #
                                    # raw block
                                    #
                                    while ($block_length > 0) {
                                            @target[$target_pos]= @source[$source_pos];
                                            $target_pos++;
                                            $source_pos++;
                                            $block_length--;
                                    }
                            }
                            elsif ($block_coding_type == 1) {
                                    #
                                    # noise block
                                    #
                                    my $max_noise= @source[$source_pos];
                                    $source_pos++;
                                    my $min_noise= @source[$source_pos];
                                    $source_pos++;
                                    my $avg_noise= floor(($max_noise+$min_noise)/2);
                                    while ($block_length > 0)
                                    {
                                            @target[$target_pos]= $avg_noise;
                                            $target_pos++;
                                            $block_length--;
                                    }
                            }
                            elsif ($block_coding_type == 2) {
                                    #
                                    # delta block
                                    #
                                    my $first_value= @source[$source_pos];
                                    $source_pos++;
                                    @target[$target_pos]= $first_value;
                                    $target_pos++;
                                    my $last_delta= @source[$source_pos];
                                    if ($last_delta > 127) {
                                            $last_delta-= 256;
                                    }
                                    @target[$target_pos]= $first_value+$last_delta;
                                    $target_pos++;
                                    my $block_num= 0;
                                    while ($block_length > 0) {
                                            my $delta= 0;
                                            if (($block_num%2) == 0) {
                                                    $source_pos++;
                                                    $delta= (@source[$source_pos]&0xF0) >> 4;
                                            }
                                            else {
                                                    $delta= (@source[$source_pos]&0x0F);
                                            }
                                            if (($delta & 0x08) != 0) {
                                                    $delta= ($delta&0x07) - 0x08;
                                            }
                                            else {
                                                    $delta= ($delta&0x07);
                                            }
                                            $delta+= $last_delta;
                                            @target[$target_pos]= @target[$target_pos-1]+$delta;
                                            $target_pos++;
                                            $last_delta= $delta;
                                            $block_length--;
                                            $block_num++;
                                    }
                                    $source_pos++;
                            }
                    }
            }
            return @target;
}
#
# Test Frame
@source= (0x24,0x6D,0x8A,0x81,0x9F,0x81,0x02,0xD3,0xE0,0x0F,0x3D,0x1F,0xF1,0x12,0x0F,0xF1,0xE1,0x0F,0x3C,0x2D,0x4F,0x2F,0x0E,0x75,0x8A,0x83,0x91,0x8C,0xFE,0x2F,0x1F,0x1F,0x04,0xC3,0xEF,0x11,0xFE,0x21,0xB5,0x86,0x00,0x2E,0x02,0x0F,0xE1,0xF1,0xE2,0xF0,0x11,0x2D,0x1D,0x4E,0xF1,0xF0,0x03,0xF0,0x0F,0xF1,0x0F,0x1F,0x00,0x01,0x10,0x1D,0x2D,0x10,0x11,0xFF,0x6B,0x8B,0x84,0x02,0x8E,0x97,0x9D,0x81,0x9A,0xEE,0xF7,0x85,0x6F,0x12,0x3D,0xCB,0xFC,0x81,0xC3,0xF4,0x07,0x02,0xA9,0xAE,0xB0,0xBF,0xA9,0xF7,0xF4,0x24,0xFE,0xFF,0xB1,0x07,0x05,0xF0,0x31,0x3A,0x1E,0xA1,0x1E,0x0F,0x13,0x4E,0x02,0x1D,0x3D,0x2C,0x00,0xF1,0x1F,0x1F,0x1F,0x3F,0x1F,0x0E,0x3F,0x0E,0x2F,0x21,0x8D,0x81,0x00,0x00,0x10,0xF3,0xFE,0x1F,0xF0,0xF1,0xBF,0x85,0xFF,0x21,0xE2,0xE2,0xE0,0xE2,0xE2,0x0E,0x2F,0x13,0xC3,0x0E,0x2F,0xD2,0xF1,0x10,0x02,0xD1,0x0E,0x1F,0x02,0xE0,0x01,0x03,0xEE,0x2F,0xE4,0xC4,0xD2,0xFF,0x11,0xE3,0xC2,0xBB,0x90,0x01,0xE0,0xF2,0x1E,0x4F,0xFF,0x01,0xE0,0x1F,0x1E,0x12,0x0E,0x1F,0x2C,0x4E,0x1F,0x02,0xE3,0xE1,0xFF,0x01,0x1C,0x4E,0x02,0x0F,0x1F,0x0F,0x11,0xE1,0xFF,0x3D,0x95,0x88,0x01,0x2E,0xD2,0xF0,0x1F,0x10,0x00,0x1F,0x01,0xD3,0xF0,0x0E,0x01,0x87,0x86);

@target= decode_data (3, @source);
print "Source: (" . scalar @source . ") ";
for ($i= 0; $i < (scalar @source); $i++) {
            print $source [$i] . " ";
}
print "\n\n";
print "Target: (" . scalar @target . ") ";
for ($i= 0; $i < (scalar @target); $i++) {
            print "(" . $i . ")" . $target [$i] . " ";
}
print ".\n\n";

@target= (0x85,0x85,0x85,0x85,0x85,0x85,0x85,0x85,0x85,0x85,0x85,0x85,0x85,0x85,0x85,0x85,0x85,0x85,0x85,0x85,0x85,0x85,0x85,0x85,0x85,0x85,0x85,0x85,0x85,0x85,0x85,0x85,0x85,0x85,0x85,0x85,0x85,0x85,0x85,0x85,0x85,0x85,0x85,0x85,0x85,0x85,0x81,0x83,0x82,0x84,0x84,0x84,0x84,0x83,0x85,0x84,0x84,0x83,0x81,0x80,0x80,0x82,0x84,0x85,0x85,0x86,0x85,0x85,0x85,0x84,0x86,0x84,0x84,0x81,0x82,0x82,0x84,0x85,0x86,0x85,0x86,0x86,0x86,0x86,0x86,0x86,0x86,0x86,0x86,0x86,0x86,0x86,0x86,0x86,0x86,0x86,0x86,0x86,0x86,0x86,0x86,0x86,0x86,0x86,0x86,0x86,0x86,0x86,0x86,0x86,0x86,0x86,0x86,0x86,0x86,0x86,0x86,0x86,0x86,0x86,0x86,0x86,0x86,0x86,0x86,0x86,0x86,0x86,0x86,0x86,0x86,0x86,0x86,0x86,0x8C,0x8A,0x8A,0x89,0x89,0x88,0x88,0x87,0x86,0x89,0x88,0x8A,0x8A,0x89,0x89,0x8A,0x8A,0x88,0x88,0x89,0x86,0x86,0x88,0x88,0x88,0x8A,0x8C,0x8D,0x8C,0x8C,0x8B,0x8B,0x89,0x89,0x88,0x87,0x87,0x88,0x8B,0x8B,0x8C,0x8A,0x8C,0x8C,0x8B,0x8B,0x8A,0x89,0x88,0x8A,0x8B,0x8C,0x8D,0x8D,0x8C,0x8C,0x8C,0x8B,0x8B,0x8A,0x89,0x88,0x87,0x87,0x88,0x89,0x8B,0x8A,0x8B,0x89,0x88,0x87,0x87,0x88,0x88,0x87,0x87,0x87,0x87,0x87,0x87,0x87,0x87,0x87,0x87,0x87,0x87,0x87,0x87,0x87,0x87,0x87,0x87,0x87,0x87,0x87,0x87,0x87,0x87,0x87,0x87,0x87,0x87,0x87,0x87,0x87,0x87,0x87,0x87,0x87,0x87,0x87,0x87,0x87,0x87,0x87,0x87,0x87,0x87,0x87,0x8E,0x97,0x9D,0x9A,0x88,0x75,0x69,0x6F,0x81,0x96,0xA8,0xB6,0xBF,0xC7,0xCB,0xC3,0xB7,0xAB,0xA6,0xA9,0xAE,0xB0,0xA9,0xA0,0x96,0x90,0x8C,0x8C,0x8B,0x88,0x84,0x7F,0x75,0x6C,0x63,0x61,0x5F,0x62,0x64,0x66,0x6B,0x71,0x7A,0x7D,0x81,0x83,0x7F,0x7C,0x7A,0x76,0x72,0x6D,0x69,0x68,0x6B,0x6C,0x6D,0x70,0x74,0x75,0x79,0x7A,0x7D,0x7C,0x7B,0x7A,0x78,0x77,0x77,0x76,0x76,0x75,0x75,0x74,0x76,0x77,0x79,0x7A,0x7B,0x7A,0x7C,0x7D,0x7E,0x7D,0x7E,0x7E,0x80,0x83,0x81,0x81,0x81,0x81,0x82,0x83,0x83,0x86,0x88,0x88,0x89,0x89,0x88,0x87,0x85,0x84,0x85,0x84,0x85,0x87,0x87,0x89,0x89,0x8B,0x8B,0x8B,0x89,0x89,0x87,0x87,0x87,0x85,0x85,0x84,0x84,0x87,0x86,0x88,0x8A,0x8A,0x8C,0x8D,0x8B,0x8B,0x8A,0x8A,0x8B,0x8C,0x8D,0x90,0x90,0x91,0x92,0x91,0x91,0x90,0x8F,0x90,0x8F,0x8E,0x8D,0x8D,0x8D,0x90,0x91,0x90,0x91,0x91,0x8F,0x91,0x8F,0x91,0x90,0x91,0x91,0x90,0x90,0x91,0x90,0x92,0x90,0x90,0x90,0x91,0x90,0x8F,0x8D,0x8D,0x8E,0x8D,0x90,0x92,0x93,0x93,0x93,0x94,0x93,0x92,0x92,0x91,0x91,0x8F,0x8E,0x8F,0x90,0x8F,0x8F,0x8E,0x8F,0x8C,0x8D,0x8C,0x8C,0x8B,0x8A,0x8B,0x8A,0x8C,0x8C,0x8D,0x8D,0x8C,0x8B,0x8B,0x8C,0x89,0x8A,0x89,0x88,0x89,0x8A,0x8A,0x8B,0x8B,0x8B,0x8A,0x8A,0x8B,0x8A,0x8A,0x89,0x87,0x88,0x86,0x88,0x89,0x8C,0x8D,0x8B,0x8B,0x8A,0x89,0x89,0x88,0x88,0x88,0x88,0x88,0x89,0x89,0x89,0x8A,0x88,0x89,0x89,0x89,0x89,0x87,0x87,0x86);

print "Target: (" . scalar @target . ") ";
for ($i= 0; $i < (scalar @target); $i++) {
            print "(" . $i . ")" . $target [$i] . " ";
}
print ".\n";
Ended: Data
Ended: General
Hardware ↵
Hardware
25 words
Overview
The hardware essentially can be divided into three groups: antennas, amplifiers and the controller. Here's a simplified flow chart with three antennas:
graph LR

subgraph Amplifier Board
    PAMP1
    PAMP2
end

subgraph Amplifier Board
    PAMP3
end

ANT1([H Field Antenna 1]) --> PAMP1[H Field pre Amp. 1]
ANT2([H Field Antenna 2]) --> PAMP2[H Field pre Amp. 2]
ANT3([E Field Antenna]) --> PAMP3[E Field pre Amp.]
PAMP1 ---> AMP1[Amplifier 1]
PAMP2 ---> AMP2[Amplifier 2]
PAMP3 ---> AMP3[Amplifier 3]
GPSANT([GPS Antenna]) --> G
N <--->|Ethernet| I[(Internet)]

subgraph CTRL ["Controller Board"]

    AMP1 --> ADC1
    AMP2 --> ADC2
    AMP3 --> ADC3
    G[GPS] <-->|Data| CPU
    G[GPS] -->|1PPS| CPU
    CPU <--> N[Network Controller]

    subgraph AMPS ["Amplifier"]
        direction TB
        AMP1
        AMP2
        AMP3
    end

    subgraph MCU ["Microcontroller Unit (MCU)"]
        ADC1 & ADC2 & ADC3 --> CPU{CPU}:::cpu
    end


    %%messes up everything
    %%GAIN -.-> AMP1
    %%GAIN[Gain Control] --> MCU

end

classDef cpu fill:#f66

click CTRL test

click PAMP1 "lightning-detectors/blue/#h-field-pre-amplifier-pcb-16x"
click PAMP2 "lightning-detectors/blue/#h-field-pre-amplifier-pcb-16x"
click PAMP3 "lightning-detectors/blue/#e-field-pre-amplifier-pcb-17x"

click ANT1 "antennas/hfield/"
click ANT2 "antennas/hfield/"
click ANT3 "antennas/efield/"

click CPU "#mcu"
click ADC1 "/station-operation/technical_reference/#adc"
click ADC2 "/station-operation/technical_reference/#adc"
click ADC3 "/station-operation/technical_reference/#adc"
Lightning detectors ↵
System MINI
319 words Estimated reading is 1 minute
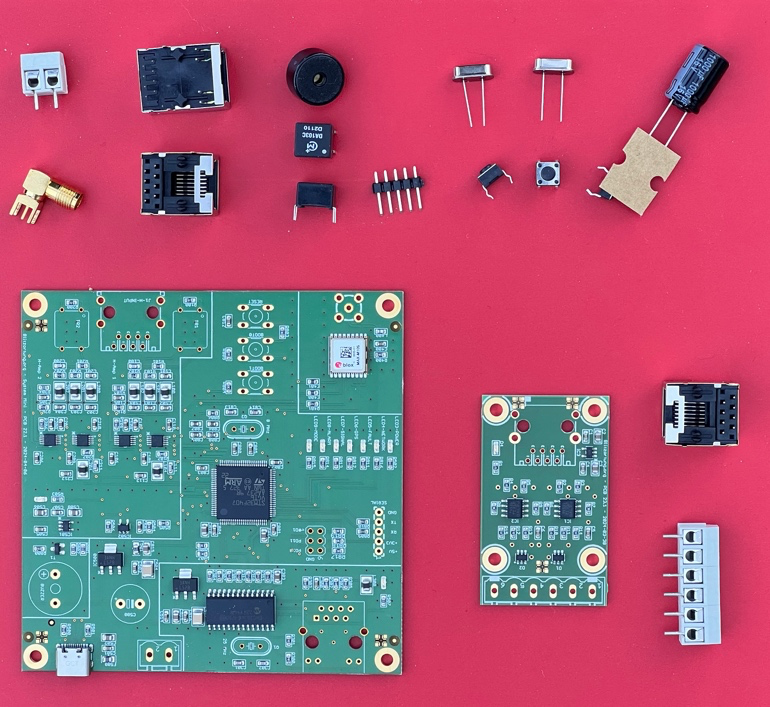
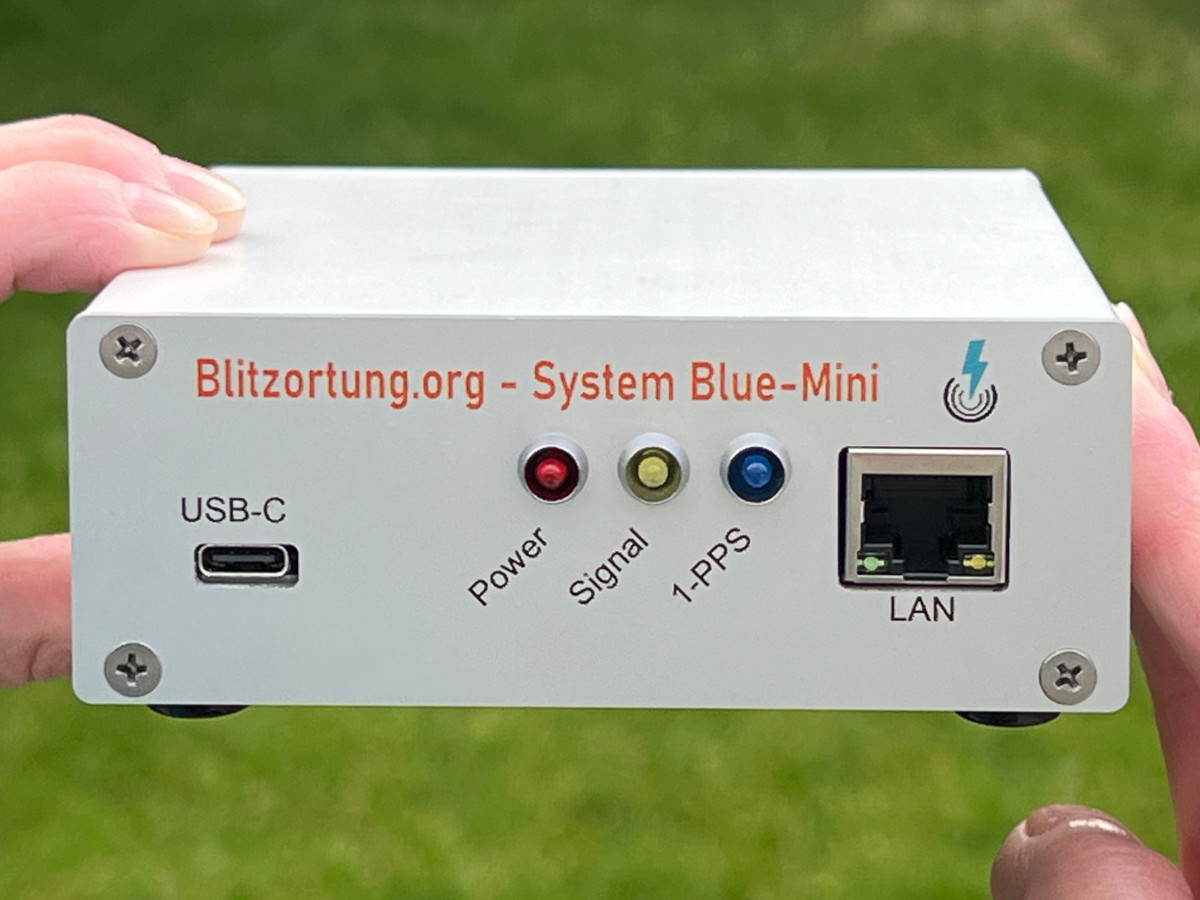
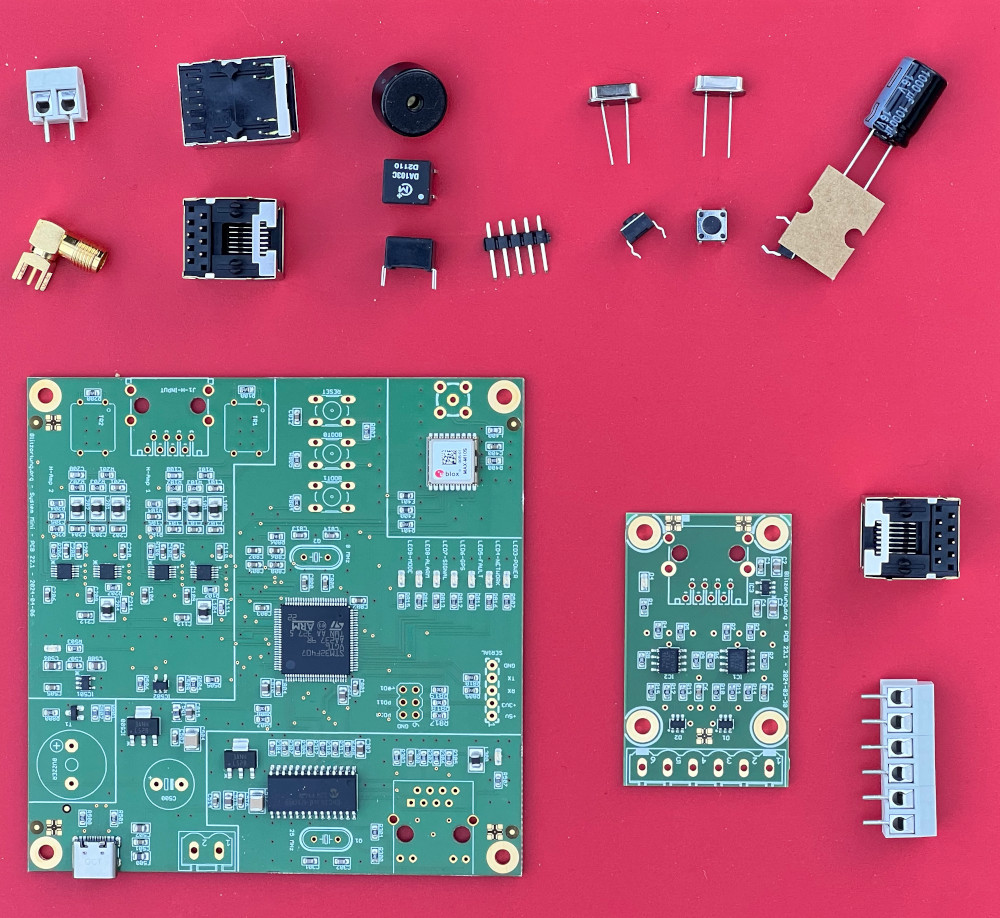
The System Blue Mini, or System Mini for short, is a System Blue in which some unimportant components have been omitted for cost reasons. It supports two H-field channels. This is the main application of application for the detectors. The third H-field channel and the E-field channel have been omitted. Furthermore, certain filter options that should only be used in noisy environments have been omitted. The detector works optimally with the preamplifier PCB 23.1. The u-blox MAX-M10S was installed as the new GNSS module. It supports the simultaneous reception of various GNSS (GPS, GLONASS, Galileo, and BeiDou). System Mini is powered via a USB-C socket.
Assembly
The PCBs have several through-hole technology (THT) components which need to be soldered by yourself. As they are almost identical to the BLUE PCBs you can use the assembly instructions there.
Some additional notes:
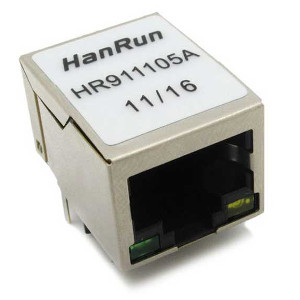
- The RJ-45 HanRun socket with the LEDs is the Ethernet socket. The other RJ-45 socket is the connection to the preamplifier.
- The electrolytic capacitor C500 (560µF – 1000µF) is only necessary if you use an untrustworthy power supply or if the board is powered via the terminal. Do not solder this capacitor if you are using an intelligent USB-C power supply, such as the one used to charge notebooks.
- If you have one of the test boards 22.0/1, then please do not change the jumper settings, these are for selecting different power supply options for some components and for the coding of the board.
H-field preamplifier 23.1
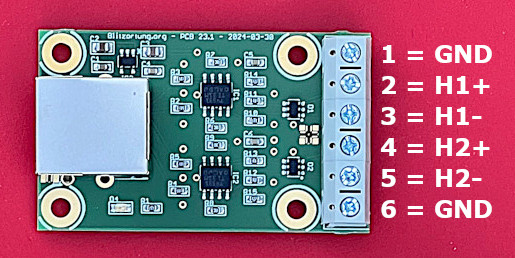
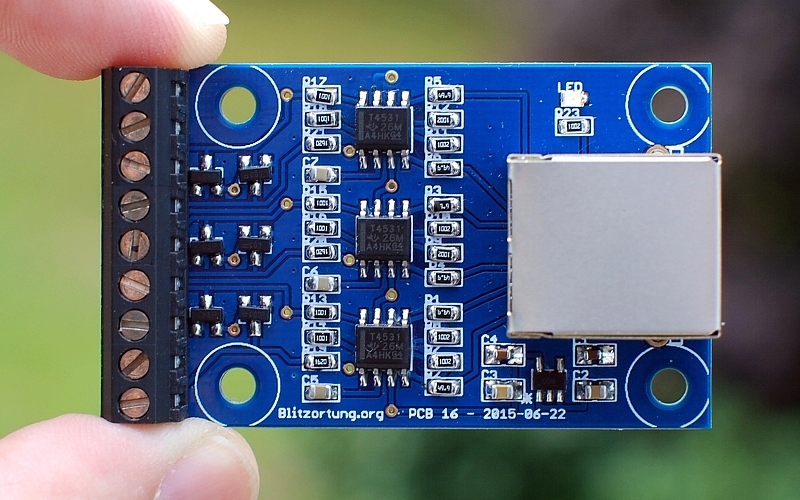
The H-field preamplifier PCB 23.1 has 6 input pins. The two outer pins, pin 1 and pin 6, are ground. They can be used for shielding antennas. Pin 2 and 3 is the first amplifier input, pin 4 and 5 is the second amplifier input.
Operation
The firmware for System MINI is the same as BLUE, but only the two amplifier inputs are shown.
System BLUE
2041 words Estimated reading time 8 minutes
The Lightning Detector System Blue is a universal receiver for electromagnetic waves in the VLF/LF frequency range between 3 kHz and 300 kHz. It has three input channels for H-field antennas and one input channel for an E-Field antenna. The following two criteria played a crucial rule during the design of the detector.
- The detector should not be too expensive for the end user.
- The detector should provide the user with a variety of experimental possibilities.
The Kit
The main difference between System Blue and previous systems is that System Blue has partly prefabricated circuit boards. All surface-mount devices (SMD) are already soldered. However, there are still some components with leads that have to be inserted into holes drilled in the printed circuit boards and soldered to pads on the back side by manual assembly. For soldering you should use a soldering iron with a 1mm tip and thin solder wire. Do not try to solder these components if you do not have any experience with soldering electronic parts.
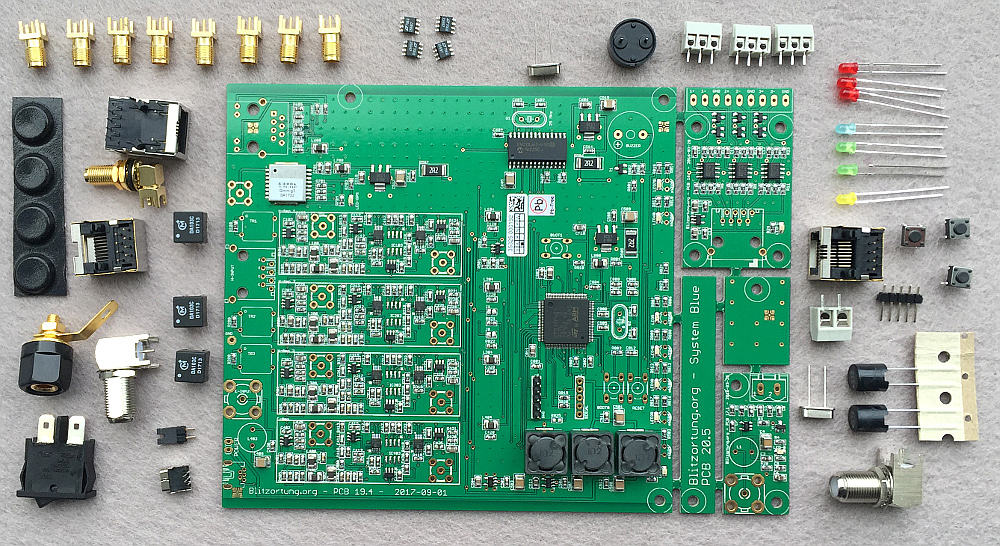
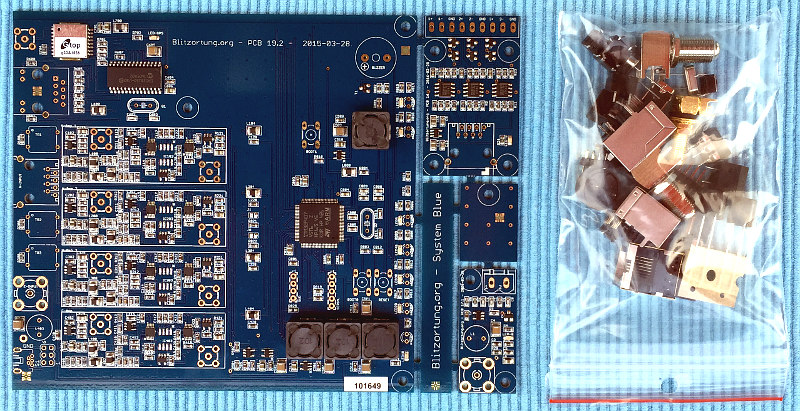
The board with the identification PCB 20.x is a panel consisting of a main board PCB 19.x an H-field preamplifier PCB 16.x and an E-field preamplifier PCB 17.x. The latest version of September 2017 is the panel PCB 20.5 with the main board 19.4 the H-field preamplifier PCB 16.1 and the E-field preamplifier PCB 17.1.
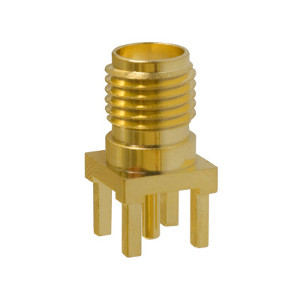
The following picture shows a complete set with all parts. Not all of these parts are essential for the operation of the detector. The 8 SMA jacks are not supplied. The maximal 4 filter ICs can be purchased separately and are not included as standard. The 3mm light-emitting diodes, the switch, the rubber feet and the grounding socket are only necessary if the main board is installed in the housing. These parts are only included if the housing is ordered.
Assembly
In the following chapters youe will find detailed assembly instructions. Some of our members also recorded the assembly of their stations on video.
Separate the boards
You can separate the boards manually. After that, you should file off the overhanging edges.
Controller board PCB 19.x
The controller board PCB 19.x has the following through-hole technology (THT) components.
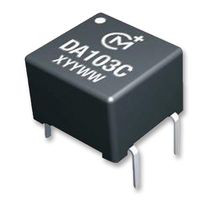
- 3 x DA103C - Transformer - Murata Power Solutions
- 1 x Inductor - 3.3 mH - Taiyo Yuden
- 1 x USB Mini-B Connector, PCB mounting, 90°
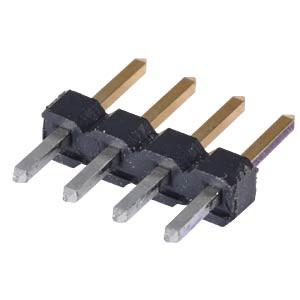
- 1 x 1x4 Header, straight, Pitch 2,54 (only 19.1/19.2/19.3)
- 1 x 1x5 Header, straight, Pitch 2,54 (only 19.1/19.2/19.3)
- 1 x 2x5 Header, straight, Pitch 2,54 (only 19.4)
- 1 x 1x2 Header, straight, Pitch 2,54 (only 19.4)
- 1 x 2x3 Header, straight, Pitch 2,54 (only 91.1/19.2/19.3)
- 1 x Jumper (only 91.4)
- 2 x Jumpers (only 91.1/19.2/19.3)
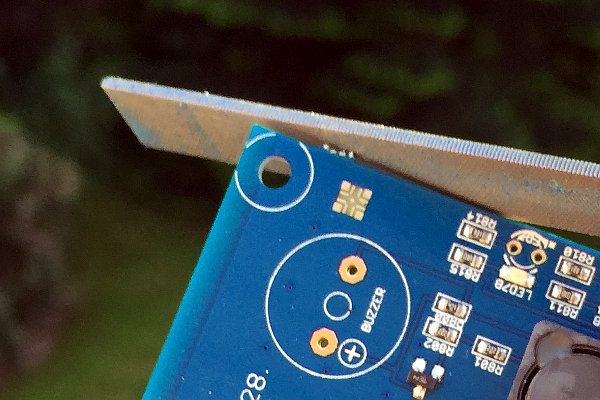
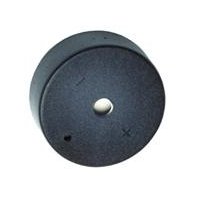
- 1x Piezo Audio Indicator
- 1x Crystal, 8.0000000 MHz
- 1x Crystal, 25.000000 MHz
- 3 x Pushbutton 6x6mm, height: 4,3mm, vertical
- 1 x RJ45 Modular Connector
- 1 x HanRun (HR911105A) RJ45 network connector with integrated magnetics
- 1 x F-Connector, PCB mounting, 90°
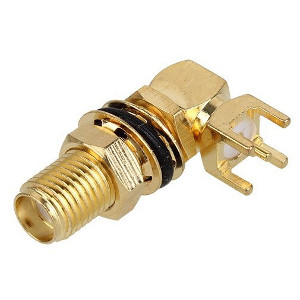
- 1 x SMA Connector, PCB mounting, 90°
- 1 x Ground Socket (only PCB 19.4)
Some of the THT components may have been soldered because they were required to install the initial firmware.
The DA103C Transformers have a white dot at one corner. On the main board, there are white dots printed at the placeholders for the transformers TR1, TR2, and TR3. The white dots at the transformers must match the white dots at the main board.
The 3.3mH inductor is L403.
Crystal Q1 has a frequency of 25 MHz, crystal Q2 has a frequency of 8 MHz.
Some Piezo Audio Indicators have a ’+’-mark, which should match the ’+’-mark on the board. (If there is no ’+’-mark, then the orientation is not important.)
All other components can not be soldered at wrong places because of their physical layout.
Power supply
Note
Please use a 1 Ampere or bigger power supply. We have had some bad experiences with 500mA power supplies.
The main board is supplied with a 5V USB power adapter. The plug must be a USB-B Mini 5 pin. The power supply is not part of the kit and must be purchased separately. The power consumption is about 450mA.
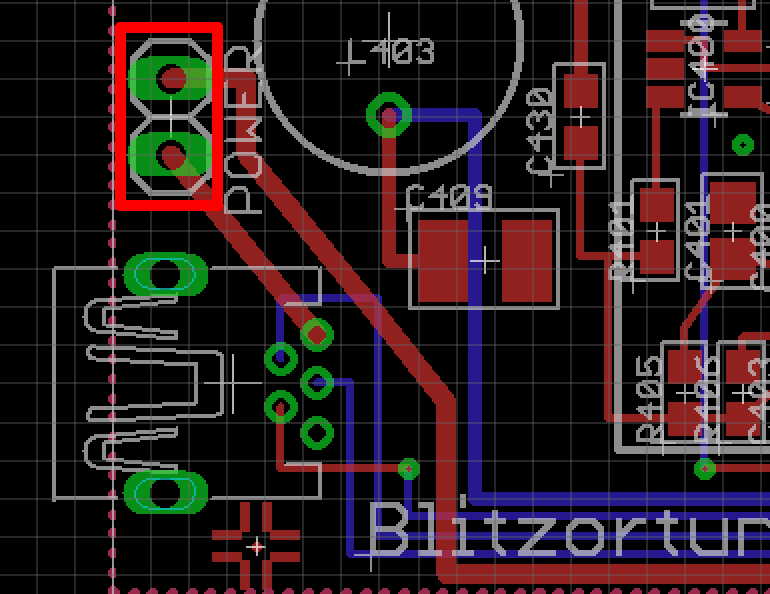
At switch S1 on PCB 19.2 you have to connect pin 5 and pin 6 with a jumper. This turns the board on, if a USB power supply is connected, shown by the red rectangle in the image below. You must connect pin 1 and pin 2 a jumper so that the pre-amplifiers get power, shown by the green rectangle in the image below. Note that these jumper settings are different from the early board PCB 19.1. Please refer to the circuit diagrams. At 19.4 you must connect the two pins of the power jumper.
Network connection
The router is connected at the RJ45 network port with a shielded twisted pair network cable (FTP, STP, S/STP, or S/FTP). More information about accessing the web interface can be found
Digital filter option
The complete digital filter option consists of
- 4 x digital filter ICs (LTC1569-7)
- 8 x SMA Connector, PCB mounting
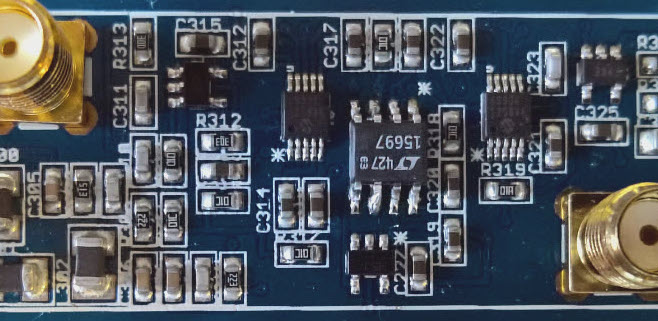
In general, it is not necessary to install the digital filter ICs. The system also operates without them. However, if you want to experiment, or if you have extremely strong interference at frequencies above 20kHz, you can try to get better signals with the digital low pass filter ICs. Since the digital filter ICs are relatively expensive, you should test one filter IC at one channel, preferably at the E-Field channel. If the desired effect is achieved, the other channels can be upgraded.
The digital filter ICs have a point at one corner of the housing. This point identifies Pin 1. It must match the white dot on the main board. You need a soldering iron with a small tip to solder the SOIC-8 package.
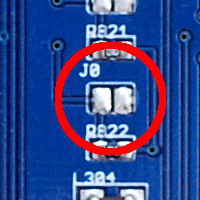
You have to close (solder) Jumper J0, otherwise the firmware will not recognize the filter ICs, and thus will not allow you to adjust them.
All inputs and outputs of the amplifiers are passed via buffer amplifiers to SMA connectors. If these connectors are installed, then the signals can easily be monitored with an oscilloscope or an FFT analyzer. There are various computer programs for signal analysis, if the output of the preamplifier is passed in to the PC via a sound card.
Housing option
The housing option consists of the following parts.
- 1 x aluminum enclosure
- 1 x front panel
- 1 x back panel
- 1 x rocker switch
- 8 x screw M3 10mm
- 4 x rubber feet
- 3 x LED red
- 2 x LED green
- 1 x LED yellow
- 1 x LED blue
The housing is made for boards of size 130.0 mm x 140.0 mm. The main board PCB 19 has the dimension 130.0 mm x 138.5 mm and is slightly shorter than the housing. The LEDs on the front panel are soldered with an angle of 90 degrees. The overlapping edge of the LED housing closes the gap between the board and the front panel. In this construction, the LED can not be crushed by pressure from outside at the front panel, which is the reason for the difference in size between the housing and the main board.
The threads at the corners in the aluminum housing are drilled by machine. Any protruding metal chips must be removed with a screwdriver or a wooden stick otherwise they may be fall onto the board. Do not use your finger to clean the threads.
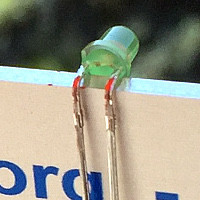
The connecting wires of the LEDs can easily be bent 90 degrees using the front panel that has a width of 2 mm. On the main board there are white stars printed near the LEDs. In these holes the short ends of the wires have to be inserted. This is the cathode (-) of the diodes.
At the back panel, the rocker switch can be inserted to turn the power on and off. It has to be connected to pin 5 and 6 of S1 (19.1/19.2/19.3) or at the power jumper (19.4).
The rubber feet can be stuck under the housing.
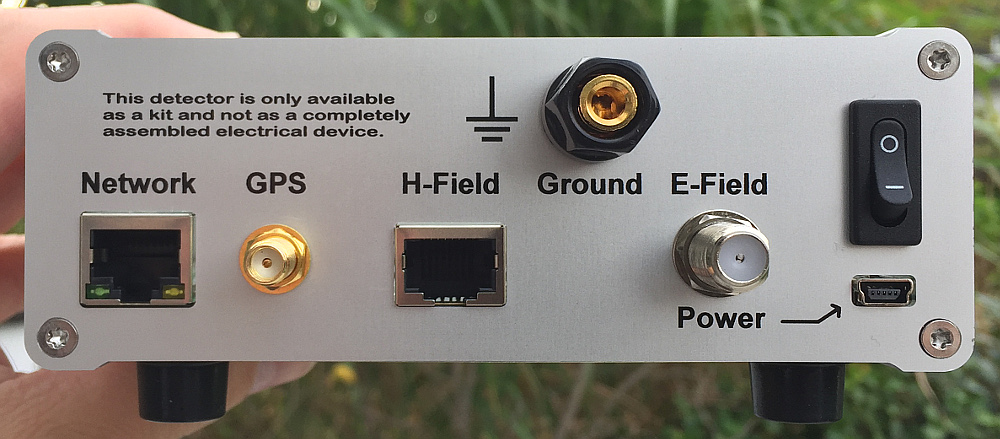
From version 19.4 a pole terminal for connecting ground is included. The layout of the back panel has also changed. The ethernet controller was placed a little further away from the amplifiers. The Ethernet socket has been swapped with the GPS socket.
Voltage regulator extension (PCB 19.1/19.2 only)
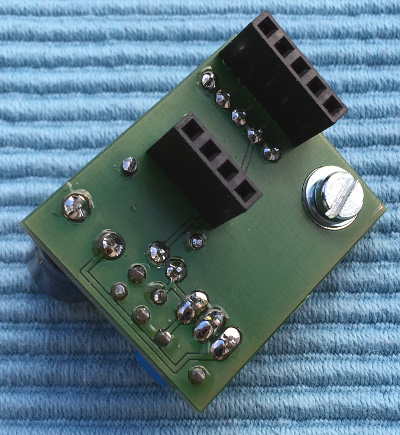
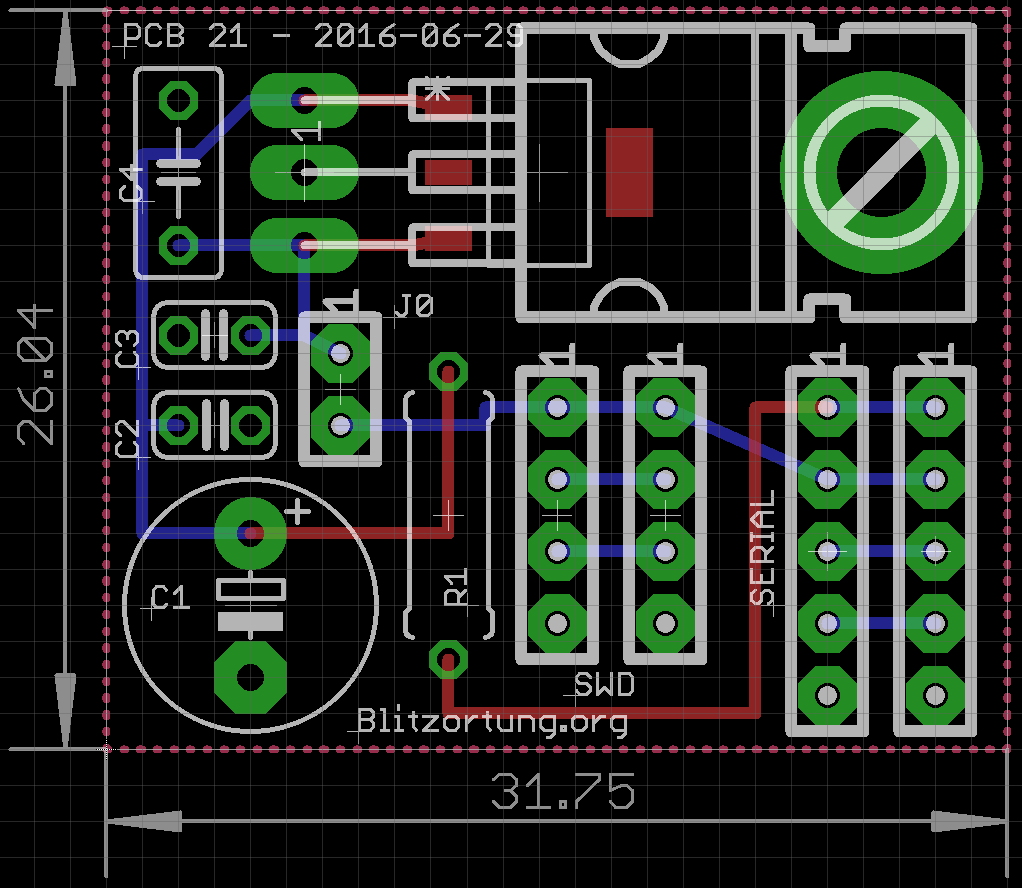
Unfortunately, the voltage regulators of the boards PCB 19.1 and PCB 19.2 are not adequate for the current consumption of the boards. This problem is eliminated by the piggyback board PCB 21.
PCB 21 is manufactured on a panel with severals boards and thus may have overhanging edges. You should file off these edges.
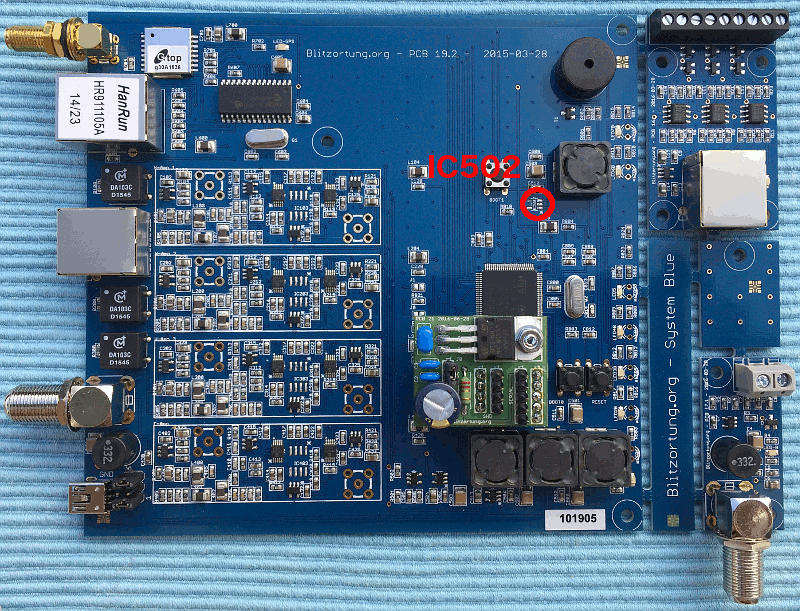
The voltage regulator IC502 should be unsoldered from the board. Please do not operate with both voltage regulators. They can act against each other.
H-field pre-amplifier PCB 16.x
The H-field pre-amplifier board PCB 16.x has the following THT components whose placement is obvious.
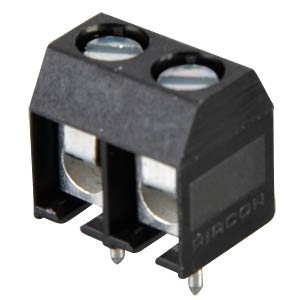
- 1 x Header 3-pin, Pitch 3.5mm
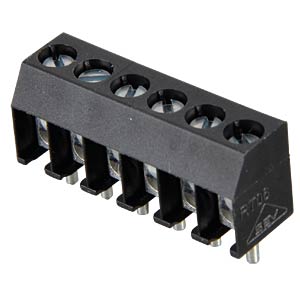
- 1 x Header 6-pin, Pitch 3.5mm (or alternatively 2 x Header 3-pin, Pitch 3.5mm)
- 1 x RJ45 Modular Connector
| 1 | 2 | 3 | 4 | 5 | 6 | 7 | 8 | 9 |
|---|---|---|---|---|---|---|---|---|
| A-1 | A-2 | GND | B-1 | B-2 | GND | C-1 | C-2 | GND |
The antennas are connected to the pre-amplifier as shown above. The screw strip is intended for connecting the wires of loop antennas. The wires of ferrite rod antennas have to be soldered to the back of the board. They cannot be screwed. These wires are insulated with varnish. Before these wires are soldered, the varnish must be scraped off with a knife.
The H-field pre-amplifier is connected with a shielded twisted pair cable (FTP, STP, S/STP, or S/FTP) to the main board. This cable should not be placed next to the network cable. Please keep a distance of at least 10 cm. The cable may have a length of up to 30 meters.
If you use loop antennas, than you should close (solder) the jumper for the corresponding channels at the back side of the board.
If the pre-amplifier is powered, the red LED should light.
E-field pre-amplifier PCB 17.x
The E-field pre-amplifier board PCB 17.x has the following THT components whose placement is obvious.
- 1 x Inductor - 3.3 mH - Taiyo Yuden
- 1 x Header 2-pin, Pitch 5.08mm
- 1 x F-Connector, PCB mounting
In panel PCB 20.1 and subsequent panels the free board space next to PCB 17.x is used as an experimental electrical antenna. This antenna is designed only for testing purposes. Due to a small manufacturer's error on Panel 20.5, the printed circuit board next to the E-field preamplifier is not connected to the input of the E-field preamplifier. Here, either a small solder bridge must be made or a corresponding antenna must be connected to the input. You can also break off this aerial and connect a wire antenna at the two pin header. The external connection point is ground, the central connection point is the antenna. Note that any electrical antenna must be placed outside far away from buildings and electrical interference sources.
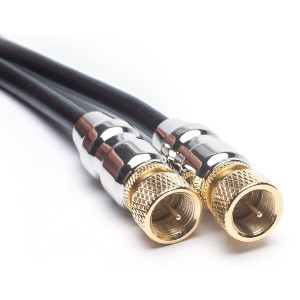
The E-field pre-amplifier is connected with 75 Ω double shielded coaxial cable to the main board. The cable may have a length of up to 100 meters. The ends are attached to F-connector.
When the pre-amplifier is powered, the red LED should light. On the early pre-amplifier board 16.1 the green LED probably lights very weakly with a supply voltage of 3.3 volts. However, this is not a defect and is normal.
System RED
705 words Estimated reading time 3 minutes
Note
System RED is not produced anymore, but still supported as the digital part is similar to BLUE.
Documentation
- PCB 10.3 / 12.3 (2013-10-05)
- PCB 10.3 / 12.3 (2014-02-23)
- PCB 10.4 / 12.3 / 13.1 / 14.1 (2014-05-11)
Video overview
Differences to System GREEN
Below is a list of comparisons between technical data of the old GREEN and newer RED systems. RED is much more flexible, precise and has several new features, while staying in a similar price range.
Amplifier performance
-
RED
The amplifier had a huge delay. The antennas didn’t have damping resistors and thus, also self-resonances. The high and low-pass-filters were simple and had a low cutoff frequency.
-
GREEN
Reduced delay and antennas with damping resistors. This minimizes self-resonances of the antennas. The filters are better and have a higher cutoff frequency, so we get more information from the signal. All those things are one of the most important improvements on System RED!
Gains and Thresholds
-
GREEN
Gains have to be set by jumpers or potentiometer on the amplifier. Threshold for signal trigger were fixed on the controller board.
-
RED
Gains and thresholds can be changed individually for each channel by software. This gives the possibility of automatic gain/threshold configuration by the server to maximize the detection rate of the whole network. There’s still a potentiometer on the amplifier board, mainly for testing purposes.
MCU (Microcontroller Unit)
-
GREEN
ATMega644 with 20MHz, 64kB flash, 4kB RAM, no DMA, 2 USARTs. One of the main limitations were the missing DMA capabilities.
-
RED
STM32F4 ARM Cortex M4F technology with 168MHz, 1MB flash, 192kB RAM, several DMA channels, 6 USARTs. This MCU fits perfect for our needs. There are still resources left, for example the integrated DSP. We could use it to examine a signal closer before sending it. The unique processor-ID gives us the possibility to identify each hardware.
A/D Converters (ADC)
-
GREEN
Two independent external 8-bit converters with around 500ksps, which have to be polled by the CPU. There was no other configuration possible.
-
RED
Three independent 12-bit converters integrated in the MCU with up to 2200ksps each, which write their data into memory by themselves (DMA). So we can now see the signal before the trigger, which is important for a better position computing. The A/D-converters can be configured by the CPU in different ways, i.e. sampling time, resolution, threshold. Each A/D-channel has a multiplexer, so one converter can be used for different amplifier channels. All three converters can be joined to sample one input with almost 12000ksps. So the 1PPS signal can be checked for accuracy or the voltages for bad power supplies. The A/Ds are also acting as a hardware monitor by checking voltages and temperature.
Connection
-
GREEN
Needs serial or USB cable connected to a running computer or embedded device, where the tracker has to be installed.
-
RED
Uses direct Ethernet connection, so no other device/computer is needed. Thus, the system runs almost "out-of-the-box".
Display, Buzzer, Buttons
-
GREEN
Only buttons for a test-signal and a reset-button. Real status could only be checked from connected PC.
-
RED
Buttons, Buzzers and LCD for checking status, easy installation, signal pass-through and several other useful things.
Firmware
-
GREEN
Only basic functionality. A firmware update needs special hardware.
-
RED
Uses a much more complex firmware, but with a lot of possibilities. Update is easily possible via web-interface and with two different programmers on-board. New features or bugfixes are easily possible.
Return channel
-
GREEN
Not available. Some trackers (like XLT) had a simple implementation. But there was no possibility to talk to the controller itself.
-
RED
The return channel through HTTP-protocol is a main feature of the new system. It allows automatic remote configuration of the controller and amplifier by the servers. It has several fallback functions, if there are problems with our servers.
Power
-
GREEN
12V power supply. The system itself had a very low power consumption around 1.5W, but a running PC was needed. If a special router was used instead, the overall power consumption was around 2.5W.
-
RED
5V power supply through USB jack. This is a common standard today. The voltages are checked by the MCU and can be shown on LCD/web-interface. The power consumption is 2-3W, mainly depending on LCD color and brightness.
Overview
262 words Estimated reading is 1 minute
We distinguish the different generations according to the color of the PCB.
System MINI
System BLUE is the current generation of our detectors. more
System BLUE
This hardware has been offered between 2016 and 2023. Compared to RED it has the adjustable amplifiers on the controller board and the external pre amplifiers are connected via differential signal transmission. more
System RED
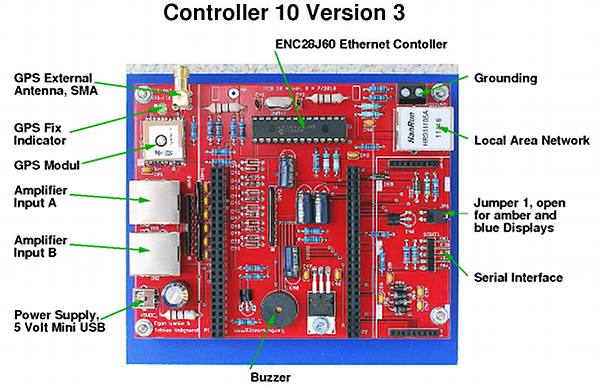
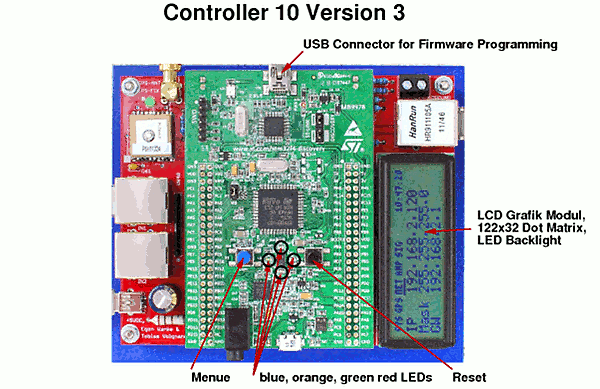
System RED has been offered between 2013 and 2016. It was a completely new development and was based on the STM32F4 Discovery board. Compared to GREEN it has much better signal quality and efficiency. more
System GREEN
This was the first generation of our TOA lightning detectors until 2012. This hardware isn't supported anymore as its signal quality and accuracy is very bad compared to the successors. You can find the documentation below.
Documentation
- PCB 4.3 / 3.3 (2009-04-02)
- PCB 4.3 / 3.3 (2009-04-09)
- PCB 6.3 / 5.3 (2010-03-29)
- PCB 6.4 / 5.4 (2010-07-19)
- PCB 6.4 / 5.4 (2010-08-02)
- PCB 6.4 / 5.4 (2010-08-18)
- PCB 6.5 / 5.5 (2010-11-03)
- PCB 6.5 / 5.5 (2010-11-24)
- PCB 6.5 / 5.5 (2010-12-07)
- PCB 6.5 / 5.5 (2010-12-25)
- PCB 6.7 / 5.6 (2011-04-01)
- PCB 6.7 / 5.7 (2011-08-08)
- PCB 6.7 / 5.7 (2011-08-28)
- PCB 4.3 / 5.7 (2011-09-12)
- PCB 6.8usb (2012-01-15)
- PCB 6.8usb (2012-02-18)
Trackers
System GREEN needed a running computer or another device for sending its signal data to our servers. The software for that was called a "tracker" and several different versions were available. Some can be downloaded here:
Hardware Reference
856 words Estimated reading time 3 minutes
PCB Versions
System BLUE
Symbols: = circuit = layout = partlist = gerber
PCB 16 H-Field amp
- 16.0: PDF
- Initial release
- 16.1: PDF
- R_24 -> 2.2k
-
16.2: PNG
- ??
-
16.3: ?
-
16.4: Eagle Eagle Gerber Partlist
- protection diodes replaced
- gain increased by 50%
PCB 17 E-Field amp
PCB 19 Controller
- 19.0: ?
- 19.1: PDF
- 19.3: PDF
- 19.3b: PDF
- pad next to the USB jack is now connected to gnd
- added a 10uF capacitor at the output of IC 505
- 19.4: PDF PNG
- exchanged the positions of the GPS module with the SMA connector and the network connector
- removed the jumper for the supply voltage for the E-field preamplifier
- SWD connector now has a pin for the 5 Volt supply voltage
- 19.5: PNG
- Changed to u-blox M8
-
19.6: PNG
19.6 Changelog
- capacitors exchanged with GRM1885C1H682JA01D
- capacitors exchanged with 80-C0603C123J3G
- capacitors not replaced, 22n capacitors not available in 0603
- Level shifter exchanged with SN74LV1T34DBVRG4
- Voltage regulator replaced with MCP1755S-3302E / DB
- L700 replaced by 60R FB (BLM21PG600SN1D) in series with 0.27 R (ERJ-3RQJR27V), 10u in series with 0.27R (ERJ-3RQJR27V), connected in parallel to 1u and 0.1u, (0.27R (ERJ-3RQJR27V) , instead of 0.22R (ERJ-3RQJR22V) to reduce the number of different components)
- L600 replaced by 60R FB (BLM21PG600SN1D) in series with 0.27 R (ERJ-3RQJR27V), 10u in series with 0.27R (ERJ-3RQJR27V) parallel to 1u and 0.1u
- L800 replaced by 220R FB (BLM18EG221SN1D) in series with 0.27 R (ERJ-3RQJR27V), 10u in series with 0.27R (ERJ-3RQJR27V) parallel to 1u and 0.1u, (0.27R (ERJ-3RQJR27V) instead of 0.33R (ERJ-PA3J5R1V) to reduce the number of different components)
- R804 exchanged with 5.1R (ERJ-PA3J5R1V)
- R505, R506, R507 exchanged with 1.5R (RC2512JK-071R5L), a compromise between the old 2.2R and the proposed 1.0R, I am concerned that otherwise not enough heat will be dissipated
- L501 replaced by 220R FB (BLM18EG221SN1D) in series with 0.27 R (ERJ-3RQJR27V), (0.27R (ERJ-3RQJR27V), instead of 0.22R (ERJ-3RQJR22V) to reduce the number of different components)
- C503 replaced by 10u, 47u in series with 0.27R (ERJ-3RQJR27V) connected in parallel to 10u and 0.1u, (0.27R (ERJ-3RQJR27V), instead of 0.22R (ERJ-3RQJR22V) to increase the number of different components)
- L502 replaced by 220R FB (BLM18EG221SN1D) in series with 0.27 R (ERJ-3RQJR27V), (0.27R (ERJ-3RQJR27V), instead of 0.22R (ERJ-3RQJR22V) to reduce the number of different components)
- C503 replaced by 10u, 47u in series with 0.27R (ERJ-3RQJR27V) connected in parallel to 10u and 0.1u, (0.27R (ERJ-3RQJR27V), instead of 0.22R (ERJ-3RQJR22V) to increase the number of different components)
- L500 replaced by 60R FB (BLM21PG600SN1D)
- Additionally on V+ two 1000u electrolytic capacitors
- C [1,2,3,4] 27 replaced by 0.1n
- Name change
- C605 replaced by 10u
- 75R adds between IC600 and uC
- C801, C802, C804 expanded with 1u
PCB 20 Complete Boards
PCB 20 contains PCB 16 + 17 + 19 on one PCB.
| PCB | Date | Layout | Part List | H-Field | E-Field | Controller |
|---|---|---|---|---|---|---|
| 20.0 | 2016-01-22 | PNG | 16.0 | 17.0 | 19.1 | |
| 20.1 | 2015-03-28 | PNG | 16.1 | 17.1 | 19.2 | |
| 20.2 | 2016-03-28 | PNG PDF | 16.1 | 17.1 | 19.3 | |
| 20.3 | 2016-03-28 | PNG | 16.1 | 17.1 | 19.3b | |
| 20.4 | ? | |||||
| 20.5 | 2016-03-28 | PNG PDF | 16.1 | 17.1 | 19.4 | |
| 20.6 | 2017-02-20 | PNG | 16.2 | 17.1 | 19.5 | |
| 20.7 | 2020-03-05 | PNG | 16.2 | 17.2 | 19.6 |
PCB 20 Changelog
Changes in PCBs 16, 17, 18 are not included here!
PCB 21
See here
PCB 22: BLUE Mini
System RED
Configurations
PCB Controller Ids
The PCB-ID pins have internal pull down.
RED
| Id | PCB | System | PD10 | PD11 | PD3 | PD1 | Offset |
|---|---|---|---|---|---|---|---|
| 0 | 10.2 | RED | - | - | - | - | 0 |
| 1 | 10.3 | RED | + | - | - | - | 0 |
| 2 | 10.4 | RED | - | + | - | - | 0 |
| 2 | 10.5* | RED | - | + | - | - | 0 |
| 3 | 10.5* | RED | + | + | - | - | 0 |
* PCBs 10.5 provided by us 2016 have the same id as 10.4.
BLUE
The PCB-Offset of 4 is defined in the firmware.
| Id | PCB | System | PD10 | PD11 | PD1 | Offset |
|---|---|---|---|---|---|---|
| 4 | 19.1 | BLUE | - | - | - | 4 |
| 5 | 19.3 | BLUE | + | - | - | 4 |
| 6 | 19.4 | BLUE | - | + | - | 4 |
| 7 | 19.5 | BLUE | +/NC* | + | - | 4 |
| 8 | 22.2 | BLUE-Mini | - | - | + | 4 |
+ = High
- = Low
NC = Not connected
* accidentally not connected on some boards
PCB Amplifiers Ids
RED
On RED the amplifier id is transmitted via USART from the amps.
| Id | Amp | H/E-Field | Source |
|---|---|---|---|
| 0 | 12.2 | 2xH | USART |
| 1 | 12.3 | 2xH | USART |
| 2 | 13.1 | 1xE | USART |
BLUE
On BLUE we know the on board amplifiers, but not their config. Here we have the solder jumpers J0 and J1. J0 has to be closed when filter ICs are installed. J1 is not used.
| Id | Amp-Type | H/E-Field | PCB-Config | PD12* | PD8* |
|---|---|---|---|---|---|
| 3 | H0 | 3xH w. filter | 0 (J0 closed) | 0 | NC |
| 4 | E0 | 1xE w. filter | 0 (J0 closed) | 0 | NC |
| 5 | -- | reserved | |||
| 6 | H1 | 3xH | 1 (J0 open) | NC | NC |
| 7 | E1 | 1xE | 1 (J0 open) | NC | NC |
| 8 | H2 | 2xH | 4** |
* configured with internal pull-up
** defined in firmware when PCB-Id is 9 (Blue-Mini)
Ended: Lightning detectors
Antennas ↵
General information
210 words Estimated reading is 1 minute
Preamplifiers are now so good that large antennas are not necessary. Eg. the H-Field pre-amplifier has differential inputs and electrical common mode signals now have much less influence. Moreover, the amplifier has a gain of 10 times.
(However, the impedance matching to the input of the reduces the gain by 50% but provides excellent matching to the transmission cable and Controller input)
Connection to H-Field preamplifier
The preamplifier is supplied with an input impedance of 2k - which suits ferrite antennas and antennas with transformer coupling.
Other antennas connected with 75 Ohm –must use the solder bridges on the back side of the PCB.
Coax cable and "coax cable"
For loops without transformer you can use the cheap sat-cable with copper-plated iron wire.
Loop antennas with a transformer, must use coax with pure copper and heavy shielding i.e. (75 Ohm 8mm cable as used for radio and TV-set for decades.)
No antennas must be grounded at the antenna.
It may be a good idea to ground the Controller.
One or more antennas
Your receiver works fine with either an H-Field or an E-Field antenna. Both types have their advantages and disadvantages. You can easily start with one of them, and then install the other later, or settle for one.
Magnetic antennas
730 words Estimated reading time 3 minutes
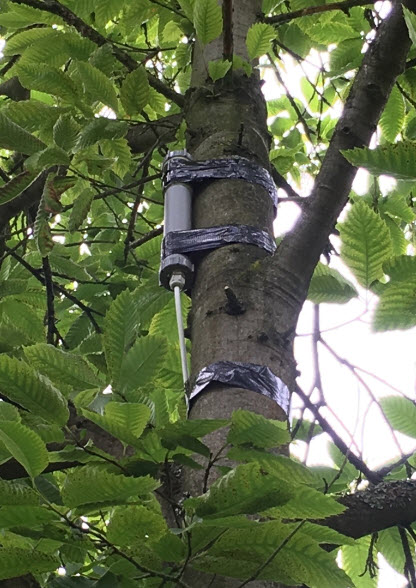
Either ferrite rod antennas or Loop Antennas may be used. A magnetic antenna does not need to be mounted high since the magnetic field is not easily attenuated. They must be a minimum of several meters from other electrical installations - in the garden just above the ground, attic, or on a balcony is ok.
We normally use 2 rods, but BLUE allows for an extra - which could be vertical.
Ferrite rod antennas
Ferrite rod antennas are very suitable for a lightning detector. They are small, can be operated indoors and can even be shielded. The length should not be less than 12cm. Lengths over 30cm make no sense. Two antennas are sufficient, three antennas are a luxury. Regardless of whether it is one, two or three antennas, they should always be operated horizontally. Two antennas should be mounted at a 90 degree angle and three antennas at a 60 degree angle. They can be arranged crosswise or side by side. Blind spots can be eliminated with just two antennas. Alignment in a north / south or west / east direction is not necessary. Shielding is usually not necessary as the input on the preamplifier is symmetrical.
The wire on the ferrite rod antennas is insulated with varnish. This lacquer must be scraped off so that the wires can be connected to the preamplifier. The stripped wires cannot be fastened in the screw clamps of the pin header because they are too thin for that. Either the wires are soldered to the soldering points on the back of the preamplifier at the pin header or a bigger wire is soldered to the wires, which can then be fastened in the screw clamp. It does not matter where the wire with the node is connected to. The knot only plays a role with bipolar preamplifiers. Our preamplifier has a symmetrical input.
Loop Antennas
Loop antennas can be made in many ways - in principle, it is just a conductive wire, wound as a coil.
The shape does not matter as it is the area of the total number of turns that determines the strength of the signal. Circular gives the largest area for a given length of wire, but a rectangular or any other shape, may be easier and is equally effective. Magnetic signals in a loop generate a current, so the wire used should be minimum of 0.75mm² and preferably thicker.
Wire Loop
3 turn, circle (100cm diameter) ~ Area = 0.5² * Pi * 3 ~ 2,4m² Use 0,75mm² or thicker – lacque or plastic isolated copper wire
Wire Loop - "Classic"
Loop antennas has been knows since 30s, so it was obvious to start with this model.
8 turn, square 100cm ~ Area = 8m²
Originally made for System GREEN - for System BLUE 3-4 turns is enough.


Multi Turn
20 turn, (38cm diameter) ~ Area ~ 0.19² * Pi * 20 ~ 2,3m² (inductance ~ 500μH)
Use 1mm² lacquer or plastic insulated copper.

Coax Loop
A 3 turn, circle (100cm diameter) ~ Area = 0.5² * Pi * 3 ~ 2,4m²
Inner conductor to the terminal 1-2 and the screen from both ends to terminal 3 (shielding)
The screen must be broken at the midpoint, as shown below, so it does not short out the signal.

Möbius antenna
A 2 turn with a diameter of 1m gives a total area of 0.5 * 0.5 * 3.141 * 4 ~ 3,14m²
(0.5 x 0.5 x 3.141x 2)/4 = 0.39m2
(The cable is cut midway and the shield from one end is soldered to the inner conductor at the other end and vice versa - that way there will be 4 active turns)


Antenna with a current Transformers
Whether we use 4 turns of 1mm² or 1 turn with 4mm² is in principle gives the same result if we use a current transformer. It may be convenient to use a thick copper pipe or copper bar for external antenna.This provides a relatively large current to be transformed to adapt the pre-amplifier.
If we use a 50-turn toroidal current transformer as shown below, we get a relative area magnification of approximately 7 times. A loop of Ø=38cm made of 5mm brake pipe gives a relative area of 0.38 x 0.38/4 x pi x 7 = 0.79 m2.
Examples of möbius antennas with a Transformer
Electric antennas
76 words
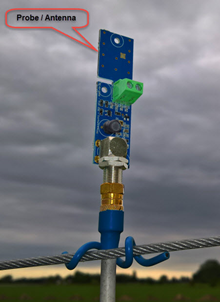
The "E-Field antenna" is a PROBE, a high impedance sensor that detects changes in the electric field between ground and atmosphere.
Use the built-in antenna, or a piece of wire, 10cm is fine, 1-2,5mm²
It should be placed high and far away from electrical installations.
Connect to Controller via 75 Ohm coax cable ( TV ) and an F-Plug It is omnidirectional, and we use only one.
Ended: Antennas
Ended: Hardware
Files ↵
This repository contains public files for the Blitzortung.org project. A lot of files are linked from the documentation.
Sub folders
75 words
documents
Contains old PDF documents for prevoius hardware versions.
firmware
Firmware for the microcontroller on RED and BLUE controller boards.
hardware
Contains schematics, layouts, and so on for the lightning detector PCBs.
tracker
Old tracker software for the microcontroller.
extra
Leave empty! Placeholder for files which are non public (i.e. due to copy right reasons).
Extra ↵
33 words
This repository contains files for the Blitzortung.org project which are non public (i.e. due to copy right reasons).
Don't add files which contain sensitive information like passwords, private keys and so on.
Docs internal ↵
Internal
148 words Estimated reading is 1 minute
Downloads
Warning
The following downloads are copied from external sources and we don't give any warranty for them!
STM32 tools
- STM32 COM Port driver for Windows
- STM32 Cube Programmer - Win 64bit
- STM32 Cube Programmer - Win 32bit
- STM32 Cube Programmer - Mac
- STM32 Cube Programmer - Linux
GPS tools
GlobalTop / Sierra Wireless
- Sierra Wireless GNSSTool
- GlobalTop Flash Tool
- Firmware AXN5.1.1_8525_3333 (for Gmm-g3)
- Firmware AXN5.1.1_8526_3333 (for Gmm-g3b)
u-blox
Datasheets
Only the most important datasheets are linked here.
ICs on Controller PCB
- STM32F407 MCU: Datasheet, Reference, Errata
- STM32F4Discovery Board: Reference
- ENC28J60 Ethernet Controller: Datasheet, Errata
GNSS modules
- GMM G3 (MT3333): Datasheet, Commands
- PA6H (MT3339): Datasheet, Application Note, Commands
- u-blox MAX M8: Datasheet, Integration Manual
- u-blox MAX M10: Datasheet, Integration Manual
ICs on Amplifier PCB
Ended: Docs internal
Ended: Extra
Ended: Files
Station operation ↵
Station Operation
93 words
After assembly, installing your TOA lightning station is almost plug and play. However, it may take some time to understand all of the aspects of your specific hardware and lightning detection in general. Placing the antennas far away from electric disturbers has the greatest influence on performance.
Keep your system running!
Even if not everything might work as expected for you, every single station is an important part of the network - even if there are no thunderstorms around you. Future (automatic) firmware updates might resolve specific issues or improve performance.
Initial Setup
700 words Estimated reading time 3 minutes
First steps
If the board is built up you should do a first quick test on your desk:
-
Attach a 5 volt USB power supply to the controller board.
You should hear some beeps and some of the LEDs should light up.
See
here if no LED or just the red power LED lights up. -
Connect the controller to your home network via ethernet cable.
The green LED on the network connector should be on and the yellow one should flicker.
Don't mix up the RJ45 ethernet and amplifier port. ;-)
-
Try to access the web interface via IP address (DHCP) or just try
http://blitzortung.
Just look around and familiarize yourself the web interface.
There are
several ways to get the IP address . -
Connect the GPS antenna
After several minutes the blue LED should start flashing every second.
Be patient. The GPS antenna should have visual contact to the sky.
-
Connect the preamplifiers
On the connected preamplifiers the red LEDs should be on
-
Touch the input contacts on the preamplifiers with a finger to generate a signal pulse.
A signal should be displayed on the web interface at the "Signals" page.
Raise gains until something happens.
-
Set up an account (see below).
A message should appear for automatic account creation.
No message means there's no internet connection.
IP address
By default the IP address will be assigned by DHCP and the hostname is blitzortung. Check
Note
If DHCP fails, the following settings will be used after some time
- IP-Address: 192.168.1.235
- Netmask: 255.255.255.0
- Gateway: 192.168.1.1
- DNS: 8.8.8.8
Install antennas and wiring
The system should be able to run 24/7 over the whole year. Try to install everything in a way so that it will last for a long time. Protect it against water and UV radiation. Especially RJ45 cables can suffer from UV radiation very fast.
As the antennas should be installed far away from electric disturbers, they are often placed outside high above the ground and above surrounding object. Keep in mind that this also raises the chance of being struck by direct lightning.
GPS antenna
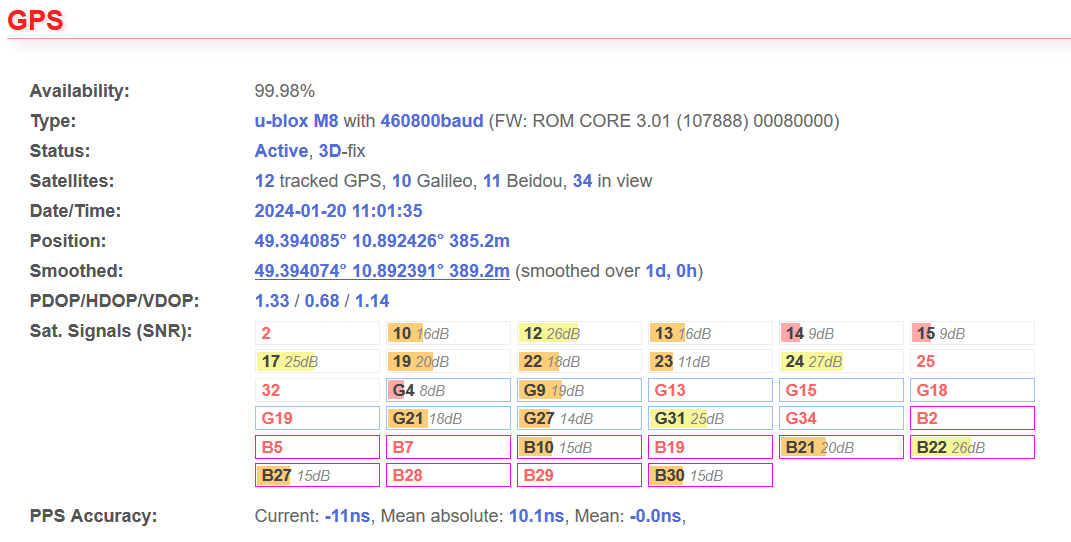
In general, the GPS will receive more satellites when having good view in direction of the equator. That means, if you have only the possibility to place your GPS in-house, you should choose a place on the south side of the building (or north side on the southern hemisphere). This fact is more important, the higher your latitude is.
Setting up an account with Blitzortung.org
User Account
You only need one user account. You can assign multiple stations to a single user account.
On the top of the web page of the internal firmware web server you find a link to request an account for Blitzortung.org. This link is only visible, if the station is not assigned to a user ID. Follow the instructions in the email you will receive. The account is associated with your email address.
After registration enter your username or email and your password on the login page of Blitzortung.org ⧉. After a successful login you are on the "Project Area -> User data" page. Here you can complete the information about you and your stations.
If your station is not assigned or you want to assign a new station, enter the device ID of your station in the line "Assign a new station: (Processor ID)". You find the device ID of your station on the web page of the station under processor information.
Check the community
With your new account you should also have access to our internal forums. You will find a lot of useful additional information there and you can ask other users for help. Access will be enabled when you go to the forum with Further Info -> Forum ⧉. If that doesn't work and you don't see any internal forums then just ask for help there.
Overview
765 words Estimated reading time 3 minutes
Danger
Please don't forward the web interface to the internet. It's not designed for that and it's a security risk. If you want to access the web interface from outside your home network, then use a VPN connection. Also don't post the device ID anywhere as it can be used to assign the station to another user.
Web interface
Most parts of the web interface should be self explaining. In case you see small blue "i" icon, just hover over it with the mouse cursor to see additional information. When you click on the "i" you will be redirected to the Web Interface Reference.
The web interface is only available via unencrypted HTTP. Due to limited hardware resources there are currently no plans to implement a secure HTTPS/TLS web server. Irrespective of this, the signals and station data are sent to our servers in encrypted form.
Video overview of the web interface
Amplifiers
The channels of the amplifiers 1 and 2 are named 1A, 1B, 1C, 2A and so on. Additionally they have the following numbering scheme:
| Channel | 0 | 1 | 2 | 3 | 4 | 5 | Type |
|---|---|---|---|---|---|---|---|
| RED | 1A |
1B |
1C |
2A |
2B |
2C |
Uses external amplifier boards, so has variable amount of channels |
| BLUE | 1A |
1B |
1C |
2A |
3x H-field, 1x E-field | ||
| MINI | 1A |
1B |
2x H-field |
Buttons
-
Reset just restarts the controller (resets the CPU). It's almost the same as power cycling, but the GPS module doesn't loose the satellites.
-
BOOT0
enters DFU mode upon reset. -
BOOT1* is for different purposes on boot or while running.
* On System RED this is the blue button.
LEDs
System BLUE
| LED | Color | Description |
|---|---|---|
| Power | red | Always on when powered |
| Mode | green | On when system is okay, i.e. voltages are correct. |
| Network | green | On when connection to Blitzortung.org is established. |
| Fault | yellow | In case your stations receive too much (bad) signals, this LED turns on. |
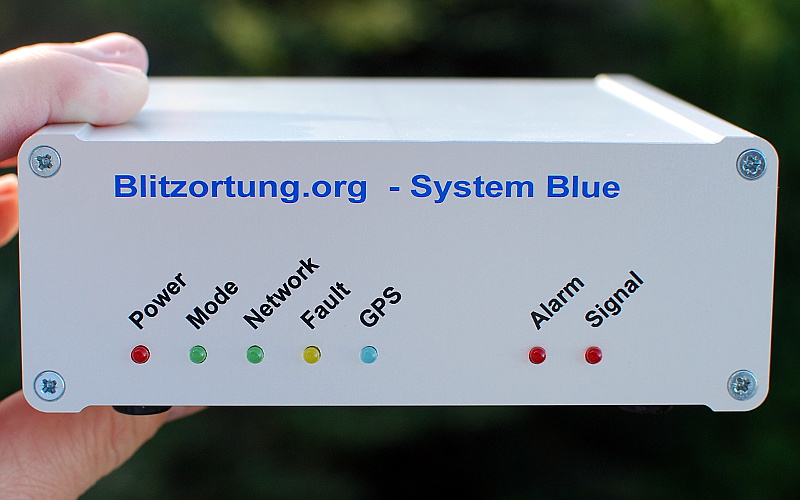
| GPS | blue | Flashes every second when GPS is up an running. Blinking or "off" means that GPS is not locked (yet). |
| Alarm | red | Blinks when lightning alert is active. |
| Signal | yellow | Flashes on a signal. |
Buzzer
The buzzer creates a tick sound on every sent signal. That can be very useful but also annoying. That's why sounds and volumes can be adjusted in the web interface. To disable sounds completely press BOOT1 for some seconds. Typical beep sounds are listed in the following table:
| Length | High Tone | Medium Tone | Low Tone |
|---|---|---|---|
| Short | End interference mode | - | Enter interference mode |
| Medium | Found amplifier / first signal | Startup | Error with Network, GPS |
| Long | New message (i.e. ask for account registration) | - | Hard fault Error |
LCD
Note
Only System RED has a LC Display.
On top of the display is the status line, which shows several categories. If there's a problem on a particular category, then its text is inverted. Under some circumstances the text can blink. Here is a list of most different conditions for each category:
- SYS: Voltages too high/low.
- GPS: Problem with GPS <-> controller connection, bad position accuracy or bad/missing 1PPS pulse. Blinking if GPS fix has been lost.
- NET: Network not configured properly or no network cable attached. The symbol is blinking, when there was a error while remote configuration request.
- AMP: No amplifier connected.
- SIG: Stays inverted until first signal received after boot. Otherwise inverted on interference mode.
- STR: Invisible until Lightning alerts are enabled or a AS3935 is detected.
Every category has one or more pages in the main display area. Most of the displayed values should be self explaining. The page category is marked with a horizontal line in the status bar. The page switches automatically every ~8 seconds. You can switch the page by hand when doing a short push on the blue button. After that, the page won't get changed for some minutes. If this page looping is disabled in the settings, then there will be no automatic change to the next page. Some error events can always switch to another page, so that you can see the error message. You can run actions on some pages when doing a medium push:
- SYS: Opens a menu where you can a) enable the buzzer amplifier buzzer throughput for all channels or b) toggle LCD page looping on/off.
- GPS: Page 1: Sends initialization string. Page 2: Nothing.
- NET: Page 1: Nothing. Page 2: Manual remote configuration request.
- AMP: Opens a menu where you can enable the potentiometer or initialize the selected amplifier (upload/download of gain levels).
- SIG: Does a manual trigger and sends the signal.
- STR: Currently nothing.
Signal detection
1650 words Estimated reading time 7 minutes
The controller cannot distinguish between electromagnetic signals which have been sent out by lightning discharges on the one hand, and which are a result of local noise on the other hand. There is a variety of such sources which can generate interference, i.e. power-supplies, energy-saving lamps and almost all electric home equipment.
The system uses a combination of hardware and software filters to distinguish between these two types of signals.
Hardware Filters
The amplifiers already have fixed low and high pass filters on board which can not be adjusted.
High Pass (BLUE only)
System BLUE has a switchable high pass filter.
Further description still missing. Contributions/examples from community are welcome.
Adjustable Digital Filter (BLUE only)
See
Further description still missing. Contributions/examples from community are welcome.
Software Filters
Info
Theoretically a notch filter implemented with DSP functions would be sufficient to mask local noise. However, they alter the signal shape and also our hardware isn't fast enough for that so we have some very simple and unusual filters which don't need much processing power. So only if a channel doesn't get filtered by them, it may get analyzed by DSP functions.
Software filters are used to limit the number of data sent to the computing servers. They are applied on each channel individually and they decide wether the signal is good or not. As a result the whole signal is filtered (nothing will be sent) or just specific channels. They do not alter the signal shape sent to the servers. Some filters are always enabled, some have to be enabled manually or will be enabled by the servers. The following table lists all available filters. The letter in brackets is used to identify the filter. When such a letter appears on the
| Filter Name | Letter | Description / Use Case |
|---|---|---|
| Threshold (by ADC) | L |
Signal is below the threshold (ADC hardware watchdog) |
| Threshold Filter | T |
Avoid transmit of low power signal (traffic saving) |
| Peak (Voltage) Band | P |
Filters voltage band in case of special disturbers |
| Spike | S |
Spike detection from on board electrical noise |
| Max Amplitude | M |
Avoid high power signals and focus on lower amplitudes |
| DSP | D |
Check frequencies, filter specific noise |
| Channel Interference | I |
Too much interference on one channel |
| Interference Mode | - | Signal sending temporarily disabled |
Threshold (by ADC)
This is not a filter like the other ones as it is implemented in hardware, but it is included here for the sake of completeness. An upper and lower threshold are set for each channel. Only if a signal exceeds either of these thresholds, the CPU will read the data of all channels and continue with the further signal processing and filtering. While doing this the CPU can not handle any other tasks.
Threshold Filter
If one channel has been triggered then always all other channels are processed too, even if their amplitudes stay below the threshold. These channel can still be sent, as long as they stay over a adjustable threshold percentage. This may give some additional (useful) data to the computing servers, but also avoids unnecessary further data processing an saves traffic on very low powered signals.
The only parameter of this filter is the minimum percentage of the threshold. For example, if the minimum percentage is set to 50%, then only channels with an amplitude of at least 50% of the threshold will be included in the signal packet.
Peak Band Filter
Here the number of peak amplitudes which occur in a specific voltage span (band) are counted over some time. In case there are too much of peaks in one band, then the signal of this channel will not be sent. This filter is off by default and should only be enabled on noise from specific devices which can not be filtered otherwise.
The purpose of this filter is very limited and only useful for a few special cases. For example robotic lawn mowers can produce single peaks at a constant rate with constant voltage levels, i.e. 100 peaks per second at 1V. Lowering the gain here is not an option, because it would reduce the overall sensitivity of the sensor. But the beak band filter will detect that there are a lot of peaks around 1V and then ignore this voltage band. Thus, sferics with much lower amplitudes can still be detected.
For historic reasons this filter can be manually enabled on the web interface, but the parameters can not be adjusted there. The parameters are:
- Number of Bands: The number of voltage bands which are checked for peaks.
- Measure Interval: Peaks are added up within this period.
- Minimum Count: The minimum number of signals on a channel within measure period.
- Filter Count Min.: The minimum number of signals within measure period in a band so the band gets masked.
- Filter Count Min. Percentage: The above condition is only true if count is above this percentage.
- Filter Count Max.: Band will be masked if count of peaks is above this parameter.
Spike Filter
This filter is used to detect spikes in the signal, i.e. sudden changes in the amplitude of the signal between two very close samples. Only the trigger point will be checked for a spike, so it takes very few CPU time. Spikes can be a result from
The spike filter is enabled by default on RED stations. If a spike has been detected, the whole signal will be ignored.
Parameters are spike width and minimum size.
Max Amplitude Filter
This filter may be activated by the servers on close thunderstorms. It avoids sending signals with very high amplitudes from strong lightning discharges as they can easily be detected by stations a bit farther away. The resources then can be used for processing and sending signals from signals with lower amplitudes.
Parameters are minimum and maximum amplitude voltage. So far it isn't used and it is unclear whether this filter is really useful.
DSP Filter
Work in progress
Filtering not implemented yet
When a channel hasn't been filtered before it will be processed by DSP functions. This is very CPU intensive workload although the STM32F4 processor has support for signal processing, like fast fourier transformation (FFT). The FFT will be made with fewer samples (i.e. divided by 4). With default settings and three channels it is able to process about 1000 signals per second. However, in this case almost no processing power is left for other tasks, like sending the signals. Thus the previous filters are important to keep the signal rate low. The results of the DSP processing, the frequency spectrum, won't be transmitted to the servers, as it would produce unneeded traffic. Within the determined frequency spectrum, the frequency bands with the highest energy are determined. Just like the other filters a yes/no decision will be made.
Parameters:
- Divisor: The divisor for the FFT calculation.
- Bands: Amount of frequency bands to check.
- Buffers: Amount of buffers, so that results can be seen on signals page.
Interference Filter
The moving average of triggered signals per second of the particular channel is computed. If this value is higher than a defined maximum threshold then the channel will be disabled. It will be enabled again if the rate drops below a minimum threshold. If a toggle from off to on happens to fast within a certain time span, the sensitivity will be raised. Higher sensitivity value result in even lower max/min thresholds. The sensitivity will be slightly lowered again if the off/on toggle time span is long enough. The default thresholds and time spans are derived from the slow interference mode value (see below).
Parameters:
- Max Rate: Defaults to 70% of the slow interference mode value.
- Min Rate: Defaults to 50% of the slow interference mode value.
- Time Gap: 5 times of the "smooth" value (moving average time)
Please note that the interference filter might not always work as intended and while active may cause some additional CPU load. That's because the ADC watchdog stays active even for the channel which has been "disabled" by the interference filter, because it needs to count the triggers. In extreme cases it triggers all the time which leads to ~1000 signals per second. This may have influence on the other channels. While interference filter is active on a channel, no DSP checks are made on this channel.
Interference Mode
The interference mode checks the amount of signals which are already queued ready to send. Such a signal has already passed all filters. However, that might still be too much to process on our computing servers. So the interference mode will be enabled, when the amount of signals is higher than a defined value. The threshold value for disabling the interference mode is several percents lower, which avoids conditions where the mode toggles between on and off all the time. The thresholds cannot be changed by the user.
In detail, there are three interference modes implemented:
- Burst: It is very fast and checks the signal rates of a very short time period, i.e. of one second. This is very useful to protect the server against short bursts, which take only some seconds but produces a lot of interference signals.
- Slow: Checks the amount of signals during a longer time span, i.e. 60s. That means, it will be enabled on medium amount of interference signals over a longer time span.
- Repeated Bursts: Counts the number of signals before the burst mode is triggered and enables the slow mode in case the threshold is reached. This mode is used to detect repeated bursts of signals over a longer time span, which are not detected by the burst mode alone.
Signal examination
1078 words Estimated reading time 4 minutes
The features described here are not needed for the lightning detection and station operation itself. But they can be very useful for optimization, for research and deeper analyzing.
Live Signal view
The Signals page allows seeing the waveform of the received sferics, interference signals or background noise, even if they are not sent to the servers. However, not all signals may be displayed for performance reasons, especially if many consecutive signals are received within a short period of time.
If the time stamp appears green, the signal has been released for transmission. It appears red if it has been marked as invalid, e.g. due to filters or lack of GPS reception. Signals from noise floor have a black timestamp.
Info
Every browser can be used to see the signals, but unfortunately Firefox is very slow compared to Chrome/Chromium based browsers. Especially on high frequent updates (i.e. noise floor) together with the frequency spectrum tabs in Firefox might not respond anymore due to high memory and CPU consumption.
The image above shows a very weak pulse in the first channel (red) that is only slightly stronger than the background noise. The second channel never reached the threshold, so it is marked with an L (
Frequency spectrum
The frequency spectrum is only visible under the signal when the DSP is enabled and a signal has been transferred which was previously analyzed by the DSP filter. Signals of channels which have been sorted out by other filters may not contain a frequency spectrum. The frequency spectrum may also not be available for signals in quick succession, because due to limited on board memory the buffers are already occupied by the next signal, when the browser requests it. Those buffers not needed by the actual DSP processing itself and could even be disabled by the filter in case more memory is needed for other purpose.
If the Auto Voltage checkbox is activated, then the amplitudes of all channels are normalized regarding the most powerful frequency bin (which will be 100%). Otherwise the highest ever transmitted amplitude until the whole page is been reloaded will be the reference.
The noise floor frequency spectrum is the moving average of the last couple of noise signals (10 by default, see "Noise Smooth" on status page). If the noise overlay is activated, then this noise floor spectrum is overlayed on the currently received signals spectrum with dark grey. In other words: The leftover colored spectrum is the energy of the received signal/sferic.
The frequency bands can also be shown in the spectrum. They are even available when the spectrum couldn't be transmitted (i.e. due to lack of buffers).
The frequency bin width varies with the FFT resolution. More information can be found in the description of the
Audio Playback
Wave audio streaming
Danger
The audio stream feature is highly experimental an may not work as expected and it can even lead to controller reboots. It needs a lot of CPU processing power and network throughput, so it will decrease detection performance!
With this feature the browser or an audio player app can receive the original sampled data for each amplifier channel as a standard WAVE stream individually. This allows hearing and/or deeper analyzing the actual incoming signal from the amplifier. That may help identifying local disturbers and thus allows better placement of the antennas.
The sample rate can be adjusted individually but it should be a integer divisor of the original A/D converters sample rate. In case of the default ADC sample rate of 500kHz you may use 50kHz (1/10) or 31.25kHz (1/16). The ADCs default resolution is 12bit, so for 8bit output the lower 4bits are removed and for 16bit the signal is "amplified" by 4bits to use the full dynamic range.
The audio stream can be played in the browser window. This may not work at on mobile devices as they don't seem to support WAVE streaming and the ADPCM format does not work even on desktop browsers. Software like VLC ⧉ can play all those formats and is available for almost every type of device. Also note that only one stream is possible. When requesting a new stream while another one is running the old one will be terminated.
Due to buffering on your local device the stream will always have a delay of some seconds. So if you want to optimize an antenna position, and you just moved the antenna, then wait a few seconds.
Warning
The current implementation is too slow to read all needed data (~10-20% loss), so it needs to lower the frequencies during begin of stream to not run out of buffers. Also ADPCM is limited to one channel only.
For optimal streaming experience:
- Close any other browser windows which accesses the web interface
- Use low latency connections to connect to your station (direct LAN, high speed WiFi - no VPN, Internet)
- Use single channel and ADPCM format for high sample rates
- Stay below 1.5Mbit/s
- Disable filters*
- Disable thresholds (set to 0)*
- Lower ADC sample rate*
- Use monitor mode (disable server communication)
* Remember to set them back after streaming!
Usage with SpectrumLab
SpectrumLab ⧉ is a spectrum analyzer software for Windows with Waterfall Display and real-time audio processing provided by DL4YHF.
There's currently no option to directly send the stream ⧉ to SpectrumLab (but it is planned). To see and process the audio stream in SpectrumLab (or any similar software) you have to use the mixer input as recording device (which may not be available on every sound card). Then simply open and play the stream with VLC and select the sound card in SpectrumLab. Then you can apply different filters and further process the received signal. You can even play and hear this signal with another sound card.
Note
You are welcome to add further explanation, use cases and (audio-)examples.
Buzzer playback
This feature is just for fun or for demonstration purpose. It has been there long before the ability to transmit an high quality audio stream. The quality of the buzzer playback is far worse. Just select one or more channels and start the playback. You may need to adjust the volume if you hear nothing or too much noise.
GNSS / GPS
1515 words Estimated reading time 6 minutes
Overview
Position data is sent by the GNSS module every second over an serial bi-directional connection to the MCU. The MCU itself can send commands to the GNSS module, but does that only if needed (i.e. during initialization).
graph LR

G[GNSS] <-->|Data| CPU
G[GNSS] -->|1PPS| CPU
GPSANT([GNSS Antenna]) --> G
GNSS status
The status page of the web interface gives a detailed overview of the GNSS status. The picture shows values from a station where where the GNSS antenna has been placed inside the building under the roof during a sunny day. The signal strength is not perfect, but okay. In case of a weather change, however, the reception quality may decrease.
GNSS module chipset
Our systems have different chipsets installed. The controller firmware detects them automatically. It also requests the firmware versions of the GNSS module. In case of problems firmware versions can be updated.
Satellite reception
Note
The count of tracked satellites shouldn’t fall below 6 too often. A value of four is the absolutely minimum! Higher values are always better.
Satellites in view gives the number of satellites, which could be tracked under perfect conditions (i.e. on a airplane). The number of tracked satellites should be close to the number of satellites in view. For example, when you have 15 satellites view and only 4 tracked, then you should search a better place for the antenna.
Please note that those values will change very often, because the GPS satellites are moving fast, weather and condition of the ionosphere can change quickly. You should see similar values every 24 hours, as the satellite constellation will be almost the same.
Using other GNSS
Note
Always have in mind, that we use GNSS mainly for precise time synchronization and not for positioning!
In addition to GPS, there are other global navigation satellite systems (GNSS) with their own satellites, which are operated by various countries. At the time when the first Blitzortung.org TOA systems went online around 2008, however, there was only GPS globally available. Every GNSS uses its own time base, but they are synced in some way 1. For absolute timing precision we can only rely on the GPS time base. This is why we generally use the word GPS instead of GNSS. It is also not possible to deactivate GPS in the web interface settings.
That means that every additional satellite from different GNSS will improve position accuracy, but not necessarily the accuracy of the absolute time, as there might be an offset between the time GNSS time bases. In the worst case the GNSS module may decide to use another base when GPS coverage is not available.
Depending on the chipset not all GNSS constellations are supported. For example, the u-blox MAX M8 doesn't support GPS + Galileo + GLONASS, but does support GPS + Galileo + Beidou.
Galileo
Galileo is operated by the European Union. The time bases of GPS and Galileo is officially synced 2. If you want to use an additional GNSS besides GPS, Galileo should be your first choice.
Beidou and GLONASS
Beidou is the Chinese and GLONASS the Russian navigation satellite system. It's not 100% clear whether they are officially synced with the GPS time base. 3 So far we didn't experience any time offsets when enabling one or both of them.
Baud rate
The baud rate for the GNSS module connection is variable and can be set in the web-interface. However, you should avoid slow baud rates as it can take too long for the GNSS module to send the whole data before the next 1PPS-pulse. We recommend baud rates of 115200 and higher.
SBAS
In the GPS settings you have the option to enable SBAS. This is a service which can improve position accuracy and is provided for different regions of the world (i.e. EGNOS, WAAS). The accuracy will be improved due to additional information about current status of the ionosphere. The needed data is sent by satellites on geostationary positions. To receive their signals, your GNSS antenna needs a good view to them. For the northern hemisphere that means there should be no buildings, trees etc. on the south side of the antenna.
On older chipsets SBAS might cause problems or even make time accuracy worse. If you are unsure, leave it disabled.
Position and Precision
Note
Using our lightning detector on a mobile vehicle is not supported. It must stay at a fixed position.
While the system is running the position will be smoothed. So you we get a very accurate 3D position.
PDOP stands for position dilution of precision. There are also values for vertical and horizontal position (VDOP, HDOP). The DOPs give the best estimation about the "GPS-quality". The lower the values, the better the position accuracy. Values below 1.0 are almost perfect and those below 3.0 are still far good enough for our purposes. The DOPs give a idea whether the constellation of tracked satellites is good. For example, even if you receive 8 satellites your PDOP could be bigger that 7 (very bad), because the GPS sees only satellites from a part of the sky and cannot calculate a good position.
Timing precision
For exact timing the GNSS module sends a 1PPS pulse which the CPU compares with its internal 84MHz timer. The accuracy of 84MHz is 11ns. That's why the "current" PPS accuracy often shows 11ns or a multiple.
GPS tools
In the web interface under Tools -> GPS several commands can be send to the GNSS module. They are mainly for testing and debugging in case the GNSS module isn't working as expected. For u-blox modules it is possible to send UBX binary messages when entering strings like ubx06 8a 12 34 45.
Direct connection to GNSS module
It is also possible to enable a pass through mode, which enables direct communication between you computer and the GNSS module. When enabling the GPS to
Known Problems
No satellite reception
We had some cases where no or just one or two satellites were received by the GNSS module, even with optimal placement of the GPS antenna. Sometimes it worked again after a GPS cold start or complete power cycle. If this doesn't help, then the GPS antenna might be defective. With a new standard active GPS antenna the reception was fine.
Solve Gmm-g3 wrong date bug
The Gmm-g3 has a bug and reports a wrong date since November 30th 2022 (week rollover bug, see this internal forum thread ⧉). The latest firmware can detect this bug and will show a warning in the web interface.
Important
An update of the GNSS module firmware is highly recommended! When the Gmm-g3 is not updated with the new module firmware, it will stop working after some days or weeks and you have to power cycle the controller to get it working again.
Firmware upgrade
The bug has been fixed in the Gmm-g3 firmware AXN3.8 and upwards. All needed files to upgrade the firmware can be downloaded here (password required):
- STM32 COM Port driver
- GlobalTop Flash Tool
- Firmware file AXN5.1.1_8525_3333_1152.1151100.1.bin
Info
If you experience problems during the upgrade procedure don't hesitate to contact us.
Follow these steps to upgrade the firmware:
- For PCB 19.1 and older: Close the solder bridge J3 on the bottom of the PCB.
- Download and install the
STM32 COM Port driver . - Connect the controller to your computer via USB-cable.
- In the web interface choose Tools -> GPS -> Pass-Through (USB) -> Send.
A new virtual COM port should appear on your computer.
The controller will beep once and it will operate as usual while in this mode (sending signals etc.). However, it can not send anything to the GNSS module and the controller just passively listens to the data from the GNSS module.
- Download and extract GlobalTop Flash Tool.
- Start Powerflash.
- Choose the correct COM-Port from "ComPort" -> "COM"
- Click Download Agent and choose MTK_AllInOne_DA_MT3333_MP.BIN
- Click ROM and choose the downloaded firmware AXN5.1.1_8525_3333_1152.1151100.1.bin
- Click Connect (some weird blue bars appear)
- Click Download (this will download the firmware to thg module)
Wait until flashing has been done. It will take around one minute to complete.
- Power cycle the controller (remove USB and attach again)
Some notes:
- In case of a problem, the GNSS module may need a power cycle. So just try again at 3.
- Sometimes the COM port is not visible in the Powerflash tool. In this case you have to open the COM port with another tool, for example PuTTY. While PuTTY is running, the COM port should appear in the ComPort menu. Before using "Download" close PuTTY.
- You can also try to use the Sierra Wireless GNSSTool which is newer than GlobalTop Flash Tool
Other GlobalTop modules can be flashed the same way with the associated firmware:
A linux tool can be found here ⧉, but it hasn't been tested by us.
Problems and Recovery
957 words Estimated reading time 4 minutes
No Power
If no LED is lightning up, then first check the
Power LED only
In the vast majority of cases, no firmware is installed here. This is not a big problem. Just try to
In the rare event of a hardware defect, the controller board must be
Getting the IP address
If you don't know the IP address of your controller board or you have problems accessing the web interface, there are several possible solutions.
Use the hostname
Instead if using the IP address you can just try to enter http://blitzortung in your browser. This might not work in all network setups.
IP address tick
If you don't know the IP address of the controller, then this can be signaled via the flashing of the mode LED and the ticking of the buzzer. This feature is available since firmware 10. Note: Only the last number of your IP will be signaled.
- This method only works within the first 2 minutes after power up, so you might reset the system.
- Press the button BOOT1 for 2 seconds. You might hear a short beep with a low tone.
- Press the button BOOT1 again for 2 seconds. You will hear a short beep with a high tone.
- Now each digit will be signaled by the buzzer and the status LED.
Examples
- 192.168.1.6 -> six beeps
- 192.168.22.91 -> nine beeps - pause - nine beeps
- 10.10.12.205 -> two beeps - pause - ten beeps - pause - five beeps
Use a 1:1 network connection to your computer
Connect your controller directly to your PC/laptop via an Ethernet cable. Set the IP of your computer to 192.168.1.1. Then you should be able to connect to the standard IP address of the controller (192.168.1.235). If that doesn't work, then you can try a factory reset to set the IP to the standard value. On the web interface you can set your new desired IP address. Note: You won't be able to save until you connect to the running system with the new address and click "Save settings".
Check the debug output
The IP address is printed just after startup or when obtained by DHCP. See below for more information.
Network issues
Ethernet problems
The Ethernet controller can only operate 10 MBit/s half duplex. Some network switches seem to have problems with auto negotiation and have to be set to 10 MBit/s half duplex. Otherwise the network connection might be unstable or the switch might report errors.
Since firmware 11.0 it is possible use full duplex mode. However, the Ethernet controller does not have duplex auto negotiation capabilities, so you have to set your switch to the same duplex mode manually. This is often only possible with a managed switch.
GPS issues
See dedicated GPS page.
General recovery and problem solving
The following solutions only work when the firmware is present. They allow to see debug messages even if you can not access your controller over the web interface. In case your controller doesn't show any sign of activity (no LEDs, no beeping), then you should try to
Factory Reset by Button
Connect the power and hold the BOOT1 button while doing a short push on the Reset button. Still hold the BOOT1 button and wait at least 5 seconds. You might also hear a beep shortly after reset and then again after 4-5 seconds. After you release BOOT1 the system should do a reset and start again with factory settings.
USB COM port interface
Note
On System RED you have to use the micro USB port on the Discovery board.
The STM32 COM Port driver must be installed on your PC for this. You can download it on the ST website ⧉ or here (Password required). Then you can connect your controller to your computer via USB cable.
The USB Virtual COM Port has to be enabled in the controller in Settings -> System. In case you can not access the web interface, then you have to enable debug mode upon startup (see below).
If everything works, you will see a new COM port in the Windows device manager:
You can now connect to this COM port with a baud rate of 115200, for example with PuTTY or any other terminal app.
Serial debug interface
For this you need a usb to serial breakout board. Each controller has dedicated pins for serial rx/tx lines. Check the board layouts for more information.
Start in debug mode
In debug mode more debug messages will be enabled and the USB COM port interface will be activated.
Hold the BOOT1 button while doing a short push on the Reset button. Release BOOT1 after 1 second. Now the controller waits with the boot sequence until you push BOOT1 again. That allows you to set up your serial USB connection, so you can see all boot messages.
Warning
This procedure also disables hardware watchdog. You can use the feature if you encounter crashes of your controller. With disabled watchdog, the controller won't reboot on an error, but you can check the console or LCD for debug output. Be careful when leaving the station in this mode! On error, the station will hang until reset button is pushed!
Remote debug
We can enable remote debugging to identify the problem for your. Of course this works only in case of working network connection.
Hardware defect
If none of the above methods succeeded or they showed a hardware problem a repair of the hardware might be needed. Just write us a mail or ask in the forum or help. Several stations have already been repaired by us.
Firmware
1551 words Estimated reading time 6 minutes
The firmware for System RED and BLUE can be downloaded here.
Downloads
Firmware 11.0b3 (2025-03-03) - Beta firmware
Changes since version 11.0b2:
- Audio stream: fixed not working when authentication is enabled
- RED: fix missing PCB id 3 for self-made PCBs 10.5
- BLUE: enable GNSS Galileo by default
- ENC28J60: set MAC duplex flag in half duplex again (was removed in 11.0b1)
- show duplex state read from network chip on web status page
Version 11.0b2: Changes since version 11.0b1:
- fixed login not working in previous release
- Signal page: improved style on mobile devices
- Audio stream: new option to mask signal below thresholds
Version 11.0b1: Changes since version 10.1:
- new: Interference filter (per channel)
- new: WAVE audio stream over HTTP to hear sferics and/or search/identify interference
- DSP: finally implemented FFT
- DSP: show frequency spectrum (if available) on signal page
- DSP: search for most powerful frequency bands in signal and show them on signal page
- DSP: tracking of smoothed noise frequencies
- HTTP-Client: support keep alive connections to avoid cpu intensive tls negotiation on every connection
- HTTP-Client: support for chunked transfer encoding
- HTTP-Client: use random outgoing port
- HTTP-Client: variable TLS buffer length to save some memory
- HTTP-Client: improved certificate handling to save memory
- HTTP-Server: use newest httpd included in lwip (fixes webserver not responding anymore after specific requests)
- Web status page: "ADC" is now "Signal Processing", showing more data, i.e. parameters of filters
- Web status page: Show auto threshold/gain adjustments (numbers and times)
- Peak band filter: renamed "auto ampl. filter" to "(voltage) peak band filter"
- Peak band filter: allow dynamic number of filtered peak bands (was fixed to 8 before)
- Peak band filter: show filtered bands in signal display
- Peak band filter: several improvements and fixes
- Max amplitude filter: fixed and can be enabled by server (never worked at all before)
- Signal page: allow hiding of filtered channels
- Signals: count sent signals without GPS
- Signals: improved handling of consecutive signals (aka "overlap")
- Signals: fix: do not count sent meta signals
- Memory: lower memory footprint when transmitting signal data to web interface
- Memory: count memory allocation failures
- Memory: scrub memory on alloc. fail on http connect to server
- Memory: fixed several memory allocation bugs
- Logging: disabled some logging options to reduce firmware size (mainly RED)
- Net: manual activation of 10MBit full-duplex (works only with switch manually set to full-duplex too)
- Net: show hardware counters
- Net: slightly increased tcp buffers
- Net: don't set static config before dhcp has started
- Encryption: fixed potential security risk due to insufficient key length check (thanks to gerbold)
- Encryption: fixed issue with generating random numers for encryption (thanks to gerbold)
- updated mbedtls to 2.28.9 (fixes memory leak)
Known bugs:
- Audio stream: due to slow network processing, audio frequency of stream will be lowered after some time
- Audio stream: ADPCM works only with one channel and not in browser (use VLC instead)
- DSP: no filter implemented yet (just for testing/showing spectrum and bands on signal page)
Firmware 10.1 (2024-08-17)
Changes since previous version:
- fix: truncated encrypted packets when sending to more than 1 server
- fix: no "unsaved settings" message when changeing encryption settings
- fix: minor debug output issues
Changes in 10.0
- silent reboot after 30min (instead of 6h) in case of network connection loss as workaround for rare network failures
- adjusted network receive overflow timeout which sometimes causes problems in networks with much broadcasts
- show PCB 22.2 for PCB id 8
- removed options to force unencrypted control connections
- removed proxy option, as it can only be used for unencrypted connections
Changes in 10.0b3 (unsupported - don't use!)
- new: very basic firewall
- increased: ARP table size
- minor adjustments for BLUE-Mini amplifier
- no reply on ICMP request when webserver disabled
- added option for network debug logs
- minor changes regarding inserting icons from documentation
- added possible "end" parameter in signal packet
- removed guide
- fix: fallback to static ip on dhcp failure working again
- fix: wrong transmission of key ids
- fix: no more strange chars in GNSS selection
Changes in 10.0b2 (unsupported - don't use!)
- show system type in header instead of "PCB"
- prepared for BLUE-Mini development
- fix: prevent saving settings during firmware download
- fix: no output over USB after entering debug mode via button on startup
- fix: crash on enabling USB-VCOM on RED
- fix: LED/Buzzer IP signaling now does 10 ticks for digit "0"
Changes in 10.0b1 (unsupported - don't use!)
- new: encryption with AES-GCM and privacy options for signal packets
- new: automatic firmware download and install
- new: check signature of firmware
- new: buzzer volume settings for ticks/beeps
- new: signaling last number of IP via buzzer/LED
- new: option to disable webserver (i.e. for setups in foreign networks)
- new: more privacy: do not send processor id, station id and position in signals to servers by default
- new: sending signals without gps and/or just high precision counter value (on server request for GPSless TOA)
- new: added Beidou GNSS option
- new: support more GPS baudrates on BLUE
- new: show CPU type and revision
- new: support for ublox MAX-M10 GNSS module
- new: ECDHE key exchange for remote config (enabling perfect forward secrecy)
- fix: limited MTU to 1480 max
- fix: not showing Galileo satellites due to missing ublox init
- fix: warm start ublox GPS when firmware version can not be read
- fix: SSI overflows on GPS status webpage
- fix: compress packet only once for all servers
- fix: stall on startup when network is up too fast (static config)
- fix: sometimes not showing cert information in SSL debug messages
- fix: weak encryption due to wrong random number generator configuration
- updated lwip to 2.2.0
- updated mbedtls to 2.28.6
- updated CMSIS-DSP to 1.15.0
- switched to arm-gnu-toolchain-13.2.rel1
- changed compiler optimization from -O2 to -Os to reduce size
- lots of minor improvements and bugfixes
Full changelog
Changelog
=========

Changes in Firmware for Blitzortung.org RED/BLUE controller. Not all changes/fixes are listed here.

11.0b3 (2025.03.03)
------------------

* Audio stream: fixed not working when authentication is enabled
* RED: fix missing PCB id 3 for self-made PCBs 10.5
* BLUE: enable GNSS Galileo by default
* ENC28J60: set MAC duplex flag in half duplex again (was removed in 11.0b1)
* show duplex state read from network chip on web status page


11.0b2 (2025-02-25)
-------------------

* fixed login not working in previous release
* Signal page: improved style on mobile devices
* Audio stream: new option to mask signal below thresholds


11.0b1 (2025-02-24)
-------------------

* new: Interference filter (per channel)
* new: WAVE audio stream over HTTP to hear sferics and/or search/identify interference
* DSP: finally implemented FFT
* DSP: show frequency spectrum (if available) on signal page
* DSP: search for most powerful frequency bands in signal and show them on signal page
* DSP: tracking of smoothed noise frequencies
* HTTP-Client: support keep alive connections to avoid cpu intensive tls negotiation on every connection
* HTTP-Client: support for chunked transfer encoding
* HTTP-Client: use random outgoing port
* HTTP-Client: variable TLS buffer length to save some memory
* HTTP-Client: improved certificate handling to save memory
* HTTP-Server: use newest httpd included in lwip (fixes webserver not responding anymore after specific requests)
* Web status page: "ADC" is now "Signal Processing", showing more data, i.e. parameters of filters
* Web status page: Show auto threshold/gain adjustments (numbers and times)
* Peak band filter: renamed "auto ampl. filter" to "(voltage) peak band filter"
* Peak band filter: allow dynamic number of filtered peak bands (was fixed to 8 before)
* Peak band filter: show filtered bands in signal display
* Peak band filter: several improvements and fixes
* Max amplitude filter: fixed and can be enabled by server (never worked at all before)
* Signal page: allow hiding of filtered channels
* Signals: count sent signals without GPS
* Signals: improved handling of consecutive signals (aka "overlap")
* Signals: fix: do not count sent meta signals
* Memory: lower memory footprint when transmitting signal data to web interface
* Memory: count memory allocation failures
* Memory: scrub memory on alloc. fail on http connect to server
* Memory: fixed several memory allocation bugs
* Logging: disabled some logging options to reduce firmware size (mainly RED)
* Net: manual activation of 10MBit full-duplex (works only with switch manually set to full-duplex too)
* Net: show hardware counters
* Net: slightly increased tcp buffers
* Net: don't set static config before dhcp has started
* Encryption: fixed potential security risk due to insufficient key length check (thanks to gerbold)
* Encryption: fixed issue with generating random numers for encryption (thanks to gerbold)
* updated mbedtls to 2.28.9 (fixes memory leak)

Known bugs:
* Audio stream: due to slow network processing, audio frequency of stream will be lowered after some time
* Audio stream: ADPCM works only with one channel and not in browser (use VLC instead)
* DSP: no filter implemented yet (just for testing/showing spectrum and bands on signal page)


10.1 (2024-08-17)
-----------------

* fix: truncated encrypted packets when sending to more than 1 server
* fix: no "unsaved settings" message when changeing encryption settings
* fix: minor debug output issues


10.0 (2024-06-16)
-----------------

 * silent reboot after 30min (instead of 6h) in case of network connection loss as workaround for rare network failures
 * adjusted network receive overflow timeout which sometimes causes problems in networks with much broadcasts
 * show PCB 22.2 for PCB id 8
 * removed options to force unencrypted control connections
 * removed proxy option, as it can only be used for unencrypted connections


10.0b3 (2024-04-20)
-------------------

* new: very basic firewall
* increased: ARP table size
* minor adjustments for BLUE-Mini amplifier
* no reply on ICMP request when webserver disabled
* added option for network debug logs
* minor changes regarding inserting icons from documentation
* added possible "end" parameter in signal packet
* removed guide
* fix: fallback to static ip on dhcp failure working again
* fix: wrong transmission of key ids
* fix: no more strange chars in GNSS selection


10.0b2 (2024-01-18)
-------------------

 * show system type in header instead of "PCB"
 * prepared for BLUE-Mini development
 * fix: prevent saving settings during firmware download
 * fix: no output over USB after entering debug mode via button on startup
 * fix: crash on enabling USB-VCOM on RED
 * fix: LED/Buzzer IP signaling now does 10 ticks for digit "0"


10.0b1 (2024-01-11)
-------------------

* new: encryption with AES-GCM and privacy options for signal packets
* new: automatic firmware download and install
* new: check signature of firmware
* new: buzzer volume settings for ticks/beeps
* new: signaling last number of IP via buzzer/LED
* new: option to disable webserver (i.e. for setups in foreign networks)
* new: more privacy: do not send processor id, station id and position in signals to servers by default
* new: sending signals without gps and/or just high precision counter value (on server request for GPSless TOA)
* new: added Beidou GNSS option
* new: support more GPS baudrates on BLUE
* new: show CPU type and revision
* new: support for ublox MAX-M10 GNSS module
* new: ECDHE key exchange for remote config (enabling perfect forward secrecy)
* fix: limited MTU to 1480 max
* fix: not showing Galileo satellites due to missing ublox init
* fix: warm start ublox GPS when firmware version can not be read
* fix: SSI overflows on GPS status webpage
* fix: compress packet only once for all servers
* fix: stall on startup when network is up too fast (static config)
* fix: sometimes not showing cert information in SSL debug messages
* fix: weak encryption due to wrong random number generator configuration
* updated lwip to 2.2.0
* updated mbedtls to 2.28.6
* updated CMSIS-DSP to 1.15.0
* switched to arm-gnu-toolchain-13.2.rel1
* changed compiler optimization from -O2 to -Os to reduce size
* lots of minor improvements and bugfixes


9.5b1 (2023-03-21)
------------------

* new: TLS/HTTPS support for remote config (mbedtls 2.28.2)
* new: switch to pre defined computing server in case remote config server is not available
* changed remote config URLs for usage with own CA authority
* lowered memory usage for webserver to lower risk of blank web pages
* lowered memory usage for http client
* show correct date on GPS modules with rollover bug for the next 19 years
* fix: wrong quoting in status json
* fix: show PCB 19.0 on RED stations with bad soldered PCB
* fix: web status bar didn't show all errors


9.4 (2022-11-12)
----------------

* fix: memory leaks (by gerbold)
* fix: GPS failure on low ADC sample rates
* fix: crash on buzzer playing amp sounds but beeps are off
* fix: detect lazy network errors and reset hardware
* memory debugging (by gerbold)
* changed compiler optimization to reduce flash file size
* upgrade to newest lwip 2.1.3
* upgrade to newest STM32F4 std peripherals library
* switched to arm-gnu-toolchain-11.3.rel1


9.3 (2022-11-04)
----------------

* Version change to 9.3


9.3-b2 (2022-11-03)
-------------------

* code cleanup
* remove BETA from alerts
* fix: completely removed GPS year checking
* fix: removed wrong check on guest access
* fix: no reboot with Tools -> Reboot

  Special thanks to gerbold for the help!


9.2 (2018-12-31)
----------------

* new: added HTTP proxy option for remote control
* new: rebooting via HTTP works now even when there's no memory left (..&action=do_reboot)
* new: prepared for sending noise signals to server
* new: debugging option for 1PPS counter
* fix: lowered memory usage for remote control requests
* due to space limitations, jquery and jqplot isn't included in firmware anymore and will be loaded from the web (RED)


9.1 (2018-08-08)
----------------

* send some more status information about each signal to server
* fix: sending control requests too often
* fix: out of memory when sending too much channels to signal plot
* fix: showed too high PCB version
* switched to GCC ARM Embedded 7 2018 q2 toolchain


9.0 (2018-06-09)
----------------

* new: support of PCB 19.5
* new: basic support of UBX message format for u-blox MAX-M8W GNSS module
* fix: messages on status page disappeared after one second
* fix: limit frequencies for hardware filter to ~300kHz
* fix: init tracker settings after switching modes


9.0b1 (2018-05-13)
------------------

* new: DSP for checking/filtering signals (not functional yet)
* new: added option to correct the offset in the graph
* new: option to send debug log to a syslog server IP address (UDP)
* new: support of u-blox module MAX-M8W (GNSS/SBAS-settings and reset-commands not working yet)
* improved(?) GNSS init process
* removed debug code and improved data structures to reduce memory usage (RAM and firmware size)
* lowered amount of data to reload status page
* reduced stack size
* fix: workaround for USB-VCOM not working on PCB 19.4 in case VBUS solder bridge is not closed (BLUE)
* fix: don't update existing server IP with empty IP address "0.0.0.0"
* fix: remote setting of sample rate not working
* fix: sending UDP packets to multiple servers
* fix: no automatic gain changes for RED amplifiers in certain situation
* fix: timer in debug log twice as fast than normal


8.4 (2018-01-17)
----------------

* new: mouseover for satellites
* fix: try to initialize amplifier more often after reboot (RED)


8.4b5 (2018-01-07)
------------------

* new: added cpu info in status json file
* fix: also read GNSS data from GNGSA message


8.4b4 (2018-01-06)
------------------

* new: ability to send noise data to servers
* new: logo animation (click to disable) ;-)
* change: "00:00" isn't a valid reboot time any more (leave it disabled or use another random time)
* improve: faster startup time
* improve: amplitude filters with higher resolution (64 slots instead of 32)
* fix: watchdog will be disabled in rare cases -> enable watchdog periodically (again)
* fix: missing last byte in compressed UDP packets
* fix: buzzer ticks on every consecutive signals instead of every 20th
* fix: don't apply user gain level in auto-adaption (i.e. on startup), just use them as max. allowed gain
* fix: DHCP was not always assigned when "link up" condition was missing on startup due to race condition
* fix: DHCP was not assigned when same static IP was used as fallback
* fix: DHCP timeout due to disabled system timer for some seconds during startup
* fix: voltage/PPS sampling resulted in unexpected behavior and hard faults due to developers stupidity
* fix: don't display usless unknown GPS sentences
* fix: auto refresh of status page did stop when controller ran out of memory
* several minor fixes (debug messages etc.)
* switched to GCC ARM Embedded 7 2017 q4 toolchain


8.4b3 (2017-12-06)
------------------

* fix: static IP settings not working in last firmware


8.4b2 (2017-12-06)
------------------

* flash "Fault LED" when signal couldn't be sent due to network or GPS error
* improved and cleaned up DHCP and network stuff
* show GALILEO satellites with "G" in overview
* also show "Unsaved settings..." dialog on "Status" and "Signals" page
* enabled some DHCP debugging (BLUE only)


8.4b1 (2017-12-03)
------------------

* new: added GLONASS support (experimental!) [BLUE]
* changed to new logo
* fix: correct hiding of "save to flash and reboot message"
* improved: USB <-> GPS module passthrough
* upgraded lwip to version 2.0.x (needs testing!)


8.3 (2017-11-14)
------------------

* new: support of PCB 19.4
* new: added experimental support for GALILEO (firmware update of GNSS-module needed) [BLUE]
* new: GNSS data pass-through via USB (no fw update possible)
* added some more checks for AD converters
* fix: integer overflow of "bytes sent" values
* fix: applied patch on lwip which fixes DHCP issues (untested)
* switched to GCC ARM Embedded 6 2017 q2 toolchain


8.3b2 (2016-10-03)
------------------

* slightly raised some network buffers
* fix: crash when no crash occured before reset


8.3b1 (2016-10-03)
------------------

Note: Firmware for BLUE has some additional debugging code in this version. A minor performace drop is possible. RED firmware is not affected due to size limitations.

* new: browse last signals in signal view
* new: button for entering DFU mode over web-interface
* new: option for silent reboot on hardfault
* new: send call stack on errors [BLUE]
* change: automatic reboot just before firmware flashing
* fix: added correct text to button description in "guide" [BLUE]
* fix: removed memory leak in signal view javascript
* fix: repaired anti-ADC-watchdog-lock-watchdog from FW 8.2
* fix: HTTP-client sometimes used wrong port number to connect
* fix: wrong MD5 checksum of firmware when flashed external
* switched to GCC ARM Embedded 5.4 2016q3 toolchain


8.2 (2016-09-28)
------------------

* fix: reset ADC watchdog interrupt when watchdog-flag is set for two seconds
* fix: out of memory when sending to more than one region
* fix: memory allocation errors related to network stack


8.1 (2016-09-23)
----------------

* fix: improvements for hard fault crashes and some more debug information
* fix: workaround/test for possible crashes on some specific stations


8.1b1 (2016-08-29)
------------------

* fix: restart ADC-watchdog after offset refresh


8.0 (2016-08-24)
----------------

* support for PCB 19.3
* additional remote debug information in specific hard fault situations
* refresh offset error more often
* fix: ignoring GPS messages from QZSS satellite
* fix: port number was ignored for http-requests
* fix: firmware upload under linux failed due to timeouts
* fix: use helvetia as fallback for arial on web-interface
* fix: hide analogue user input when not available [BLUE]
* fix: sometimes no restart or crash after firmware update


8.0b5 (2016-06-08)
------------------

* filter settings visible when solder bridge J0 closed [BLUE]
* description for input selection instead of input numbers [BLUE]
* sending information about inputs and filters to computing server [BLUE]
* minor changes in server urls for remote config
* lowered max opened and listening tcp connection
* factory settings/debug mode with BOOT1 button: press and hold for 2s/10s just after reset [BLUE]
* fix: raised stack memory size and added collision check
* fix: network LED stayed off after blinking, even when status is good [BLUE]
* fix (maybe): threshold/signal detection stopped after some when time in manual mode w/o noise adaption
* fix: minor issue that click on Firmware Update button had no effect
* switched to GCC ARM Embedded 5.3 2016q1 toolchain


8.0b4 (2016-04-05)
------------------

* re-added debug output via USB connector [BLUE]
* blue LED now blinks every second to show good GPS [BLUE]
* static gain information of onboard amps modified (not the final value) [BLUE]
* fix: no sampling after startup in case all thresholds are default values (120mV) [BLUE]


8.0b3 (2016-04-03)
------------------

* final changes regarding PCB 19.1 [BLUE]
* try to test whether on-board amplifier is "connected" by raising gains to maximum [BLUE/dev]
* less CPU usage when playing signals through buzzer
* not so much beeping on GPS error
* fix: disabling LEDs by LCD sleep resulted in broken LCD and amplifier1 communication [RED] or other disabled pins [BLUE/dev]
* fix: after firmware flash update procedure, the reset was broken
* fix: infinitife loop in rare cases due to non-initialized debug UART DMA
* fix: button has to be released after reset to factory settings to prevent too much writes to flash on boards without button
* fix: display stays dark with factory settings [RED]
* fix: network performance problems with on board MAC due to DMA buffer underflow handling [dev]

Not fixed yet: Loosing amplifiers (RED only so far) and sudden reboots.


8.0b2 (2016-02-14)
------------------

* added basic signal wave generator for testing amplifier [BLUE]
* improved sampling of external voltages/1pps and added more channel(s)
* show only usable channels on amplifier to buzzer output
* no more automatic reboot at 00:00 by default
* added possibility to completely disable amplifier channel
* changed behaviour of LEDs [BLUE]
* enabled button [BLUE/dev]
* added more channels colors to the LCD display [dev]
* manual change of link speed (not working yet) [dev]
* use interrupt instead of polling for Ethernet [dev]
* fix: don't show username to guests
* fix: sometimes corrupted data due to encoding
* fix: transmitted non-encoded data with wrong channel number
* fix: calculated sample rate had minor deviations
* fix: amplifier sometimes doesn't get recognized after reconnect
* fix: static IPs not working / sometimes crash when releasing DHCP
* fix: some memory allocation bugs
* fix: wrong ADC <-> amplifier channel assignment / restart ADC in case of failure
* fix: handle ADC overrun condition
* switched to GCC ARM Embedded 5.2 2015q4 toolchain (-> smaller firmware size)

--> reached over 40000 lines of own code - aaargh... :-/


8.0b1 (2016-01-24)
------------------

Note: Due to minor changes in the settings structure, some (or all) settings have been set to defaults.
Please check your configuration!

Note: System RED and BLUE share the same code base. If there are specific changes for just one
system, then it will be noted in the changelog entry.

* new: added support of BLUE final and development PCBs, which includes:
  - MEDIATEK MT3333 GPS chipset
  - gain and input changes of op amps through SPI
  - clock output for low pass filter ICs
  - more LEDs
  - STM32F42x CPU-Line [dev]
  - Ethernet through integrated MAC [dev]
  - ILI9341 TFT display [dev]
  - Reading touch screen values through STM32 ADCs [dev]
* new: direct adjusting sampling frequency through timer
* new: compression of UDP packets (lzfx)
* new: delta encoding of channel
* new: non-lossless encoding of channel data by cutting out noise
* new favicon depending on system
* fix: uploading firmware fails occacionally
* improvement: lots of general changes "under the hood"
* improvement: minor style changes in the signal graph
* lots of bugfixes


7.4 (2014-08-17)
------------------

* minified css/js files
* fix: IE gets confused by .gz file ending --> use normal file ending


7.3 (2014-08-16)
------------------

* added information about current mode and some color to the status page


7.3b1 (2014-08-09)
------------------

* GPS: added availability value in web interface
* NET: added MTU config option
* change outgoing UDP port every 5 minutes
* changed Google Maps link to ".com"
* fix: prevent sending accidentaly triggered signals
* fix: small bug in action numbering
* fix: lower browser memory usage for status page


7.2 (2014-07-13)
----------------

* TOA-ALERTS: general improvements
* fix: problem with remote control of filter


7.1 (2014-07-04)
----------------

* TOA-ALERTS: general improvements
* fix: memory leak in action URL call


7.0 (2014-06-29)
----------------

* show hint when amp 12 is on input 2 or amp 13 is on input 1
* AS3935: minor fixes, automatic calibraton checks
* fix: filter and adaption disable option per channel couldn't be disabled
* fix: possible memory leak in actions
* fix: remote control messages


7.0b5 (2014-05-18)
------------------

BETA release!

* fix: auto gain adjustment sometimes stalled
* AS3935: several minor changes in error handling


7.0b4 (2014-05-11)
------------------

BETA release!

* AS3935: raised IRQ level
* improvments regarding remote control


7.0b3 (2014-04-23)
------------------

BETA release!

* NEW: sampling of 5V power supply with rate of 8.5MSps
* raised thresholds for auto amplitude filters a lot to prevent loosing too much signals
* fix: no more mysterious gain changes (introduced in 7.0b1)
* fix: raised max. length of action URL again


7.0b2 (2014-04-20)
------------------

BETA release!

* added filter debug checkbox
* show filters for each channel in signal view
* reset network hardware if remote config connection fails too often
* fix: urlencode strings in user URLs
* fix: load user gains/threshold on disabling auto adapt feature


7.0b1 (2014-04-18)
------------------

BETA release!

* NEW: Filter by occurence of max. amplitudes in signals
* NEW: LEDs can be switched off when LCD dimmed
* improved support for new E-field amplifier
* improvements in some other filters
* noise adaption can be disabled for single channels
* some improvents in noise adaption
* force lower gain, if to high/low voltage (noise) affects ADC accuracy
* support manufacturer GNS as GPS device
* fix: GPS data sync bug
* fix: raised max. length of URL
* fix: noise adaption stuck in gain 2*2
* fix: minor LCD distortions
* switched to GCC ARM Embedded 4.8 2014q1 toolchain


6.8 (2014-03-13)
----------------

* AS3935: added URL parameters: strokes_all, disturbers_all, events
* minor changes in communication with amplifier
* fix: memory leak when too much HTTP ressources needed
* fix: enabling potentiometer through LCD working again


6.7 (2014-03-02)
----------------

* WEB: responsive design for smartphones (beta!)
* WEB: added station id in head - click to show it in the title
* removed antenna selection and information
* raised some network resources and lowered memory consumption
* fix: connection issues with HTTP control in combination with some routers/firewalls (thx to Don)
* fix: noise adaptation not working when threshold is zero (in automatic mode)
* fix: plot and satellite not showing just after firmware update
* fix: clarified the "Pending..." message after firmware upload and auto refresh of the page
* fix: no more log out after firmware upload when auth is enabled


6.6 (2014-02-20)
----------------

* WEB: show link to changelog when new FW available
* WEB: show NTP request count
* WEB: some style changes
* WEB: seconds converted to days/hours/minutes
* no-connection reboot/timeout set to 2 hours
* fix: web alert sounds
* fix: memory curruption on boot caused by alert settings
* fix: stack curruption due to AS3935 actions (!)
* fix: ADC hangs on re-init


6.5 (2014-02-16)
----------------

Note: Firmware update via web-interface had some strange bugs in 6.3/6.4 !
Chance is high, that it won't work. If upload fails (you won't see a warning message), then
you must save your settings again. Otherwise they are lost on the next reboot!

* NEW: StratumOne NTP time-server (not as accurate as similar products due to hardware restrictions)
* ALERTS: settings always visible, even when server is not capable for it
* AS3935: Tune capacitor value can be manually adjusted
* ACTIONS: more parameters added to the URL depending on calling peripheral
* ACTIONS: can be called by URL now
* ACTIONS: added status on main page
* WEB/ACTIONS: alert sounds through browser on action (toggle by clicking on name in status, saved in a cookie)
* WEB: changed method of loading javascripts (one big file instead of several small ones)
* WEB: menu instead of dropdown-box on settings page
* fix: no more gain changes by noise adaptation when amplifier potentiometer is enabled
* fix: hardened web-based firmware update, so that it retries on flash write error (and does not stop as it was before)


6.4 (2014-01-22)
----------------

* new map of GPS satellite constellation
* fix for fix for problems with negative smoothed GPS coordinates after boot (sorry again)
* other minor fixes


6.3 (2014-01-20)
----------------

* some changes on auto noise adaptation
* fix: web-interface firmware update repaired and implemented some function to warn developer when not working ;-)
* fix: problems with negative smoothed GPS coordinates after boot (sorry region 2+3)


6.2 (2014-01-19)
----------------

* improved auto adapt to noise level adjustment (shared channel support, remote configurable)
* I2C: frequency can be changed
* fix: don't display "STR" when no alerts are enabled and AS3935 is not present
* fix: auto-config stays in interference mode when noise level was too high
* fix: minor signal display issues


6.1 (2014-01-12)
----------------

* NEW: automatic gain/threshold <-> noise level adjustment (very beta!)
* WEB: minor improvments on signal view
* WEB: message when firmware update check fails
* LOG: Enable USB-Virtual-COM-Port when pressing blue button before booting
* SYS: faster boot, but show boot screen for some seconds
* AS3935: don't create new event when no lightning has been detected
* fix: on multiple alert events, call action with highest priority only (for TOA and AS3935)
* fix: bug, which caused too high CPU usage
* fix: wait some time before reset GPS smoothing
* fix: memory leak in webserver


6.0 (2014-01-05)
----------------

NOTE: Due to minor changes in the settings structure, some settings have been set to defaults.
Please check your configuration or reset them to defaults.


Major changes and improvements:

* NEW: ACTIONS and lightning ALERTS - individual combinations of TOA-lightning, AS3935, I/Os and buzzer sounds :-)
* WEB: open parts of webpages in a separate popup window
* WEB: live plot with received/sent signals on status page
* TRACKER: filter out spikes caused by digital signals the controller hardware (lower thresholds possible)
* TRACKER: record noise level of 10 times per second (can be displayed in signal view)
* TRACKER: prevent overlap of two consecutive signals (up to 50% overlapping before)
* ADC: Alternate channel mapping when two amps connected: use same threshold for whole amplifier instead of same channel of both amplifiers
* LOG: Option to use micro-USB-jack as virtual COM-port to see debug output (very beta!)
* AS3935: nicer display of events in web-interface


Minor changes, improvments and fixes:

* WEB: signal rate in title
* WEB: using dynamic memory for webpage contents
* WEB: slightly darker fonts on the web-interface
* WEB: improved data transmission signal view: can now be used on more than one device at the same time
* WEB: thresholds in graph
* AMP: Option for a channel, so that it won't be transmitted to servers (for experiments)
* SYS: Option to reboot once per day at given time
* SYS: Option for CPU sleep mode, which saves up to 40mA@3V (CPU usage calculation doesn't work with it)
* SYS: Option for voltage check toggle, for those who have problems here
* SYS: Option for flash prefetch toggle, which eliminating some (very low) noise in ADCs
* SYS: Check whether uploaded FW is equal to running firmware
* LCD: Option to disable LCD page looping: page will stay on user selected one (and return there after an event)
* BUZZER: different way of playing sounds (unfortunately deep beep is not as loud as before)
* LOG: introduced console-commands: r=reboot, m=free dynamic mem, s=show memory content
* LOG: logging debug output via UDP (like good old tracker XT; enabled by server)
* GPS: smooth values stay after reset (using backup SRAM)
* GPS: faster availability of GPS after reboot
* AS3935: sending events to server via remote config
* AS3935: auto noise floor adjustemnt
* USER-I/O: added high-impedance output option
* NET: (maybe bugfix) reset network when no ingoing packet for some time
* fix: don't touch USER-I/O when not enabled (may solve issue with buzzer)
* fix: several bugs on AS3935 and USER-I/O functions
* switched to GCC ARM Embedded 4.8 2013q4 toolchain (-> smaller binary on the same optimization level)


5.0 (2013-12-01)
----------------

* NEW: 1PPS-sampling with 8.4MSps to check timings and 1PPS quality
* NEW: Live status display in web-interface
* NEW: Possibility to connect AS3935 lightning sensor via I2C (experts only)
* NEW: I/Os for own purposes (experts only !!!)
* minor changes in networking
* supports PCB-Id 2 (10.4)
* minor layout changes
* fix: reset ENC28J60 on error and no more ENC28J60 interrupt on error (fixes high CPU usage)
* fix: signal page timeout detection on refresh
* fix: some values on http remote config weren't updated


4.5 (2013-10-06)
----------------

* reboot when no http-connection or no valid information got over remote config
* improved GPS smoothing behavior and lowered tolerance
* LCD can be rotated by 180 degrees
* fix: memory not freed when control connection could not be established
* fix: some more memory leaks closed
* fix: no more init loops for non Mediatek GPS modules
* fix: DHCP renew works now
* fix: blue LED forgets blinking on some 1PPS pulses
* updated to GCC ARM Embedded 4.7 2013q3 toolchain


4.4 (2013-09-15)
----------------

* buzzer signal output settings can be saved to flash now
* GPS individual command text field
* GPS PA6H init enables AIC and disables EASY (see PA6H datasheet for more info)
* signal view: settings saved in cookies
* fix: don't show valid uploaded firmware when it's no more available in flash


4.3 (2013-09-12)
----------------

* volume changes for signal pass-through
* fix: controller-id scrambled on LCD on station setup
* fix: faster update of signal times in LCD


4.2 (2013-09-12)
----------------

* fix: firmware upload works now in Chrome
* fix: GPS improvements, EM406 should work now


4.1 (2013-09-10)
----------------

* Amplifier -> Buzzer output improved! Hear stroke discharges during normal operation :-)
* CPU-Load estimation
* Show save-button when unsaved settings exist
* LCD boot image
* added a small guide in under "About"
* several small improvements and bugfixes


4.0 (2013-09-03)
----------------

* NEW: Firmware-Update with browser
* NEW: LCD-Driver by Roland (some fine-tuning needed)
* NEW: filter signals on too high amplitudes (currently only via remote config)
* show info when settings are not saved
* show warning when javascript disabled
* check auth also for debug log and signal data requests
* fix: DHCP retry when failed
* fix: could not save settings on first start

Note: New settings storage position. Settings will be reset to default values after update!


3.3 (2013-08-26)
----------------

* reboot after 2 hours when not getting any connection
* fix: could not save LCD contrast/backlight
* fix: smoothing wrong GPS values when running >1day


3.2 (2013-08-23)
----------------

* averaging and beep on signal page
* fix: live signal stopped working after some seconds on non-Firefox browsers
* fix: DHCP and Network timeout beavior
* fix: Potentiometer setting not working
* fix: Wrong samplerate in graph
* fix: Antenna not shown to guest


3.1 (2013-08-18)
----------------

* fix: LCD not working with factory settings
* fix: Logout on maximize
* fix: wrong reset value was sent


3.0 (2013-08-18)
----------------

* NEW: more info and options on the signal page
* NEW: live message log window (see tools)
* added header for IE10 (press Alt+S if it's still not working)
* fixed backlight=0% could not be saved
* fixed (maybe) some hard fault conditions
* fixed sudden disconnect on changing network settings


2.5 (2013-08-05)
----------------

* sending program counter to server after hardfault reset
* LCD brightness 100% on reset
* fixed buffer overflow on parsing antenna string from server


2.4 (2013-08-04)
----------------

* check position accuracy on smoothing
* fixed wrong visibility of gain settings


2.3 (2013-08-03)
----------------

* added debug output on hardfault (serial+LCD)
* enable antenna status for PA6H with newer firmware
* signal page works now with resolution != 12bit
* disable LCD backlight PWM on 100% brightness
* Change amplifier LEDs remotely
* fixed crash in http client
* fixed crash on wrong pcb-id
* fixed threshold value display


2.2 (2013-07-27)
----------------

* added expire header for IE
* added warm start tool for GPS
* added trigger statistics for channels
* GPS startup timeout increased to 300s
* GPS firmware requests improved + support for SiRF (untested)
* possibility to add small help buttins on the web interface
* even more interference mode improvements
* fixed crash/reboot on high signal rate (network stall)
* fixed LED bootup sequence indicator (for debug purposes)
* fixed missing new line in remote request
* fixed LCD refresh
* fixed broken station control POST request


2.1 (2013-07-23)
----------------

* Better handling of interference mode: instead of switching on-off-on-off... it stays in interference mode for a while
* Adjust buzzer beep on interference mode delay
* Webserver port can be changed
* info about station-id/user-id on LCD
* GPS tools for your module
* GPS position smoothing
* fixed some remote-control bugs
* fixed signal view not updating in IE


2.0 (2013-07-14)
----------------

* Initial release for all participants
Warning
Older firmwares than version 10.1 shouldn't be used any more!
Firmware update
Automatic update
With firmware version 10 we introduced a new automatic update feature. In case of a new firmware release the controller itself can download the firmware file from our server. After that the downloaded firmware will be verified and can be written to the flash. Both, download and flashing can be triggered manually by you or by the server.
Automatic updates help us a lot to hold the whole network up to date. You as station owners don't have to care so much about checking for new firmwares and installing them.
Signature verification
The download itself will be made over a secure https connection by default. However, for maximum security firmware files will all be signed since version 10. The controller checks the signature with his public key and sha256 digest. An automated flash will only be made if the signature is valid.
You will see the result just after firmware download. The signature check is completely independent from the verification of the hash which just asks the server if it is a known hash. You can still flash even with failed signature/hash verification. However, a failed signature verification may indicate a wrong or broken firmware. The signature is also different between RED and BLUE.
The screenshot shows a successful verification of the signature and the firmware hash.
Warning
You should never flash a new firmware when signature verification fails! On the other hand, a failed hash verification might just indicate a communication failure with the servers.
For experts: You can download the public signature keys for RED and BLUE.
Manual update
The manual upload of a firmware file over the web interface was the standard procedure upon firmware version 10. You just need to download one of the firmware files from above to your computer. Then upload it under Tools -> Firmware. After a few seconds you should see the uploaded firmware and verification status.
Downgrade
When downgrading to a lower version you may loose your saved settings depending on the firmware versions!
DFU firmware upload via USB
Info
Until 2023 we provided special .dfu files. These are no longer necessary as all tools can now flash the .bin files directly.
In case of a failed firmware update every controller has an internal DFU boot loader which can not be erased. Just connect your controller board via USB to your computer. Ony System BLUE hold the BOOT0 button while doing a reset or power cycle. On System RED use a jumper to connect the BOOT0 and VDD pins on the Discovery board, then power up the system.
After that procedure your computer should recognize a new USB device.
STM32CubeProgrammer (Windows/Mac/Linux)
The tool can be downloaded in the Internal section (password required) or on the ST website ⧉.
dfu-util (Linux)
Download it here ⧉ or install it via apt install dfu-util (Debian/Ubuntu). To flash a .bin file enter:
ST-Link firmware upload
Warning
This procedure is normally not needed. For security reasons the ST-Link interface has been disabled since Firmware version 10.
The firmware can be upgraded via the SWD interface with the ST-LINK/V2 in-circuit debugger/programmer. This programming device is also contained at the STM32F4DISCOVERY board used for System RED through the Mini-USB port.
On System BLUE it is connected to the SWD interface as follows.
The software (STM32 ST-LINK Utility) for programming the controller with ST-LINK/V2 can be found on the website of STMicroelectronics. The board additionally must be powered via the USB power supply during programming.
FAQ
1245 words Estimated reading time 5 minutes
Fequently asked question for station operators
General
How can I register my new station?
See
On the station itself
What power supply should I have?
One with low noise, 5V, 1A or more, USB-B mini 5 pin.
My system receives a lot of interference.
There could be a lot of different reasons for interference. Search a different place for your antennas. Lower your gain. The default values are already very high. Check whether you still receive enough stroke signals by checking the statistics on our web-sites. System RED: The LCD backlight can send out noise due to PWM dimming. Set it to 100. Under specific conditions, a simple filter could be activated.
On the signals page, whenever a signal is triggered, LP (or similar) flashes up. What does this mean?
See the
On the signals page, what is the meaning of the dotted horizontal lines?
Those lines are the noise levels. See the
Should I use the optional low-pass filters?
First answer: No. Second answer: No, even if there is i.e. a relative strong and constant 77 kHz signal from DCF77. Most likely the system performance is still better when the LP is inactive. Third answer: If you have a dominant noise source at a frequency above 25 kHz, you may want to enable the LP filter with a frequency of 25 kHz or higher.
How do I solder the low-pass filters?
The availability of my GPS suddenly dropped - why?
Although nothing else changed, the location of the antenna is ok, the cables and connectors are ok, suddenly the GPS accuracy and availability drops. There are reports that this may be caused by anomalies in the earth's magnetic filed with strong geomagnetic storms. Example August 28 in 2018. Quote: "A lot of the high activity can play heck with GPS signals… the recent effects were said to be most pronounced ±55°N… you're at about 53° I believe… My three systems, usually running at about 95-100 were in and out at ±75%, Reds and Blue,… and I'm at ±38°N… now they're back at 99+". (Source ⧉)
Sudden loss of the Web GUI
The loss of the web GUI on RED station is a known problem in FW 9.1 and earlier. There's a memory overflow after some time of operation. This overflow happens suddenly due to unknown circumstances. As there's no memory left, no more web access is possible as this needs a lot of memory. Unfortunately even a direct reboot link doesn't work. This will be possible in the next firmware. The station may even reboot in such a situation, because sometimes there's also no remote control communication possible.
The controller did a long deep beep and does rebooting
This indicates a software fault (also called hard fault). If this had happened only once, then you shouldn’t care. If you got those faults from time to time, you should contact the developers. If possible, write down the hard fault codes.
On system RED you will see the hard fault errors on the display. On very rare occasions, the on-board programmer can do strange things and interfere with the CPU. Remove the USB cable for programming and also the power supply. After 10 seconds, power up the board again but don’t connect the USB on the STM32F4DISCOVERY. You can also remove the two jumpers labeled with ST-Link to disconnect the programmer.
System RED
Nothing is working, only the two red LEDs near the mini-USB jack of the STM32F4DISCOVERY board are glowing.
This means, the CPU is not working. If this happened after uploading the firmware, then the flash procedure was not successful. Please double check the settings in the flash tool. Is the jumper close to the CPU put on the pins? If not, then the CPU has no power. See Recovery for more information.
The display has dark bands across it when the board is powered.
You are probably using the mini USB jack at the STM32F4DISCOVERY board for the power supply. Please use the mini USB jack of the controller board for power supply. It is not possible to use the mini USB jack of the STM32F4DISCOVERY board to power the controller with 5 Volt. This is a frequently made error.
I don’t see any readable information on the LCD.
First check, whether the board is powered via the mini USB jack of the controller, and not via the mini USB jack of the STM32F4DISCOVERY board. Then check, if you accidentally set the LCD contrast to 0 in the settings. Other possible reasons for a not-working display:
Check the supply voltage. If it’s over 5.2V, then the LCD might not work. You should stay below 5.1V. This is a hardware bug in PCB 10.3 and is fixed in later versions. Measure the contrast voltage with a volt meter. It has to be around -4V.
Carefully check every pin/solder-joint at the display and the controller.
The LCD backlight is not working!
Check, if you accidentally switched the backlight off in the settings. The backlight does not work, when the controller has no firmware.
LCD reports: "Fatal ERROR. Could not initialize network."
This means, the controller couldn’t communicate with the ENC28J60 network chip. Please check if everything soldered correctly and whether the chip is correctly placed in its socket. The crystal must have 25 MHz fundamental oscillation. If it’s a overtone type, the ethernet controller might not work!
PA6H GPS does not work or has very bad reception.
In most cases, this is due to wrong soldering. Carefully check all solder joints. Please be careful when re-soldering the joints after the PCB has been fully assembled. It’s much more difficult to get access to the GPS solder joints due to some big parts around the GPS module.
If the GPS antenna status shows always intern (LCD: Int) or a shortcut (ERR) then you should double check the solder joints from the GPS module to the antenna connector. If you don’t find the problem, the you should send us at least two good photos (or post them in the forum) where the solder joints on both sides of the module can be clearly seen (see Fig. 58).
In some very rare occasions, interference can disturb the GPS module. Try a different place and always make some tests outside. Please check GNSS (GPS) too!
The PA6H GPS looses 1PPS when there are a lot of satellites tracked.
This is a bug in the PA6H module which can be observed on very rare occasions. It happens only when the reception quality is good and a lot of satellites are tracked (> 14). This situation can take minutes and the controller shows GPS warnings. If you experience it, check it again on following days at the same time but some minutes earlier on each day. Contact us, if you can observe the behavior on two different days. There’s currently no real solution for that. Even a firmware update of the GPS module doesn’t help. You can position your antenna so that it does not receive so much satellites. Changing baud rate or SBAS and resetting the GPS can eliminate the symptoms for some minutes but won’t solve the problem.
Web Interface Reference
5136 words Estimated reading time 21 minutes
Most of the italic text below will also be shown on the controllers web interface next to the corresponding element.
Settings
Main
- DSP Frequency Filter
- The DSP filter will be able to check frequencies and their bandwidth in every triggered signal. This needs a lot of CPU power.
Work in progress
The DSP filter is currently only analyzing the signal, but does not filter it. It will be implemented in a future firmware 11.x version.
- Auto Adapt to Noise
- When enabled, the controller sets thresholds and gains relative to the noise floor. The relative gain will not exceed your manual gain/threshold settings.
Note
When testing new gain or threshold settings you should disable this. Otherwise you might not see any difference, as the controller will just adapt to the noise floor.
- Interference Filter
- If the amount of triggers per second for a channel gets too high, then this channel is filtered until the trigger rate gets lower again. The more this filter gets enabled and disabled within a time span, the higher the sensitivity of this filter.
- It's similar to the interference mode, but as a filter every channel is checked individually. This filter has been introduced with firmware 11.0 and there's not much experience with it yet.
- Peak Band Filter
- Enable this option if you have problems with specific interference, like from robotic lawn mowers. The controller saves the rate of signals grouped by their min/max amplitudes. If signals with specific amplitudes occur too often within a time period, those signals will be filtered.
- Should be disabled in most cases, but can help a lot in some cases.
- Number of Samples
- Samples which will be recorded for each event for all channels. In most cases all of those values will be sent to the servers. Default is 512.
- Please leave at 512 for normal operation. However, you can experiment with it and carry out tests.
- Samples before Trigger
- Include given number of samples before the trigger occurred. Default is 256.
- Please leave at 256 for normal operation. However, you can experiment with it and carry out tests.
- Ignore Signals below Threshold
- Don't send signal for a channel when the amplitude is lower than the given percentage of it's threshold value. Set to 100% to send only values which are greater than the threshold. The intention is to save traffic for unusable signals or not working channels.
- We recommend a value of 10%. For traffic saving this could be set to 100%.
Network
IP Configuration
- DHCP
- Toggle DHCP. If no valid DHCP answer received, the static configuration below will be used.
- Note: DHCP has address collision detection disabled for very fast startup. This is against the RFC, but should not be a problem in most cases.
- Static IP
- IP address of your controller, which is used when DHCP is not available or disabled.
- Default: 192.168.1.235
- Static Netmask
- Netmask, which is used when DHCP is not available or disabled. Default: 255.255.255.0
- Default: 255.255.255.0
- Static Gateway
- Gateway IP address which is used when DHCP is not available or disabled.
- Default: 192.168.1.1
- Static DNS
- DNS server, which is used when DHCP is not available or disabled.
- Default: 8.8.8.8
- MAC
- Here you can change your MAC address. Change it only if you know what you are doing!
- You may want to note it down. Sometimes it can help identifying the device in the network, i. e. routers keep track of MAC and IP address pairs.
- Max. MTU
- Should be 1480 by default. Change only if you know what you are doing.
- More details can be found here.
- Speed
- Set speed/full-duplex mode. Set only to full-duplex if you can manually set your switch to full-duplex mode too.
- Default: 10Mit/s half-duplex. More information see here
- HTTP-Proxy IP/Port
- If you have a proxy server in your network, you can enter the IP address and port here.
- NTP
- Enable NTP time server. The server uses the GPS time and 1PPS as time source. It is not as accurate as other hardware dedicated to NTP, but far enough for home usage (around ~1ms). Enabled CPU sleep mode and higher load on the controller can result in much lower accuracy.
Communication
- Signals
- The signal encryption has been introduced in firmware 10. The "Encrypted only" setting won't allow any unencrypted signals packets. As this feature is still beta, your system might stop sending any data if something goes wrong (especially on server side). That's why we recommend to use the second option. The last option, forcing unencrypted signals shouldn't be used anymore.
- More information can be found
here . - Unencrypted control connection
- This completely disables encrypted BORC control connection via HTTPS. Only plain HTTP will be used. Enable only in case of an error or for debugging purpose!
Warning
Enable only when you are know what you are doing! Everyone will be able to see and/or manipulate private data, like position, station id and so on.
- Disable certificate verification
- Don't check the TLS certificate for validity. This allows decryption of the HTTPS connection by man in the middle attackers.
Web Interface
- Auth
- Check it, if you don't want that others can access this web interface. You have to enter a username and password below, otherwise it won't work. We can not guarantee 100% security even with this option enabled!
- We recommend to enable this option and set a username and password.
Warning
Even with this option enabled, the web interface is not 100% secure. Please don't forward the port to the internet!
- Allow guest access
- When checked, guests still can see the status pages (without controller id).
- Port
- Port for the HTTP web server. After changing this value, you have to save your settings and reboot. Default is 80.
- Default: 80, which is the standard port for http. If you change it you need to access the controller differently, i.e. with port 8080 as, http://blitzortung:8080/.
- Disable webserver
- Disables the webserver completely. It can only be enabled again by a factory reset or by a remote command.
Warning
This will disable the webserver completely. It can only be enabled again by a factory reset or by a remote command.
Firewall
- Firewall
- Enables the firewall. Leave it disabled if you are unsure! It will block all incoming connections except for those networks listed below. It will also block DHCP, so you should enter the IP of your DHCP server below or use a static configuration.
Warning
This is a very basic firewall. It might not work probably in case of too much requests. If the controller connects to an external IP, then this IP will be unblocked. This firewall does not check ports or protocols. You should disable DHCP and use static network configuration.
- Allow IPs/Networks:
- Enter the IPs or networks which should be allowed to access the web interface separated by ";". You can enter single IPs, i.e. 1.2.3.4 or networks, i.e. 192.168.1.0/14.
GPS
Detailed information about this topic can be found in the GPS section.
- Baudrate
- It is recommended to set the highest possible baud rate. This is 460800 for u-blox, 115200 for Gmm-g3/PA6H and 38400 for older ones. After changing this value, the GPS module will be reinitialized if 'No automatic init' below is unchecked.
- Always init on boot
- Always send init string on boot to the GPS module to be sure the correct settings are applied (GNSS, baud rate). Enabled by default since Firmware 10.
- No automatic init
- As soon as the controller receives 'garbage' from the GNSS module, the initialization sequence will be sent to the module. You can disable this behavior here, i.e. when you use a module which is not supported.
- Use SBAS
- Enable receiving of correction data (EGNOS, WAAS). You need a good position for your antenna! If available, you can see the SBAS satellite on the status page. There's almost no advantage, so we recommend to leave this option unchecked!
- GNSS
- Select the desired GNSS. Which constellations are working depends on your GPS module. In case of a known GNSS module/chipset unsupported combinations will be hidden.
Amplifiers 1/2
Parameters
- Enable Potentiometer (RED only)
- Enable the manual adjustment of gain on the amplifier PCB. The green LED will be disabled and the yellow ones show the gain. The controller will still read the gain values, but does not set them.
- Channel A/B/C Gain
- Manually set gains. The first gain should be set higher than the second one for better signal to noise ratio. The manual gains might be lowered in case of too high amplitudes or automatic adjustments.
- Start with a low gain, preferably the first of the two factors is the higher one, the second the smaller one. Increase the gain until you see a noise level of 20 to 25 mV on the Signals page.
- Channel A/B/C HP (Highpass)
- *High pass filter on/off depending on you needs. Note: HP on multiplies the gain by a factor of 4.
- Channel A/B/C Status
- With 'don't send', the particular channel won't be send to the servers, but it can be used for trigger and you can still see it in the plot. With 'Disabled', the channel will be ignored.
- If you have channel without antenna, you should just set to "Disabled". If you have a channel with antenna, but it's not working, you should set it to 'Don't send'.
- Channel A/B/C Threshold
- The threshold values will be converted to the real threshold values for the ADC, regarding offset and channel mapping. Enter 0 to disable trigger on this channel.
- As a start, you can set it two times the noise level you see on the signals page.
Note
If several amplifier channels are mapped on one ADC, the threshold is used for all amplifier channels together or for a single channel. The maximum threshold will be used as the common ADC threshold. For RED: If you have enabled the 'Alternate Channel Mapping', then this threshold sharing is done between channels A+B of an amplifier.
- Disable Noise Adaption
- When noise adaption is enabled, this will disable the adaption on this particular channel.
- Disable Auto Ampl. Filter
- When the amplitude filter is enabled, this will disable the amplitude filter on this particular channel.
Filters
This section is only visible when the amplifier has been built with the
- Channel A/B/C Filter
- Enter the desired filter frequency. The checkbox allows enabling/disabling without changing the frequency value.
To do: Better description needed (frequency range, etc.)
Sampling
A/D Converter
- Samplerate
- Leave at 500kHz. If set to 0 kHz the internal ADC sampling timing parameters can be changed.
- Please leave at 500kHz for normal operation. However, you can experiment with it and carry out tests, for example to see much more details in the signals with higher sampling rates.
Maximum/Minimum Frequencies
There's an upper limit depending on how much channels are sampled. For two channels it is 2809kHz, for more than three channels it is 1405kHz. Too low sampling rate will slow down the controller on high signal rates, at the CPU has to wait for each sample until all values have been read.
- Force all channels on (RED only)
- When enabled, all three channels on both amplifier connectors will be enabled. In this case you should enable 'Ignore Signals Below Threshold' to limit traffic (10% is a good value).
- Alternate Channel Mapping (RED only)
- Instead sharing same channels of two amplifiers on the same ADC, channels A+B of a single amplifier will share the same ADC. Thus, threshold settings aren't shared between two amplifiers, but between two channels of the same amplifier. Note: It has no effect on channel C of both amps, which are always shared on one ADC.
The following settings are only visible when 'Samplerate' is set to 0 kHz. Too fast sampling can overclock the A/D converters! These settings were used in older firmware versions when we didn't have the ADC timer implemented.
- Cycles p. Sample 1:
- ADC clock cycles for one sample. The lower the values, the faster the sampling rate. Default is 56.
- Cycles p. Sample 2:
- ADC clock cycles for one sample when in 4-6 channel mode. The sampling frequency for a single channel has to be divided by 1. Default value is 28.
- Resolution
- You always should use 12bit. Sampling rate depends also depends on this value.
- Clock Divider:
- Set the clock divider. Note: The default setting is 2, which gives a clock of 42Mhz. The max. speed listed in the datasheet is 36Mhz, so we have a slightly over-clocked ADC by default.
Analog user input (RED only)
The analog user input is an optional feature, which has nothing to do with lightning detection. When enabled, you can measure DC voltages from -3 to 30V at the measuring point. You will see them on the web-interface below CPU temperature and on the LCD on the first page. The voltage range can be changed by replacing resistors R64 and R65 with other values. You also have to change those values in the settings section on the web-interface. The default values are 10kΩ for the serial resistor Rs (R65) and 1kΩ for the RGND (R64). If you enter 0 for the RGND, then original voltage on the ADC-input pin will be shown.
Please note, that only voltages with low impedance can be measured, i.e. voltages from a power supply or from a battery. The STM32F4DISCOVERY has an additional 10k pull-up to 3V included, which cannot be changed. As the used CPU-pin is also dedicated for a special function on the STM32F4DISCOVERY, a green LED will light up there when low voltages are applied.
Danger
Use this feature at your own risk! Wrong resistor values and/or too high voltages can damage your system!
- Enable User Input
- You can sample a voltage, which is connected to the MP pin. Only for those who now what they are doing!
- Resistors
- The controller uses the values to calculate the correct voltage. Solder the correct ones depending on your needs.
Buzzer
- Tick on signal
- Tick when a signal has been received (and sent).
- Tick volume
- Volume of the tick sound.
- Beep on boot
- Toggles the first beep after startup.
- Beep on error
- A low beep on different error conditions, like GPS, Network, Amplifier fails. If the error is gone, there's a high beep.
- Beep on interference
- A short deep beep when there are too much signals. The beeps are shorter than the error beeps.
- Delay for interference mode
- Delays the beep for interference mode. Useful when it switches on/off in short time periods. A value of 10s or more is recommended.
- Beep volume
- Adjust the beep volume.
LCD (RED only)
- Brightness
- Sets the backlight brightness. Default value is 70%, so even when using wrong resistor values, the blue/amber LCDs should not get damaged. The brightness is regulated via PWM. Set to 0% or 100% to disable PWM.
- Contrast
- Sets the contrast voltage, which is around -4V. It also depends on your supply voltage. When set to 0%, there will be no communication at all. This reduces noise spikes on very low threshold settings.
- Backlight Dim
- The time is measured after last push of the blue button. This function saves up to 6kWh per year for green LCD ;-) .
- Auto Off
- Disables LCD completely after given time after last button press. It disables all communication between controller and display.
- Auto loop pages
- If disabled, LCD will stay on the last button-selected page and it will always come back there even if there has been an intermediate event. The selected page will be stored in your settings when saving them.
- LCD blinking on action
- Blinking LCD on actions (i.e. lightning alerts)
- LED off when LCD off
- The users LED stay off when the LCD is off
System
System
- Check voltages
- Checks the 5V USB voltage and the 3V CPU voltage every second for under-/overvoltage. Disable if you get wrong values too often.
- Default: Enabled
- CPU Sleep
- Sets the CPU to sleep mode when idle. Saves up to 40mA. Network responses could take slightly longer.
- Default: Disabled
- Flash Prefetch
- The flash prefetch speeds up execution time, but creates some noise in the ADCs. Disable if you need higher ADC accuracy.
- Leave it on for normal operation. More information can be found
here . - USB Virtual COM Port
- When enabled, log messages will be send through the USB connection. Windows users need a driver. NOTE: The connection gets lost during reboot. To see all messages, you have to use the serial port of the controller.
- More information can be found
here . - Daily Reboot
- Reboot the controller at specified time. Possible values are 00:01 to 23:59. Leave empty to disable automatic reboot (recommended).
- I2C Speed (RED only)
- Currently for AS3935 only! Max. possible speed is 400000 Hz
- Firmware Autoupdate
- Automatically check for new firmware versions and install them.
- An automatic upgrade has to be triggered by the server and the firmware file must have a valid signature. More information can be found
here .
This feature is still beta but you should leave it enabled.
Debug
Warning
The debug options are only for debugging purpose. They can slow down your controller and may create a lot of traffic. Don't enable them if you don't know what you are doing!
- Debug Tracker
- Information about storing and examining the signals.
- Debug Tracker Auto Adjustments
- Print information about the automatic noise adaption feature.
- Debug Tracker Filters
- Print information about signal filters
- Debug Tracker ADC
- Print information about selected ADCs, thresholds etc.
- Debug GPS
- Prints the communication between GPS and controller. Useful on GPS problems.
- Debug UDP
- Prints the content of every UDP packet. This will slow down you controller dramatically!!!
- Debug Signals
- Some information about signal examination.
- Debug Amplifiers
- Prints the communication between amplifiers and controller.
- Debug HTTP Remote Config
- Shows data transmitted from/to control server via HTTP.
- Debug HTTP Server
- Shows accesses of files through the webserver.
- Debug Network
- Shows network/firewall logs.
- Debug Encryption
- Shows information about ciphers, certificates, RNG etc.
- Debug I2C
- Shows I2C debug messages (for AS3935 only).
- Debug Action/Alerts
- Shows debug messages from actions and alerts.
- Debug Memory
- Shows memory allocation.
- Hide Hardfaults
- Don't print information when hardfault occurred.
- Syslog Server IP
- IP address of the syslog server where the debug messages shall be sent to.
- Due to performance reasons it is not 100% compatible to RFC 5424, but it works with most syslog servers.
Actions
An action can be triggered by a lightning alert or by other events (see next sections). The action defines which alarm sound should be played or whether an output pin should be enabled. A user defined URL can be called, which can be used for own purposes. After an action has been issued, it can be ignored for a adjustable time. An action can also be used by different events.
- Name
- Desired name of the action. If empty, the action settings are not available.
- Sound
- Select desired sound, its volume and cycles. Depending on the sound, behaviour of cycles is different. If you set cycles to '0', then the cycle count will be higher (up to 5 times) on higher event levels (i.e. on closer lightning distance). 'Beep by level' always uses this behaviour, so cycle count is for cycling the grouped beeps. You can test the current settings with the 'Test' link, without saving them.
- Ignore for
- After the action has started, it will be disabled for given time.
- Output (RED only)
- The output will be triggered to its non default value for the given time.
- URL
- The URL will be called on every action.
Alerts
Lightning alerts can warn you with different actions (i.e. sounds) about approaching thunderstorms. The alerts are based on the TOA lightning data from our servers. You can specify your desired parameters like minimum distance, stroke count and time period. These values will be checked by our servers by the remote configuration feature. If the alert conditions are true, then a desired action will be issued.
Danger
Do not use these lightning alerts as the only source for protection of life or property! We can not guarantee for availability and quality of this feature! The alerts are not available when in "Monitor Mode".
- Min. Strokes
- Minimum stroke count and radius around your station. If count is zero, all other options are hidden.
- Action
- The action which will be started when the above conditions are met.
I/O (RED only)
Some pins of the STM32F4-MCU can be used as user defined inputs or outputs.
If defined as an input, a rising and/or falling edge (configurable) can trigger an action (see 5.6.1). Additionally, an URL can be called. This URL will contain parameters with the time-stamp of the trigger derived from the GPS 1PPS timer. Thus, it is possible to use the inputs for high-precision timing measurements.
Outputs are configured in push-pull mode. Each output can drive currents up to 20mA. The summarized current of all outputs shouldn’t exceed 50mA. Please check the STM32F407 datasheet for more information! An output can be toggled by calling a dedicated URL of the web-interface. Outputs can also be triggered by actions (see 5.6.1). As an example, it is possible to let a LED blink on a lightning alerts.
Danger
This feature is for experts only! Be careful on changing settings and/or modifying your hardware! Never connect switches/buttons without series resistors to the ports! Otherwise short-circuits could destroy the MCU!
User I/O
- URL
- This URL will be called when an input changes. The parameters 'pin=PPP&status=X&time=YYYYMMDDhhmmss&nsec=NNN' will be appended. PPP is the pin name, like 'PB2'. X is the status '0' or '1'. If GPS is available, the time with nanoseconds of the interrupt is appended. If not, the nsec parameter is '0'. Example: http://example.com/test.php?pin=PB2&status=1&time=20131125181932&nsec=847145393
- Debug
- Shows extended information on the debug console.
- I/O Pins
- Select the type (In or Out or Disabled), desired trigger and default state for each pin. For inputs a pullup/-down resistor can be enabled too. Outputs can be changed by calling 'http://IP-Address/index.cgi?action=output&status=X&pin=PPP'. X can be '0' for off and '1' for on. PPP is the name of the pin, like 'PB2'. No authentication is required for calling this URL!
- Action
- Select an action which will be started when the port was triggered.
AS3935 (RED only)
The AS3935 is a new microchip from austriamicrosystems, which has some lightning detection technique inside. It has been designed for mobile devices, which can inform their users about regional lightning activity. The signals from lightning strokes are received by a tiny ferrite antenna, which is tuned to 500 kHz. Compared with our own powerful amplifier/controller combination, the AS3935 is very simple and cheap, but it can not be used for lightning locating. Complete PCBs with microchip and antenna are available from different distributors.
The AS3935 can be connected to our controller board via I2C bus with 5 wires. Almost every parameter can be adjusted in the web-interface. The calibration of the antenna is done automatically after boot and after each parameter change. Refer to the AS3935 datasheet for more information about the parameters. When the AS3935 detects lightning, different actions can be started, depending on lightning count and distance (see actions_and_alerts).
Danger
This feature is for experts only! Do not use the AS3935 lightning alert as the only source for protection of life or property!
AS3935 Lightning Detector
- I2C Address
- I2C address of the AS3935. It can take up to a minute until it appears. You can also save to flash and restart, then should appear immediately. Note: Avoid address 0x0.
- Debug Messages
- Prints debug messages from the AS3935. You can see them in the debug log.
Register Settings
- Tune CAP
- Set the correct tune capacitor value or let the auto calibration do the job for you.
- Noise Floor
- Threshold for the noise floor limit (Indoor/Outdoor values). Whenever the noise floor level crosses the noise threshold, the AS3935 cannot operate properly due to the high input noise received by the antenna.
- Noise Auto Raise
- Automatically raises the noise floor setting, if there is too much noise. This prevents, that the AS3935 stops working, if the noise floor raises suddenly. If the value has been raised, lower values will be checked from time to time. It will never go below above 'Noise Floor' setting.
- Outdoor
- Enable when using outdoor (lower gain). You should enable this checkbox even when using the module indoors, otherwise the detection rate can be very poor!
- Ignore Disturber
- Doesn't show disturber on the interrupt pin.
- Signal Threshold
- Higher thresholds lowers sensitivity for very far lightning events, with an improvement of the man-made disturber rejection as benefit. '2' is the default value by the manufacturer.
- Spike Rejection
- Checks the shape of the received signal. Reject the impulse signals, like spikes, picked up by the antenna. Larger values correspond to more robust disturber rejection, with a decrease of the detection efficiency. '2' is the default value by the manufacturer.
- Min. Number of Lightning
- Issue lightning events only if a minimum number of events have been detected in the last 15 minutes.
Alerts
- Min. Lightning Count / Min Distance / Action:
- Enter non-zero values in these fields and choose the desired action to enable alerts for AS3935.
Tools
Firmware
- Upload Firmware
- Upload a firmware file to flash memory, but does not overwrite current firmware. Your device won't get damaged if there's a failure during upload!
- Flash Firmware
- Firmware files will be verified with those on the servers by a MD5 checksum. You should only flash verified firmware files!
- DFU Mode
- Enter DFU mode (
DFU flash how to )
Playback
- Amplifier 1/2
- Select which amplifier channel to play/stream. This also applies to the buzzer playback. In audio stream each additional channel will need extra bandwidth. One channel will create a mono audio stream, two channels stereo and more channels create a multi channel stream which might only be useful when you want to analyze the stream further with software tools like Audacity or SpectrumLab. {: #bst_line_input_buzzer_amp1 }
- Sampling
- Provided sampling rates are derived from A/D rate divided by 2, 4, 6 and so on. ADPCM sampling transfers only 4bit per sample but is almost as good as 16bit PCM, but it is not lossless and not supported by in browser playback (i.e. use VLC). {: #bst_line_input_stream_sampling }
- Options
- Allows you to set all samples to (almost) zero which are below thresholds, so you only hear the sferics. {: line_input_stream_options }
- Stream
- You can use the link in apps like VLC VideoLAN for live playback. The sample rate in the URL can be adjusted to different values, depending on your needs. {: line_input_stream_url }
More details see
Signals
Signal Tools
- Test Signal
- Here you can enter a test signal which will be injected into the onboard amplifiers for testing the filters.
- Sampling
- Enables sampling of the 1PPS pulse of the GPS or system voltages module with the highest possible sample rate. When 1PPS is selected, the buzzer ticks on every 1PPS pulse. Don't forget to disable this mode after you have done your tests. You can should zoom in by limiting the time (x-axis).
Technical reference
2414 words Estimated reading time 10 minutes
The following sections describes some technical details of the software.
Communication
The controller uses two ways to communicate with different servers. HTTP(S) for general configuration and control (BORC - Blitzortung Remote Control) and UDP for the signal data. Both different connection methods make the system very flexible and reliable. UDP for sending the signals reduces overhead a lot and fits perfectly our needs. We measured a packet loss much lower than 1% even on long distant connections.
graph LR

A{Controller}
A <-->|HTTP| B[BORC Control Server 1];
A --->|UDP| D[iBOD Computing Server];
D -->|UDP| F[BOD Computing Server 3];
D -->|UDP| G[BOD Computing Server 4];
A <-.->|HTTP| C[BORC Control Server 2];
A -.->|UDP| E["BOD Computing Server (Backup)"];
BORC Control connection (HTTP/HTTPS)
A HTTP connection is used for bi-directional communication. On the one hand, the controller sends information about itself, like status of GPS, amplifier, CPU or signal statistics to a control server. On the other hand, it gets information from the control server. For example, the controller gets its station-id, which computing server to use and whether a new firmware is available. The server can also change gain, threshold, sampling settings and a lot of other values.\The control connection has a also fall-back mechanism included: If a HTTP-connection to the control server cannot be established, it tries to connect to other servers, until it gets valid information.
Since firmware 10 this connection will be encrypted by default.
Signal packets (UDP)
For each signal, the controller sends a UDP packet with the needed data to at least one computing server. The main information included in such a packet is the time-stamp of the trigger. The signal data itself is included in binary format (see
The protocol is flexible and data which didn’t change since the last packet doesn’t need to be transmitted again. That could be sampling settings or gain levels. This saves traffic and processing time on client and server side. However, traffic can get high when receiving a lot of signals, i.e. due to high thunderstorm activities or due to interference. We cannot give a concrete value, but we’ve already seen stations with 300MB/day. There are some mechanism implemented to reduce traffic and we are already thinking about further improvements here.
Note
We use UDP as it uses much less resources than TCP connections where the data would stay in RAM memory until the transmission will be acknowledged (ACK) by the server. The usable memory size is just a few dozen kilobytes. In case of consecutive signals within a short time (which is common for lightning) no memory would be left for sending the next packets.
UDP Fragmentation and MTU size
The size of each UDP packet depends on the signal form, its encoding, compression and number of channels. Sometimes the UDP data packet exceeds 1500 bytes which is the maximum packet size for ethernet frames. Such a packet will be sent fragmented. Such big fragmented UDP packets often get lost on the way to our servers, i.e. on the home router, the internet provider or on some router in the data center.
This problem is solved for most users by using a lower MTU of 1480. This also affects other traffic (TCP, HTTP), but this shouldn't be noticeable at all. Using smaller packet sizes just only for signals packets is currently not possible.
Note
Starting with firmware 10 it is not possible to set a MTU higher than 1480. There will also be checks on the server side to identify packet loss.
Encryption and privacy
Web Interface
There's no encryption (HTTPS) for the web interface and there are no plans to add support for that due to limited hardware resources.
Starting with Firmware 10 the whole traffic between stations and servers can be encrypted. We are using best practice methods keeping your data secret from others. The control connection uses TLS 1.2 with ECDHE key exchange and AES-GCM encryption (TLS-ECDHE-RSA-WITH-AES-128-GCM-SHA256/-AES-256-GCM-SHA384 or TLS-RSA-WITH-AES-128-GCM-SHA256/-AES-256-GCM-SHA384). The public CA certificate can be downloaded here. The TLS buffer size is just around 6kB instead of standard 32kB like in browser (which would be almost all free RAM).
For encryption of the signal packets a unique key will be sent over the control connection. This key will be replaced by a new one after some hours. These keys are only known by our servers. The key is used to encrypt every signal packet with AES-GCM algorithm.
Encryption uses some CPU resources and a few extra kilobytes of RAM. The theoretical max. number of signals per second will drop by ~10-20%. For performance reasons you can disable encryption for HTTP and/or UDP completely.
Warning
Unencrypted communication will make it easy for others to assign your IP with the position, the station ID and the CPU ID of your controller. Unencrypted control connection will send the key as plain text which makes it easy to decrypt signal packets.
Signal detection and processing
The following list summarizes that and gives a short overview what happens when a signal on a single channel gets received:
- Electromagnetic fields induce a small current in the antenna coil.
- The signal is amplified and filtered on the pre amplifier board.
- The signal is transmitted through the cable to the controller board.
- The signal is amplified and filtered several times in the amplifier
- The signal lies on the input of an A/D-converter integrated in the MCU. It samples the voltage with about 500,000 times per second (minimum) and stores this value in a register.
- The DMA controller reads the register values of all three ADCs at once, and saves them one after another in memory. This memory block has a size of several kilobytes.
- A watchdog compares the ADC-register value with a threshold. If the threshold is reached, an interrupt is generated.
- The interrupt functions checks the 1PPS timer value and reads the needed ADC-samples from the memory block. This is the first time, where the CPU is needed.
- Depending on settings, the recorded signals are checked and filtered.
- The values of the triggered channel and the other channels as well as other information are send within a UDP packet to the computing server.
Firmware implementation
The firmware is bare metal micro controller software. That means, no operating system like Linux or an embedded real-time-operating-system (RTOS) is used as a base. This saves space and gives full control over all peripherals. The firmware has been built with the GNU Tools ARM Embedded toolchain. There are some 3rd party libraries included, which are listed in the About section of the web-interface.
Start-up Sequence
After a reset or power-on, the controller initializes itself and peripherals, like CPU clocks, real time clock, I/Os, amplifiers and USARTs. The configuration is loaded from flash. The LEDs and LCD light up and there should be two beeps: A first start-beep and a second beep for a successful initialization of an amplifier. While this boot-sequence takes less than 3 seconds, some additionally initialization will run in the background.
The GPS-module has to lock position and 1PPS signal, which can take several minutes after a cold start. Additionally, the controller checks for valid communication with the GPS and, if needed, initializes the GPS with the defined baud-rate.The assignment of a network IP address by your DHCP server can also take some seconds. As soon as the controller has a IP-address assigned, a HTTP-request servers will be sent. The response contains information like computing server address or station id.
After all these processes have been finished successfully, the controller starts sending data.
GPS
The main purpose of the GPS is the 1PPS signal which gives all worldwide station the same absolute time base. The 1PPS-line is directly connected to an I/O pin of the MCU. It is also connected to an ADC input pin to check the quality of the 1PPS-pulse in case of an error.
Real-Time-Clock
The MCU has an integrated real-time-clock (RTC). It’s only used for internal functions to be independent from GPS time. The time settings stays even when the controller has been resetted. The RTC is adjusted automatically by GPS or remote configuration. It supports UTC time only.
Flash and settings
The flash not only contains the firmware, but also user settings which can be changed through the web-interface. If no settings are present in the flash, then default ones are used.
By design, flash has several limitations. You don’t have to care about them, as the firmware already does this. One limitation is, that the whole flash area is divided into sectors. Before writing on a position which already contains data, the whole sector has to be deleted and rewritten. Most sectors in the STM32F407 CPU have a size of 128kB. Thus, a simple change of a small entry in the flash needs a full rewrite which is not so easily possible due to lack of RAM. Additionally, the flash tolerates "only" 10000 erase cycles. This is far enough, even when rewriting flash several times a day.
However, the controller downloads new configuration settings, proposed by the server, several times per hour. Due to reasons mentioned above, those settings won’t be stored in flash memory. In the current firmware, all flash operations must be done by the user himself.
Flash prefetch
For fast code execution STM32F4 can use flash prefetch. Unfortunately this may creates some noise spikes in the signals:
Prefetch is off on the two left signals and on the right ones. The far right signal has much more spikes until trigger, where the CPU enters the interrupt routine.
Backup registers
These registers keep their values upon reset. Smoothed GPS position is saved there. After a software reboot this saves some time as no check for stable position is needed.
Backup RAM
The content of the backup RAM survives upon reset. Its currently only used for debugging.
Hardware Watchdogs
If the controller hangs due to a software bug or due to external impact, an integrated independent hardware watchdog will reset the CPU. The watchdog can only be disabled by pressing the blue button during start-up. It’s not possible to save that to flash.
The STM32F4 on the controller board has brown out watchdogs enabled (the ATMega8 on RED amplifiers too). If there’s an under voltage, a internal reset will be triggered. The brown out watchdogs cannot be disabled. With all those watchdogs enabled, the system should always be accessible.
Timers
The firmware uses some of the hardware timers for measurements and/or interrupts. The most important one is again the 1PPS timer, which runs at 84MHz. That means, the timing of the 1PPS signal can be measured with an accuracy up to 12ns - theoretically.
| TIMx | Freq./Periph. | Ch. 1 | Ch. 2 | Ch. 3 | Ch. 4 | TRGO |
|---|---|---|---|---|---|---|
| 1 | Filter clock 1 | X | ||||
| 2 | 1PPS/84MHz | Read data | PPS capture | |||
| 3 | LCD Contr. (RED) | X | ||||
| 4 | Filter clock 2 | X | ||||
| 5 | ADC clock | ADC | ||||
| 6 | Buzzer | DAC2 | ||||
| 7 | Sig. Test | DAC1 | ||||
| 8 | Filter clock 4 | X | ||||
| 9 | Filter clock 3 | X | ||||
| 10 | LCD Backl. (RED) | X | ||||
| 11 | free | |||||
| 12 | 1MHz | ADC Delay | ||||
| 13 | variable | BUZZER Delay | ||||
| 14 | 400kHz | MSEC Timer | ||||
| Systick | 1kHz for Delay() | |||||
| RTC | 1Hz, uses LSI* |
* LSI: low speed internal clock, which is not very accurate. RTC adjusted by GPS.
1PPS capture
The 1PPS timer value will is captured and set to 0 on each 1PPS pulse. The accuracy of the 1PPS pulse is far enough for our needs. The timing difference between different GPS modules has been tested and the difference is just a few nanoseconds. The length of the antenna cable has more effects:
blue: u-blox, yellow: MT3333 (BLUE), purple: MT3339 (RED) with external (left) and internal (right) antenna
DMA
Several peripherals are configured to use DMA access:
- ADCs: which stores all their samples in RAM all the time (up to 150MBit/s)
- DAC: for playing buzzer sounds
- GPS USART: receiving the position data
- Debug USART: Sending debug messages.
- Signal Test: Injecting test signals into on board amplifiers via DAC
| DMA | Stream | Channel | Peripheral | Priority | Comment |
|---|---|---|---|---|---|
| 1 | 5 | 4 | GPS Rx | Medium | |
| 1 | 6 | 7 | DAC2 (Buzzer) | High | |
| 1 | 4 | 4 | Debug Tx | Medium | |
| 1 | 5 | 7 | DAC1 (Signal Test) | High | BLUE only |
| 2 | 0 | 0 | ADCs | VeryHigh |
IRQ
Interrupts are used by a lot of different peripherals, mainly:
- 1PPS timer capture
- ADC watchdog
The 1PPS-IRQ has the highest priority, which means that a 1PPS impulse from the GPS, immediately will stop the current routine and enters the 1PPS-IRQ function. The ADC-IRQ has "only" the second highest priority. There are a lot of other interrupt sources, where the timing is not so important.
ADC
The MCU has three A/D converters. Each of them can sample several input channels (0-17). The sampling rate can be adjusted by an external timer or by the ADC itself. Both modes are implemented in the firmware. The three ADCs can run simultaneously with different inputs or they run interleaved to sample the same input channel very fast. This can be used sampling 1PPS signal (timing check) or input voltage (check for power supply quality).
| Ch. | RED | BLUE | ADC1 | ADC2 | ADC3 |
|---|---|---|---|---|---|
| 0 | Button | dummy | x | x | x |
| 1 | 1PPS Test | 1PPS Test | x | x | x |
| 2 | GPS Rx | GPS Rx/dummy | x | x | x |
| 3 | Eval Digital | --- | x | x | x |
| 4 | DAC Out | --- | x | x | NC |
| 5 | Buzzer Out | Buzzer Out | x | x | NC |
| 6 | Eval Digital | --- | x | x | NC |
| 7 | Eval Digital | --- | x | x | NC |
| 8 | Amp2 Ch2 | Amp2 Ch2 | x | x | NC |
| 9 | Amp2 Ch1 | Amp2 Ch1 | x | x | NC |
| 10 | U_USB | U_USB | x | x | x |
| 11 | Amp1 Ch3 | Amp1 Ch3 | x | x | x |
| 12 | Amp2 Ch3 | Amp2 Ch3 | x | x | x |
| 13 | Eval Mic. | --- | x | x | x |
| 14 | Amp1 Ch2 | Amp1 Ch2 | x | x | NC |
| 15 | Amp1 Ch1 | Amp1 Ch1 | x | x | NC |
| 16 | Temp (int.) | Temp (int.) | x | NC | NC |
| 17 | V_refint (int.) | V_refint (int.) | x | NC | NC |
Italic means that there is a non analog part connected to the corresponding pin.
DAC
Digital analog converters for outputting signal waves.
- DAC1 is used for signal test injection (BLUE only).
- DAC2 is used for buzzer.
USARTs
| U(S)ART | Baud | Rx | Tx |
|---|---|---|---|
| 2 | variable | GPS | GPS |
| 3 | 4800 | Amp 2* | Amp 2* |
| 4 | 115200 | Debug | Debug |
| 5 | 4800 | Amp 1* | --- |
| 6 | 4800 | --- | Amp 1* |
* RED only
SPI
| SPI | Periph. | Speed | Mode |
|---|---|---|---|
| 2 | ENC28J60 | 84MHz / 4 | Full Duplex 2 lines |
| 3 | Gain | 84MHz / 128 | Tx one line |
I2C
- I2C1 is used for AS3935 (RED only)
RNG - Random number generator
The random number generator is used for generating entropy for encryption.
USB
USB can be used as virtual COM port or in DFU mode.
Ended: Station operation
Web ↵
Web pages
2 words
Ended: Web
Apps
56 words
The developers behind Blitzortung.org and Lightningmaps.org currently don't provide any native apps for Android or iOS. You can use both websites as web apps by adding them to the home screen.
The following apps are provided by station operators or partners:
Android
Blitzortung ⧉ by WuAn
iOS
BlitzortungLive ⧉ by Marco Bauer
HomeAssistant
homeassistant-blitzortung ⧉ by Mariusz
FAQ
1624 words Estimated reading time 6 minutes
Note
FAQ for station operators can be found here.
Frequently Asked Questions
Where can I get a lightning detector for participating Blitzortung.org?
Register here if you want to buy a kit and participate in the network: Cover Your Area ⧉. The form is roughly in the center of the page.
First of all, you have to assemble your lightning detector by yourself. We do not offer complete assembled station. We only offer certain parts or kits. Sometimes participants of Blitzortung.org assemble stations for friend and others. We cannot give here any names or addresses of these friendly people. The best place to find them is a forum. This is the link to the lightning location forum.
What is the price?
The total price for the necessary parts is less than 300 Euro for System Blue. The prices will differ from country to country. Note that this is only the price for the material really necessary. It does not include a housing for the assembled boards or the material to mount the antennas under the roof or outside. However, it is not strictly necessary to use a housing or a water proof out-door mounting. Many participants have mounted the components on a plastic board and use ferrite rod antennas in-doors. What you additional need in any case is a wired internet connection, two days of time for assembling and installing such a system, and some experiences in soldering electronic components. Building a lightning detector and its operation is not plug and play.
How do I check where I am on the waiting list?
You can query your rank, by sending a request with the same email address here: Cover Your Area ⧉. The form is roughly in the center of the page.
What do I have to know to be able to assemble and run such a system?
- You own a file, a solder iron for electronic parts and an assortment of screwdrivers and you are able to use these tools.
- You are not afraid of soldering electronic parts to a PCB.
- If you want to build your own antennas you may benefit from some electromechanical skills.
- You have a quiet place for the antenna. Quiet means low electromagnetic noise. It is not the best idea to place the antenna above the micro wave between the TV set and the PC. It should be as far away from electronic devices and power lines as possible.
- You have an Ethernet port at this quite place. If not, you are able to get one there.
- This Ethernet port has a constant connection to the Internet. There is some data throughput. It can be up to one gigabyte per day.
- You need a power supply, for the station (and the network equipment). It may be PoE, it may be a wall wart power supply or a linear power supply.
- You have some device with a web browser to use the web page of the controller for status display and settings.
What is the detecting range of a station?
This question is similar to the question "How far can I see?" If it is foggy, you cannot see more than 50 meters, but on a starry night you can see stars having a distance of lightyears. If a lightning discharge is very strong and the propagation conditions are well, the signal can be received over several thousands of kilometers even with small antennas. This is the case especially at night over the ocean. If a lightning discharge is very weak, it is difficult to receive it even with large antennas in a distance of only 50 km. When using 20 cm ferrite rod antennas you will receive signals from thunder storms up to 1000 km at day, and over 2000 km at night. If you use larger antennas in more quiet environments, the signal to noise ratio will increase, and you can receive signals up to 3000 km. This also depends very much on the location of the antennas. The range will increase dramatically if your antenna is placed in an electromagnetically quiet area outside a city on a hill and it will decrease if it is placed in an urban area inside a building.
Some participants are more interested to receive close lightning discharges instead of distant lightning discharges. They waive the long range fine tuning and concentrate to trim the system for close lightning discharges. The challenge to receive close lightning discharges such that they can be used for the computations is to separate pre- and post-discharges from the main stokes.
What is the detection accuracy of the system?
The answer to that questions is not so easy, as we would have to compare the positions from a lot of observed strikes with those we measured. You are welcome to report strike observations to us, but you must write down the exact time and position of the strike! You can also use a video-camera for this purpose.
There is another method to estimate the accuracy: Some tall structures, like antenna masts, radio towers or wind mills are struck much more often by lightning than other areas. When displaying all detected strokes of a long time period (i.e. one year) on a map, a cloud of strikes can be seen around some of those tall structures. This cloud has a diameter of roundabout one kilometer for countries with a high station density. That’s all we can say. We currently don’t have any authoritative scientific values for that. Please note that this method doesn’t say anything about the accuracy of a single stroke. We also cannot tell you anything about the strokes, which are misplaced by several kilometers.
The accuracy varies much in different regions of our network. Higher station density will increase the accuracy and yield for that area. That’s why additional stations are needed even in those areas where you already can see lightning data. See also Question 6.
Does the Blitzortung.org network register every stroke?
No, probably not. It depends mainly on station coverage of the specific region. In regions with low station coverage, almost only the strong lightning discharges will be detected, as their signals can be received easily in a distance of several thousand kilometers (see Question 2). These are mainly CG ones (cloud-to-ground). The power of IC lightning (intra-cloud) is lower and the alignment of our antennas is optimized for CG.
Can you differentiate between CG or IC lightning and show polarity and current?
Currently not, but it is planned. The RED and BLUE stations already provide all needed data to determine the values. Please note, that several estimations have to be made, so these values can be inaccurate. But it’s the same for all other lightning detection systems. Even if some commercial networks say that they can always clearly differentiate between CG or IC, there’s also a big uncertainty.
What are the best distances between the detectors?
Lightning detectors are best placed in a distance between 50km to 300km around the lightning discharges. However, even if there is another station nearby, it is still interesting for the project to place a station beside the existing one. The reason for that is very simple. Only 50 % of all stations will work continuously and only 50 % of the running stations are perfectly adjusted. The TOA lightning location network is based on "Give and Take". Your station best contributes to the computations if it is placed in a distance between 50 km and 300 km from the discharge. If the storm is nearby, your station usually overrides. Even a very low pre-discharge will cause a very high signal strength because of its low distance.
Can I get the source code for the Firmware and the layout data of the PCBs?
In recent years, our lightning detection system growth and become more popular and more successful. Unfortunately, this also increased the number of people who just want to copy our system instead of joining our community and working together with us. To protect our work in that we have invested several thousands of hours of our free time, we provide the sources of the Firmware only for selected familiar members of the project which we already know for a long time.
Can I make own PCBs
Yes, you might do that, but please contact us before. Please note, that we’ve designed our current PCB layout the way it is for a good reason. There are always improvements possible, but not all make sense when regarding the whole process from testing, manufacturing, assembling to support. We release new PCB versions from time to time to improve the system and to add new features. If you have own suggestions, then you are welcome to tell us about them, so we could integrate them in the next release.
Warning
If lightning detectors don't provide the same signal quality and characteristics GPS 1PPS timing as our own detectors, the resulting lightning detection accuracy from our servers can get worse or even fail. Keep this in mind when designing and building stations with own hardware and sending the data to our servers.
Is it possible to build such a hardware with RaspberryPi, Arduino or similar?
Theoretically yes. But you always would have to connect separate (expensive) A/D-converters, because most of such CPUs have only bad or slow ones integrated. Our CPU has them implemented on the same die. Other hardware can have different behavior regarding timing. An 100% equal timestamping of all stations is very important for a good accuracy. For the same reason, we use a bare metal firmware without any OS. This gives full control over the hardware and its timing.
Appendix
382 words Estimated reading time 2 minutes
Abbreviations
- Blitzortung
- German for lightning (Blitz) locating (Ortung)
- TOA
- Time-of-arrival. The Blitzortung.org and almost all commercial lightning detection networks uses the TOA method for accurate locating of lightning strokes.
more - DF
- Direction-Finding. A method for locating lightning strokes. Not as accurate as the TOA-method.
more - E-field
- Electric field. The counterpart of the H-field in an electromagnetic field.
more - H-field
- Magnetic field. The counterpart of the E-field in an electromagnetic field. Can be detected with magnetic field antennas, like loop or ferrite antennas.
more - GPS
- Global Positioning System. A satellite navigation system that provides location and time information anywhere on the Earth. Maintained by the United States government.
more - GNSS
- Global Navigation Satellite System. A system that uses satellites to provide autonomous geo positioning like GPS, Galileo, GLONASS or Beidou.
more - SBAS
- Satellite-based augmentation system. Improves the navigation system's accuracy through the integration of external information into the calculation process. These external information are broadcasted to the GPS receivers by satellites.
more - 1PPS
- One pulse per second. A very accurate pulse from the GPS module which can be used for exact absolute time measurements. That means, all clocks of all world-wide stations show the same time with a deviation of a few dozen nanoseconds. This is essential for the TOA method. ADC or A/D Analog-to-digital converter. Converts a continuous voltage to a digital number.
more - MCU
- Micro Controller Unit. A small computer on an integrated circuit containing a processor core (CPU), memory and peripherals.
more - PCB
- Printed Circuit Board.
more - UTC
- Coordinated Universal Time which is equal to Greenwich Mean Time (GMT). All time stamps used for computing the lightning data use UTC as time base.
- VLF
- Very low frequency. Radio frequencies in the range of 3 kHz to 30 kHz or wavelengths from 10 to 100 kilometers. The most powerful emissions of lightning discharges occur in the VLF range.
- sferic
- An abbreviation for radio atmospheric signal. It is a broadband electromagnetic impulse which occurs as a result of lightning discharges.
- DSP
- Digital Signal Processing. For filtering/selecting signals via dedicated CPU instructions like FFT.
more - FFT
- Fast Fourier Transformation.
more - ADC
- Analog/Digital (A/D) Converter. Integrated in our MCU.
more
Statistics
This documentation has 36 pages with 30060 words.


